This page may contain affiliate links. So, I receive a small commission at no cost to you when you make a purchase using my link. This post is about How To Make The Best Ever HOT Scorpion Pepper Bacon!

Prepare for EXTREME HEAT. I kid you not, this Trinidad Scorpion Pepper bacon is INTENSE.
The first time I tried this bacon I had a slight headache and my stomach started hurting. But believe it or not I wanted more!
The hot, sweet, salty, and fruity flavors in this bacon are out of this world! So if this sounds like something that would make you happy, then please read on! I'll show you how to make the BEST Ever HOT Scorpion Pepper Bacon!
[feast_advanced_jump_to]Trinidad Moruga Scorpion Peppers
First please allow me to tell you a little bit about Trinidad Moruga Scorpion Peppers.
Now, these chili peppers are some of the world's hottest chilies in the world. At the time of this writing, Pepper X Peppers have been named as the World's Hottest Pepper as of August 23, 2023.
Pepper X surpassed the Carolina Reaper peppers as the World's Hottest Pepper, and the Trinidad Moruga Scorpion is currently in 3rd place, not too far behind the Carolina Reaper.
Scorpion Peppers And Their Scoville Rating
The heat level of the Scorpion peppers in EXCEPTIONALLY HOT. These chilies measure between 1.5 million - 2 million SHU (Scoville Heat Units) on the Scoville scale.
Basically, the lower the number on the scale, the less "hot or spicy" the pepper will be. For comparison, ghost peppers, which are very very hot peppers, measure from 600,000 - 1,041,427 SHU on the Scoville scale. And Scotch bonnet peppers come in at 125,000 - 300,000 SHU!
Where Do Scorpion Peppers Come From?
The name of this variety of chili pepper tells us where it comes from. Trinidad Moruga Scorpion Peppers come from the village of Moruga on the island of Trinidad.
How Do Scorpion Chiles Taste?
So we know these chiles offer intense heat, but how do they taste? They have a delightfully fruity flavor and are also sweet. So you get an awesome sweet and spicy combination in these chilies!
Why Chili Heads Will LOVE This Recipe!
If you are a chili head, you will LOVE this recipe because:
- As a lover of spicy food, it doesn't get much better than this! The Scorpion pepper will deliver the exceptional heat that your taste buds desire!
- When combined with brown sugar and bacon, you know you have an unbeatable combination! In addition to being hot, the bacon has great flavor with fruity, sweet, and salty notes which are so so beyond fantastic!
- This recipe is easy and quick! Prep time is about 3 minutes and total time approximately 30 minutes.
- You'll have a blast making your own homemade hot and spicy bacon!
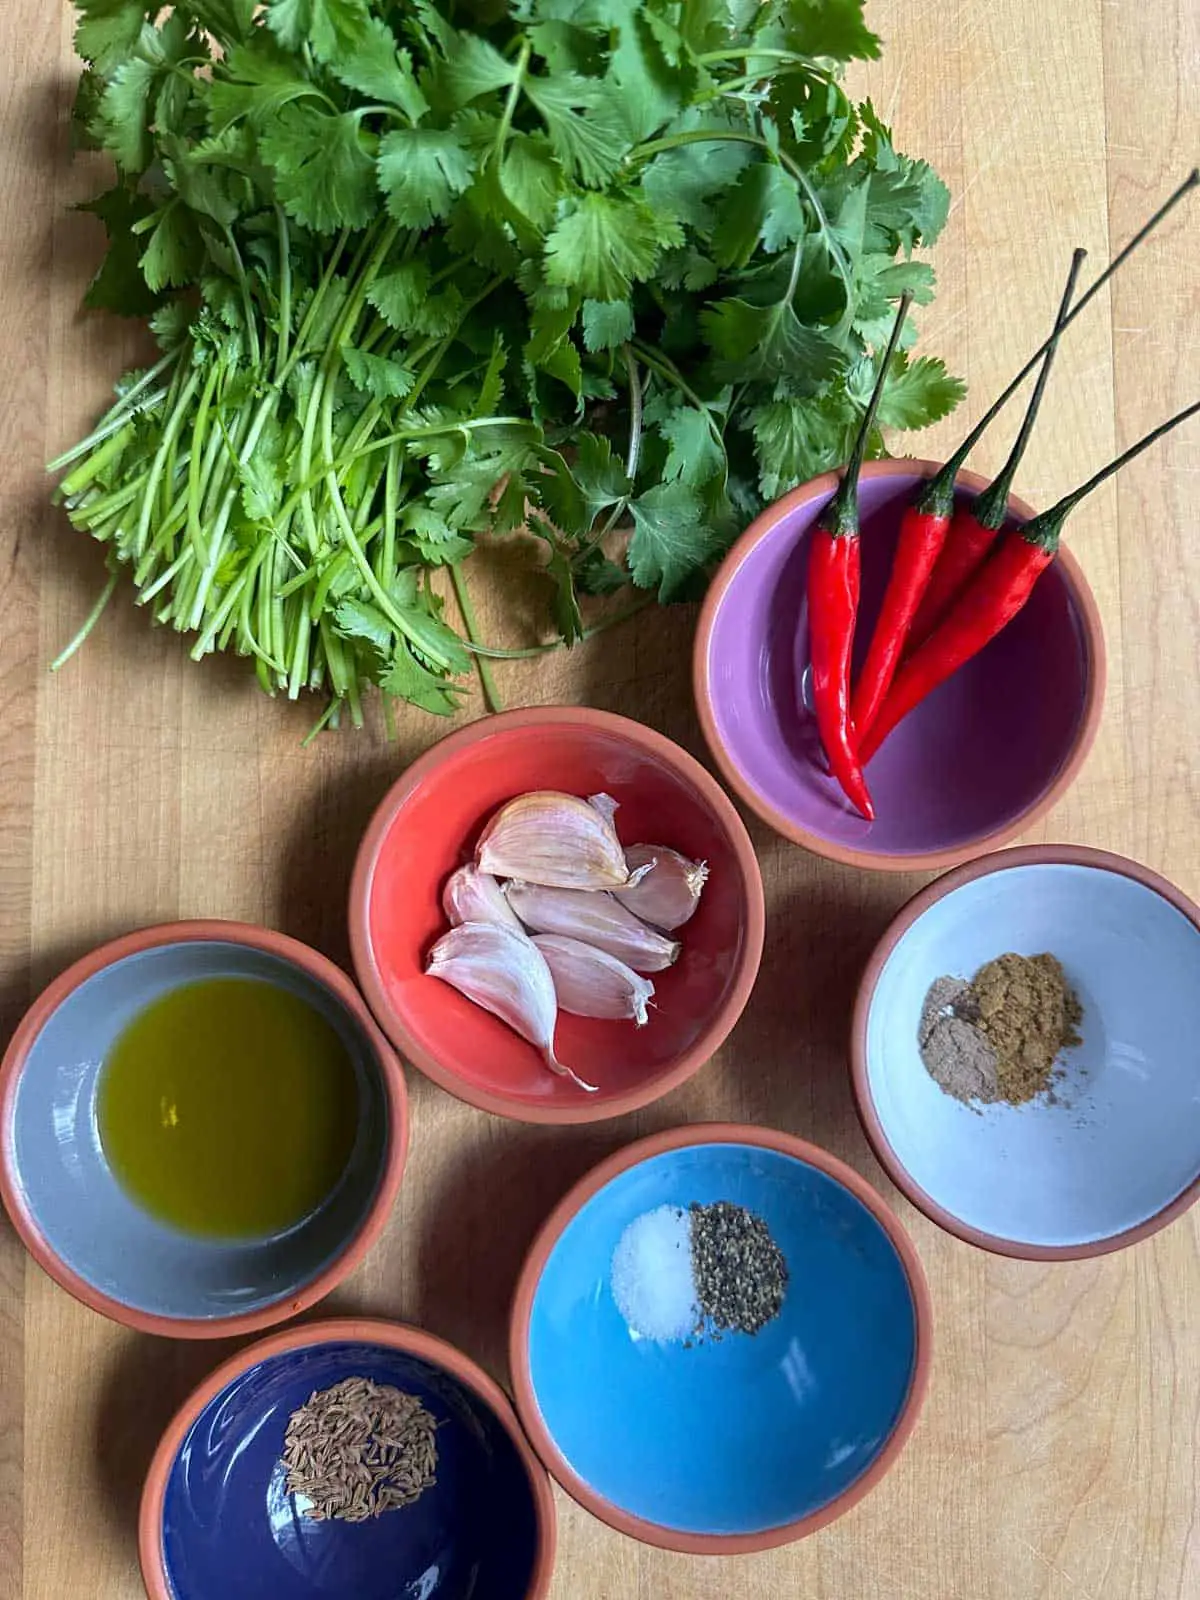
🥘 Ingredients
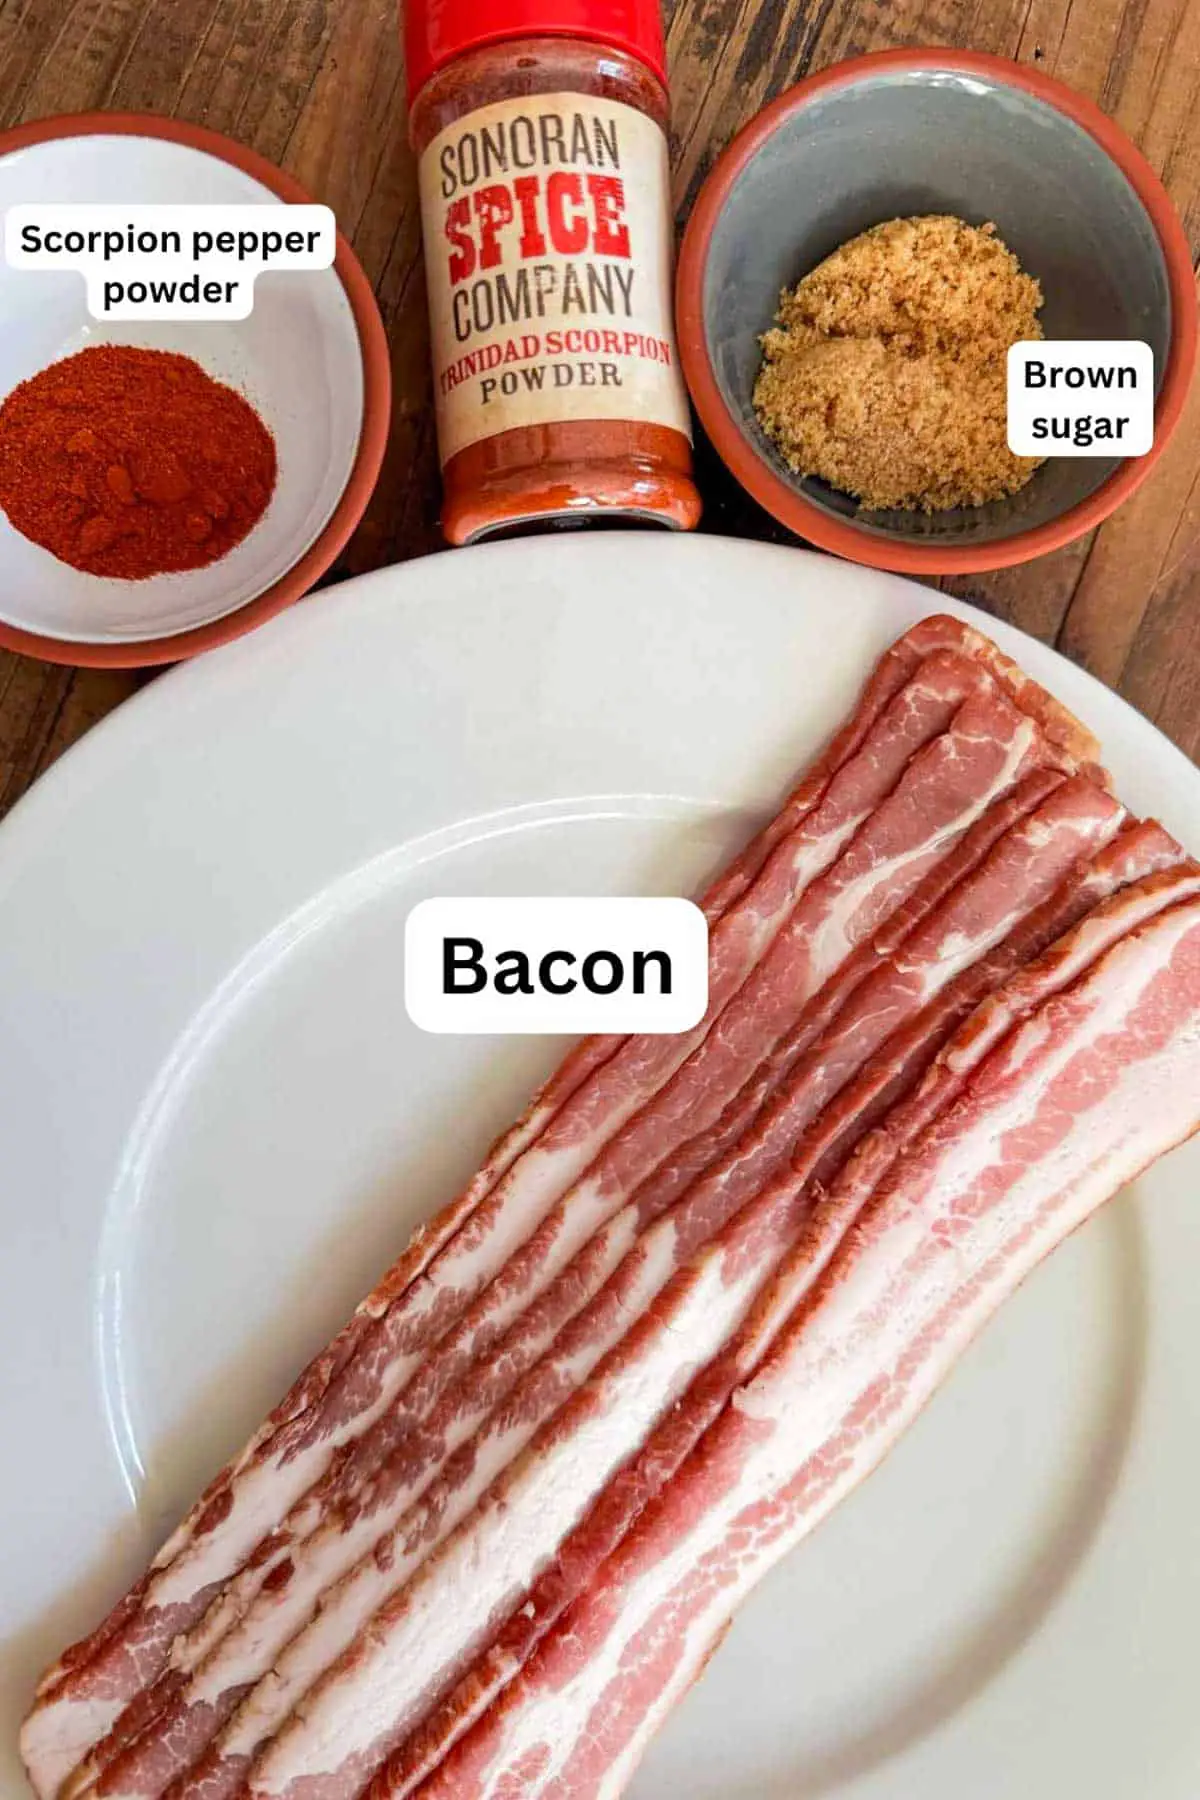
So you only need 3 ingredients to make this EXTREMELY SPICY bacon:
- Bacon - I used regular cut bacon, not thick cut
- Trinidad Scorpion pepper chili powder - my favorite brand is by Sonoran Spice. You can also find several options on Amazon.
- Brown sugar
It should take about a minute or so to gather these ingredients, so on to the simple recipe!
🔪 Instructions
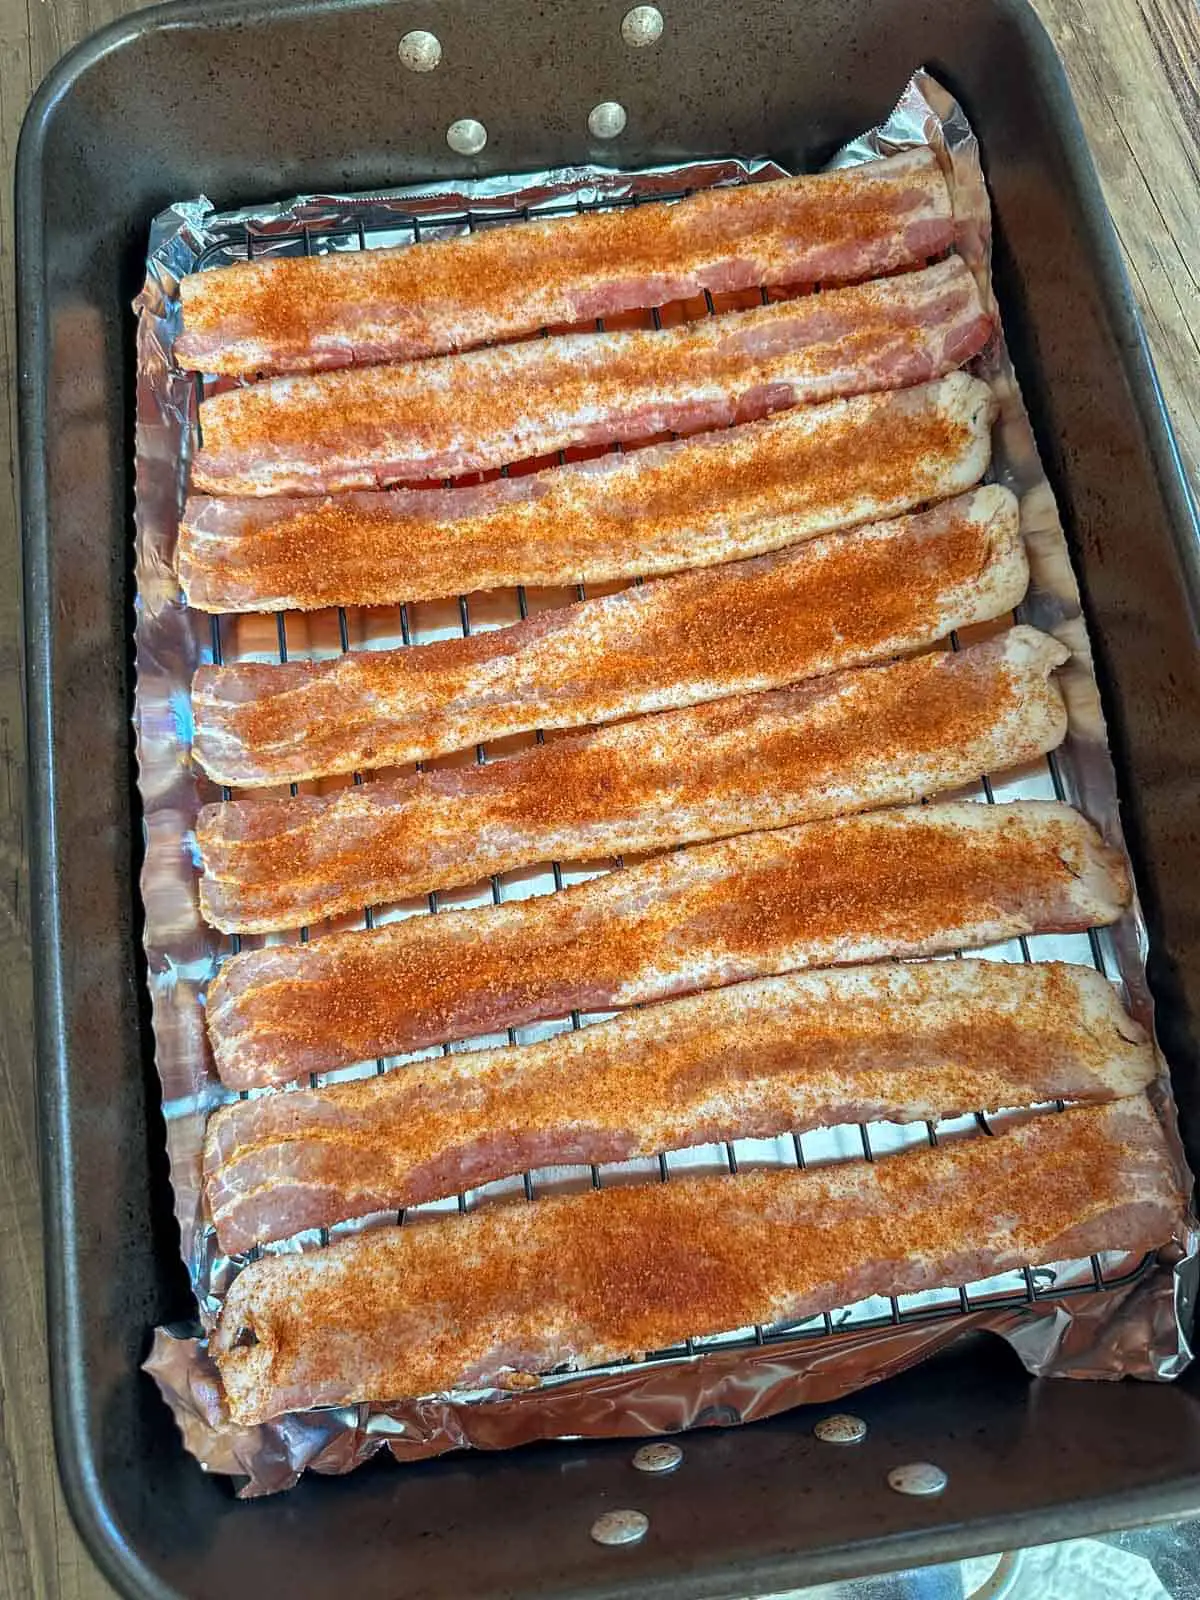
Preheat your oven to 400F and line the bottom of a roasting tray with aluminum foil for easier cleanup.
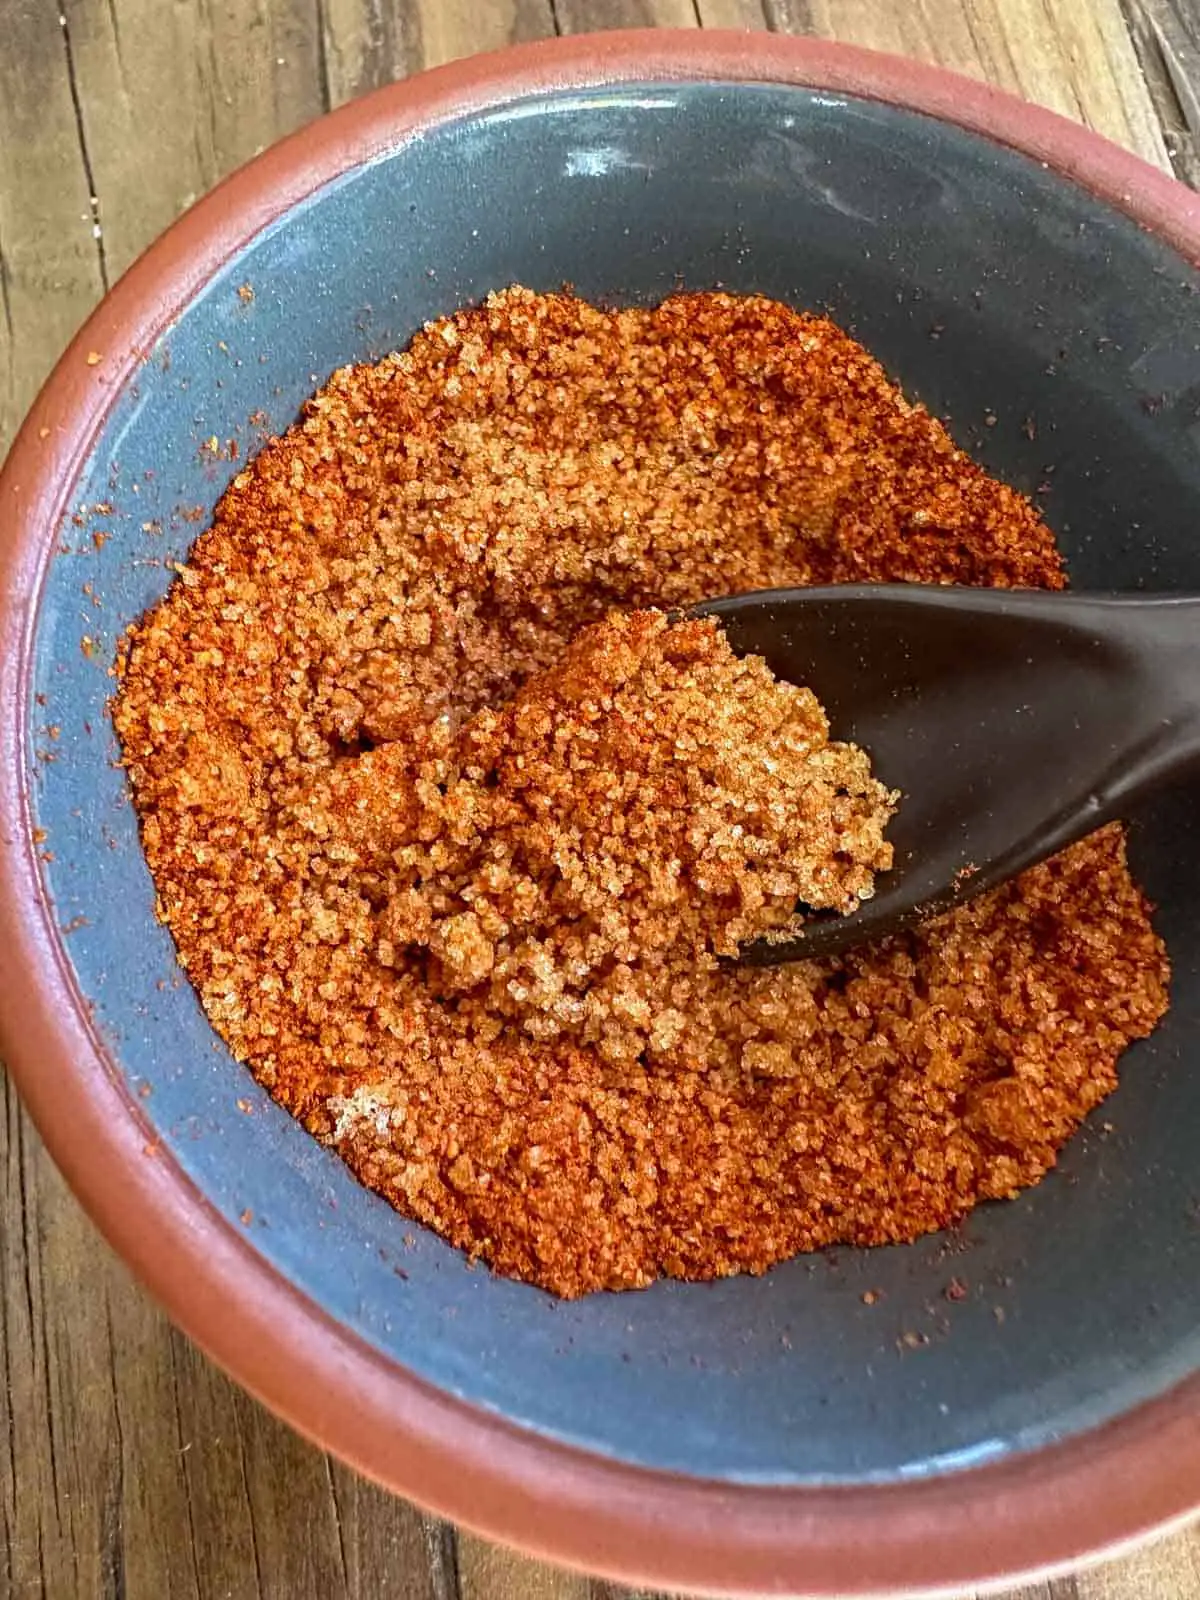
While the oven is heating up, make your spice mix by combining the Scorpion pepper powder and brown sugar in a small bowl.
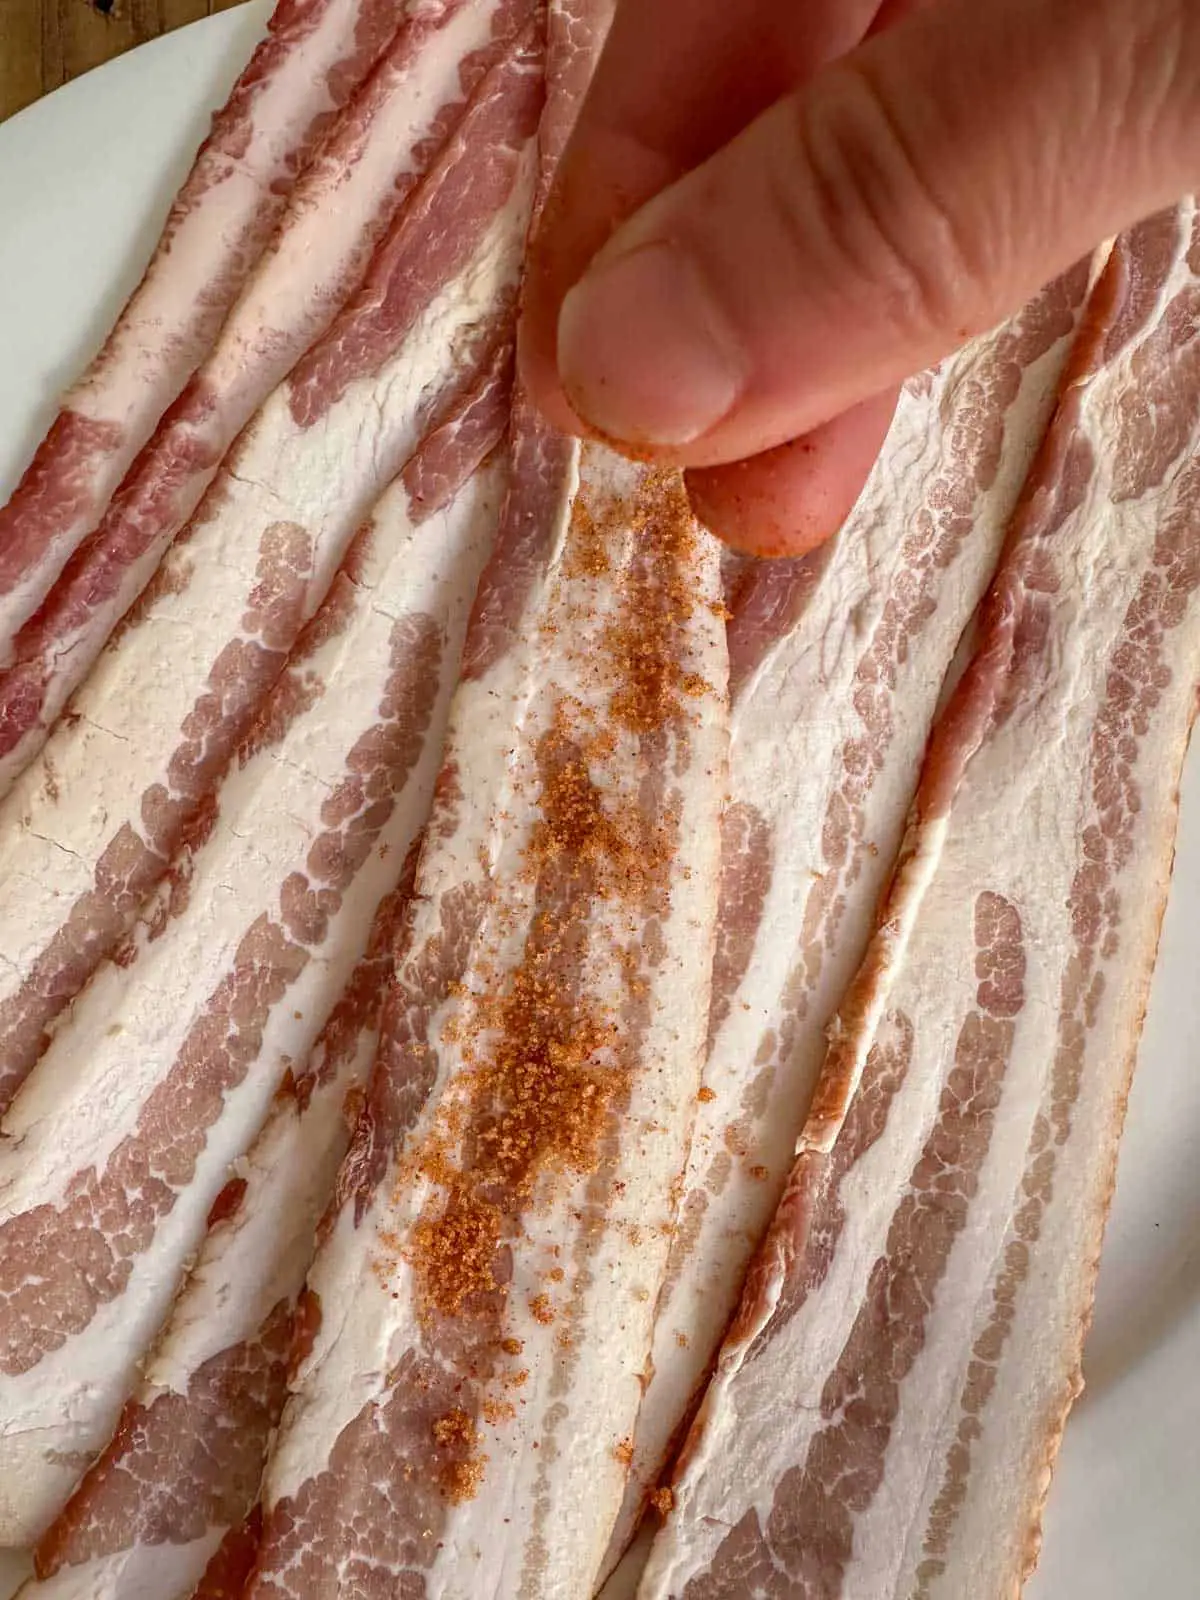
Season the bacon by sprinkling the spice mix on both sides of the bacon. Press the spice mix down with your hands. Try to use an equal amount of seasoning on each slice of bacon.
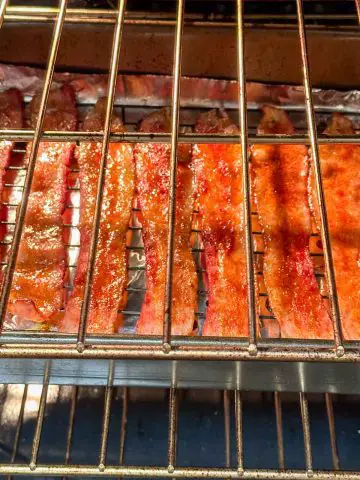
Lay the seasoned bacon on a rack and place it in your foil lined roasting tray. If you don't have a rack, you can place the bacon directly in the tray (you will just have to drain the bacon of fat if you don't have a rack for use).
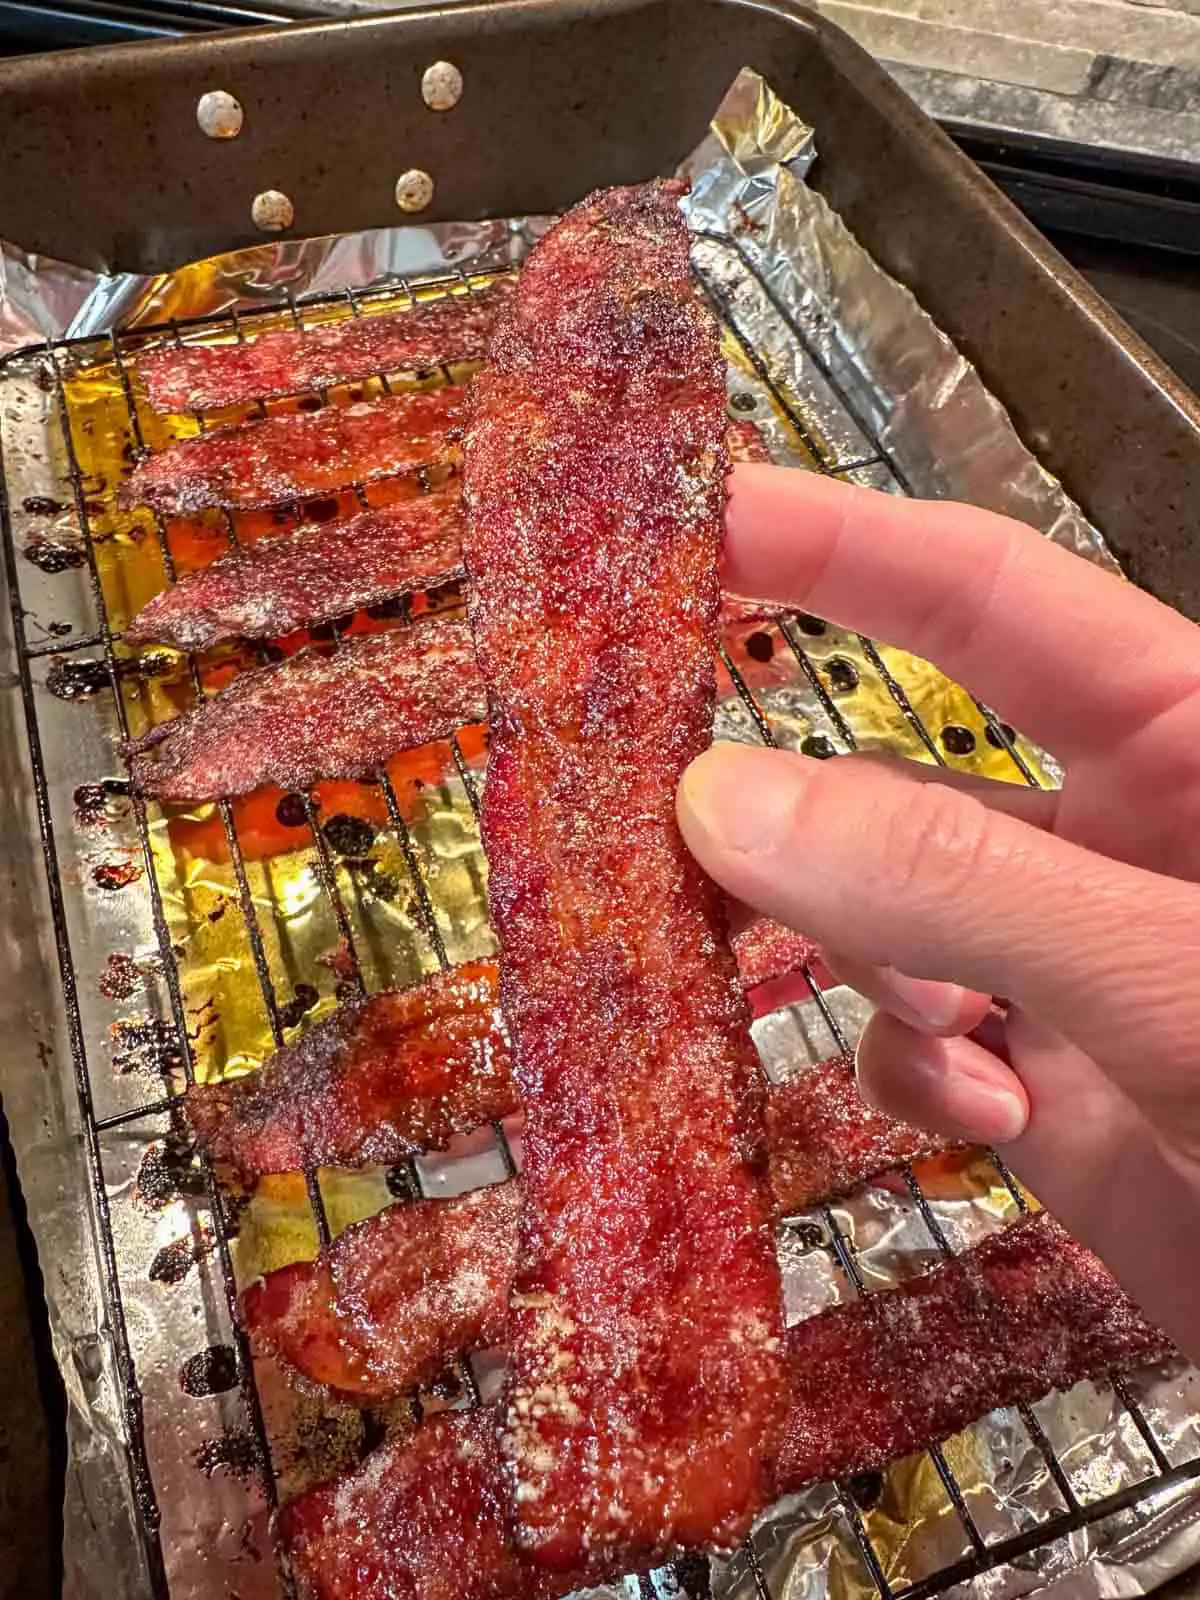
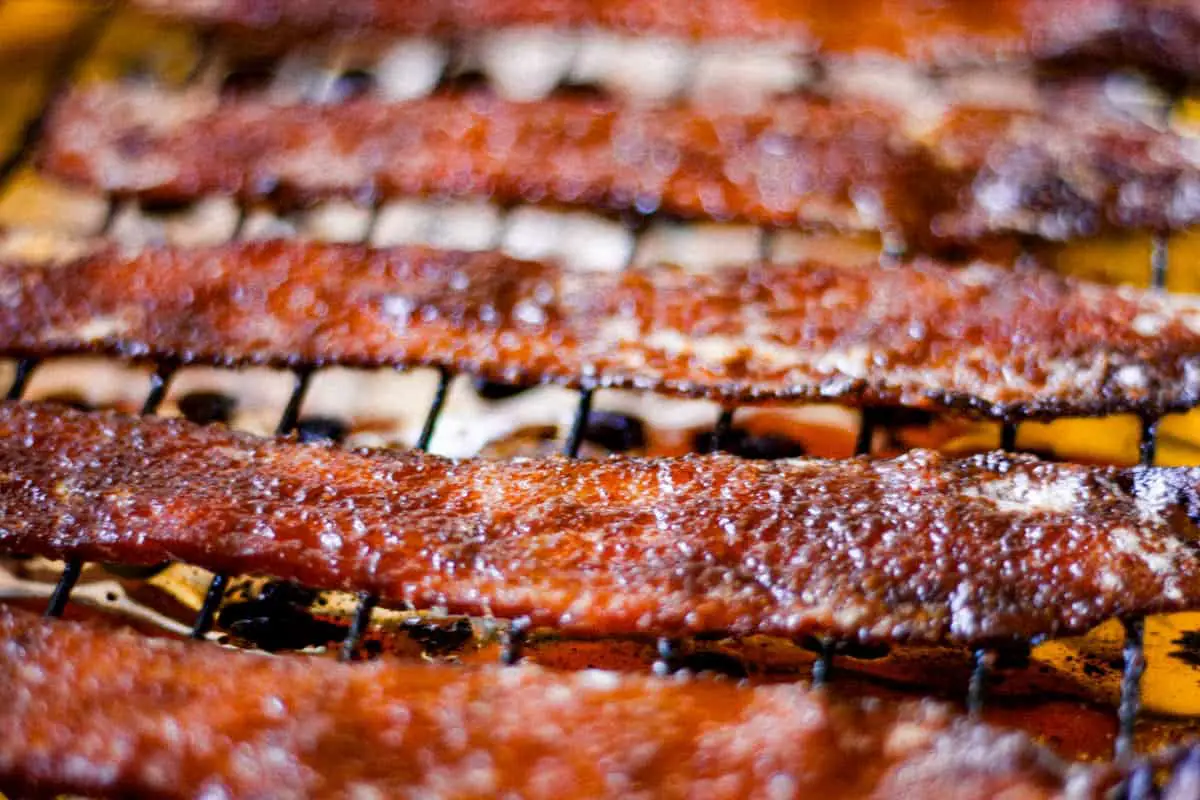
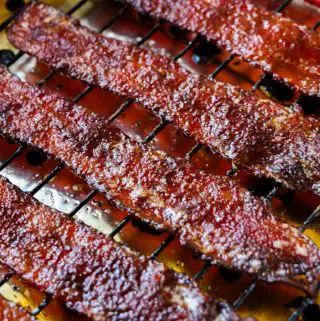
Place the rack in the center of your oven and bake until the bacon is crispy to your liking. Now, it took me about 25 minutes. I recommend to check your bacon after 10 minutes, and then approximately every 5 minutes until your bacon is perfectly crispy!

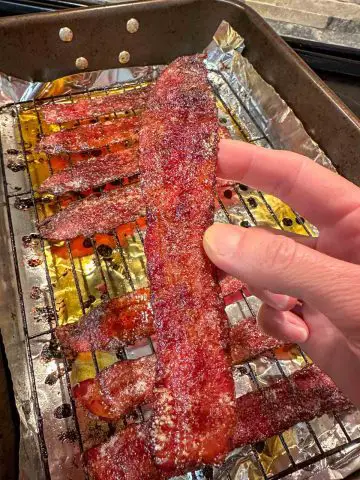
Remove the roasting tray and allow the bacon to cool, during which time the bacon will continue to crisp up a bit. Then get ready to enjoy your HOT bacon!
Suggestions For Serving
My favorite way to enjoy this bacon is as a snack. This spicy delight doesn't last very long at my house!
Slices of this spicy bacon would also be perfect to add to your hamburgers, or how about adding crumbled bits to spice up your salad?
The full printable recipe card can be found below! I hope you will enjoy this wonderfully hot and fiery bacon!
FAQ
Trinidad Scorpion pepper was named the world's hottest chili pepper in 2012.
This intensely hot pepper comes from the village of Moruga in Trinidad and Tobago.
Store this Scorpion pepper bacon in an airtight container in your refrigerator. This is best enjoyed within 3 days.
Some Other Great Recipes You May Enjoy!
Here are some other great recipes that you may enjoy:
1,000 Foods To Eat Project
In conclusion, Bacon is listed in the book 1,000 Foods To Eat Before You Die, by Mimi Sheraton. I am working my way through the foods listed in this book. This is called my 1,000 Foods to Eat Project. Bacon is food #74 in my project! Please visit the 1,000 Foods To Eat Project page to see some other MUST TRY foods of the world that you may love to try!
Join Me On A Fun Food Journey!
Finally, I invite you to come along on this food journey with me! Please sign up to get the latest recipes and inspiration for you to expand your food comfort zone! It's an incredible journey, please join me by signing up here.
Cheers!
Grace
How To Make The Best Ever HOT Scorpion Pepper Bacon
Equipment
- Oven
- roasting tray preferably with a rack
Ingredients
- ½ lb bacon I've used regular cut, not thick cut bacon
- ½ tablespoon Scorpion pepper powder this amount is HOT! Adjust down if you want a "milder" heat
- 1.5 tablespoon brown sugar
Instructions
- Preheat your oven to 400F and line the bottom of a roasting tray with aluminum foil for easier cleanup.
- While the oven is heating up, make your spice mix by combining the Scorpion pepper powder and brown sugar in a small bowl.

- Season the bacon by sprinkling the spice mix on both sides of the bacon. Press the spice mix down with your hands. Try to use an equal amount of seasoning on each slice of bacon.
- Lay the seasoned bacon on a rack and place it in your foil lined roasting tray. If you don't have a rack, you can place the bacon directly in the tray (you will just have to drain the bacon of fat if you don't have a rack for use).
- Place the rack in the center of your oven and bake until the bacon is crispy to your liking. Now, it took me about 25 minutes. I recommend to check your bacon after 10 minutes, and then approximately every 5 minutes until your bacon is perfectly crispy!
- Remove the roasting tray and allow the bacon to cool, during which time the bacon will continue to crisp up a bit. Then get ready to enjoy your HOT bacon!