This page may contain affiliate links. I receive a small commission at no cost to you when you make a purchase using my link. Here is a recipe for Scrumptious Banoffee Pie!
First allow me to start off by stating that this was my first dessert post! I am not really someone who eats many desserts. However, I decided to make this Banoffee Pie for a movie night and had SO MUCH FUN making it that I couldn't wait to post about it!
Not only was it fun to make, but it's OVER THE TOP delicious! I'm super excited to share this easy banoffee pie recipe with you!
Jump to:
Banoffee Pie Scene in Love Actually Was The Inspiration For This Post!
Recently we watched the film "Love Actually" for one of our movie nights. There is a scene where Juliet (played by Keira Knightly) offers Mark (played by Andrew Lincoln) a slice of Banoffee Pie. I decided that I would make the classic British dessert, Banoffee Pie, to accompany the film.

What is Banoffee Pie and Where Did it Come From?
There is a great article on Wikipedia about Banoffee Pie which goes into some detail about what this dessert is and the history of this dessert. But in a nutshell, "banoffee" is a portmanteau of banana and toffee. It also includes cream, and this absolute delight sits on top of a buttery biscuit base. Sometimes chocolate shavings, coffee, or vanilla are added.
This pie originated in England and was invented by the chef and owner of "The Hungry Monk Restaurant" in East Sussex, England. Click here if you would like to see "The Original Hungry Monk Banoffi Pie" recipe!
🥘 Ingredients For Our Banoffee Pie
As mentioned, the core ingredients of Banoffee Pie are:
- Fresh Bananas
- Toffee
- Cream
- Buttery biscuit base
The easy recipe I want to share with you here uses the same method to make the toffee as the original Hungry Monk recipe. However, my recipe will involve making a base using graham crackers and butter, rather than the original shortcrust type baked pastry made with flour, sugar, butter, and egg. This recipe will be a no bake pie recipe, and very easy to make.
🔪 Instructions
Making The Toffee Is a BLAST!

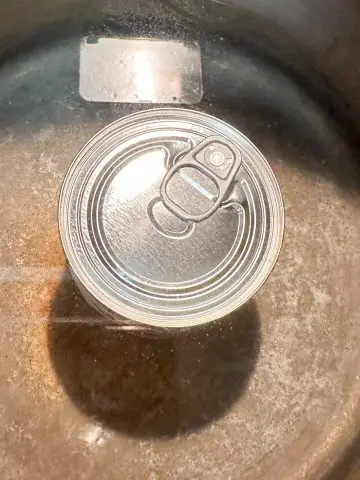
So, would you believe you can make toffee (caramel sauce) out of a can of sweetened condensed milk? I didn't, until I tried it!
It takes a bit of time, but you WILL be rewarded with a most luscious and scrumptious toffee! By the way, we can also call this dulce de leche, which is caramelized milk.
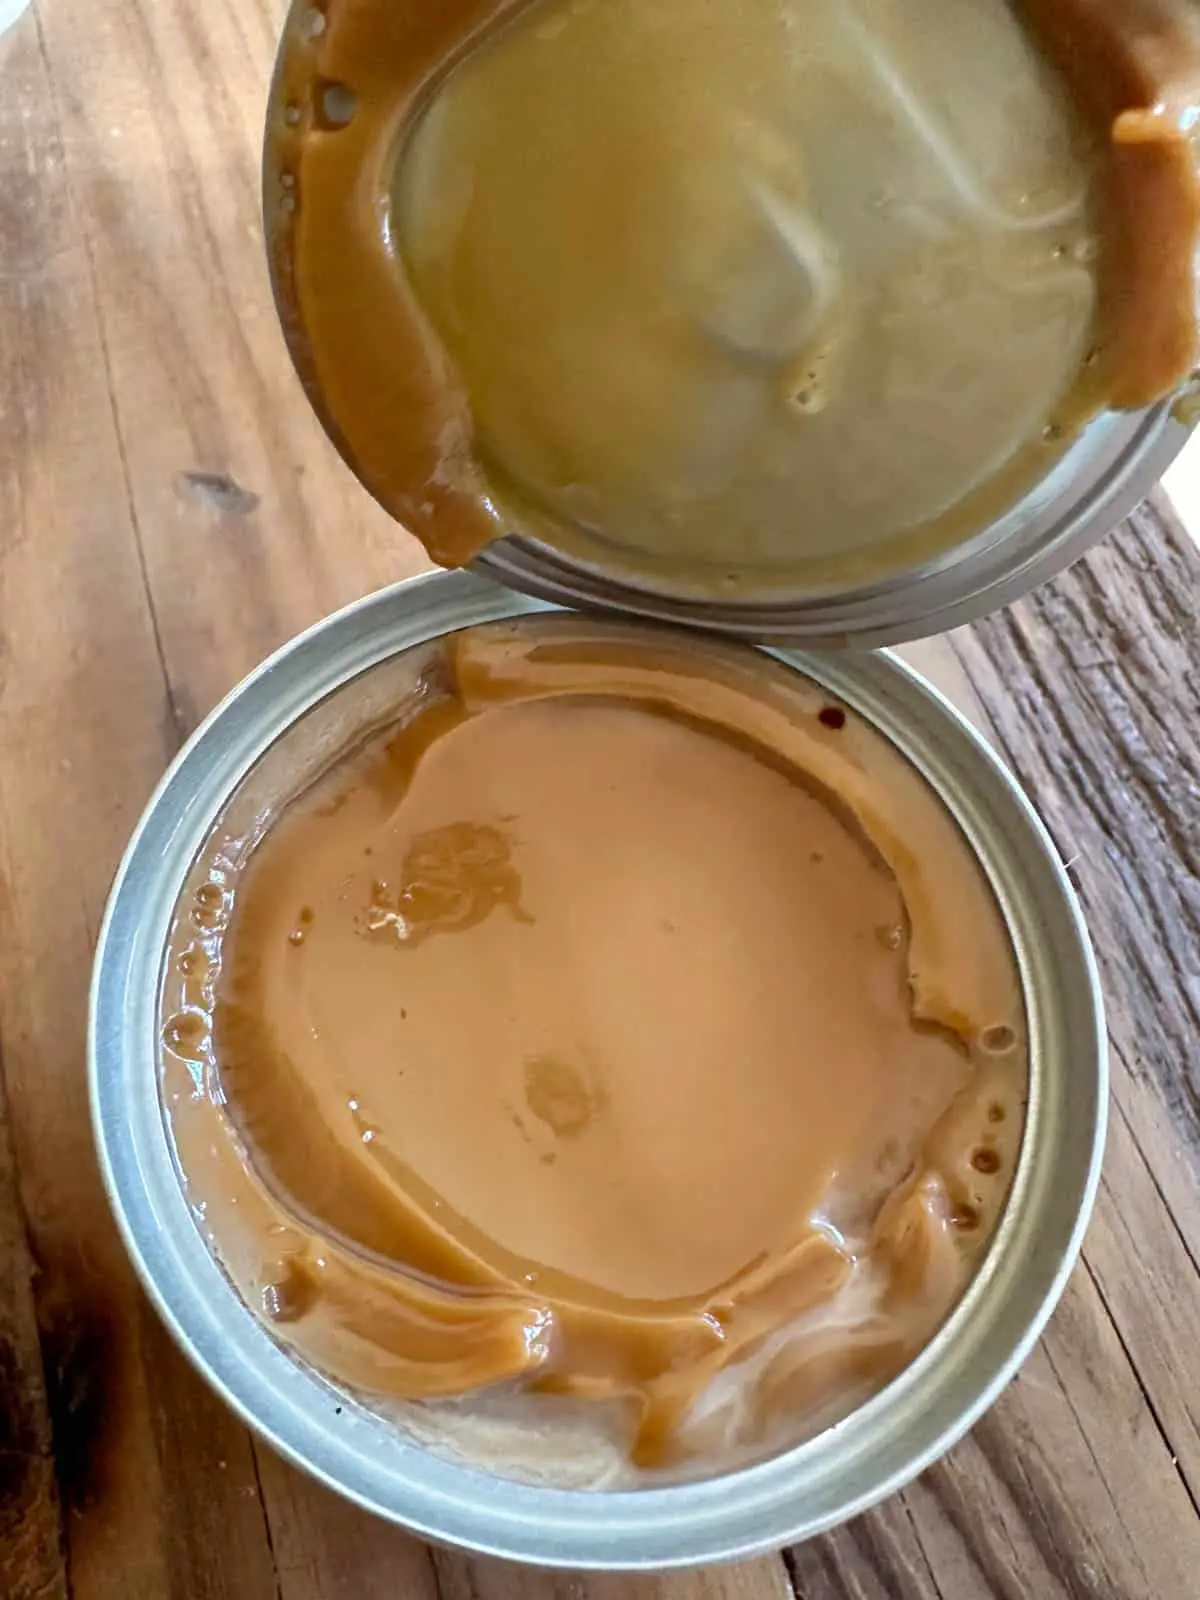
Setting a can of sweetened condensed milk in submerged water (at first boiling, then simmering) for 2.5 hrs will give you your own dulce de leche! Isn't the color GORGEOUS?! Trust me, it is also absolutely mouthwatering!
A couple of words of warning...be sure to let the can cool to room temperature after removing it from the water before opening it! I let mine cool for about an hour before carefully opening the lid. You can help speed the process along by submerging the can in an ice bath until it has cooled down.
Also, you MUST make sure the water is topped up! Never allow the can to be out of water. I used a deep large stock pot to make my toffee, and added a ton of water and this worked well for me.
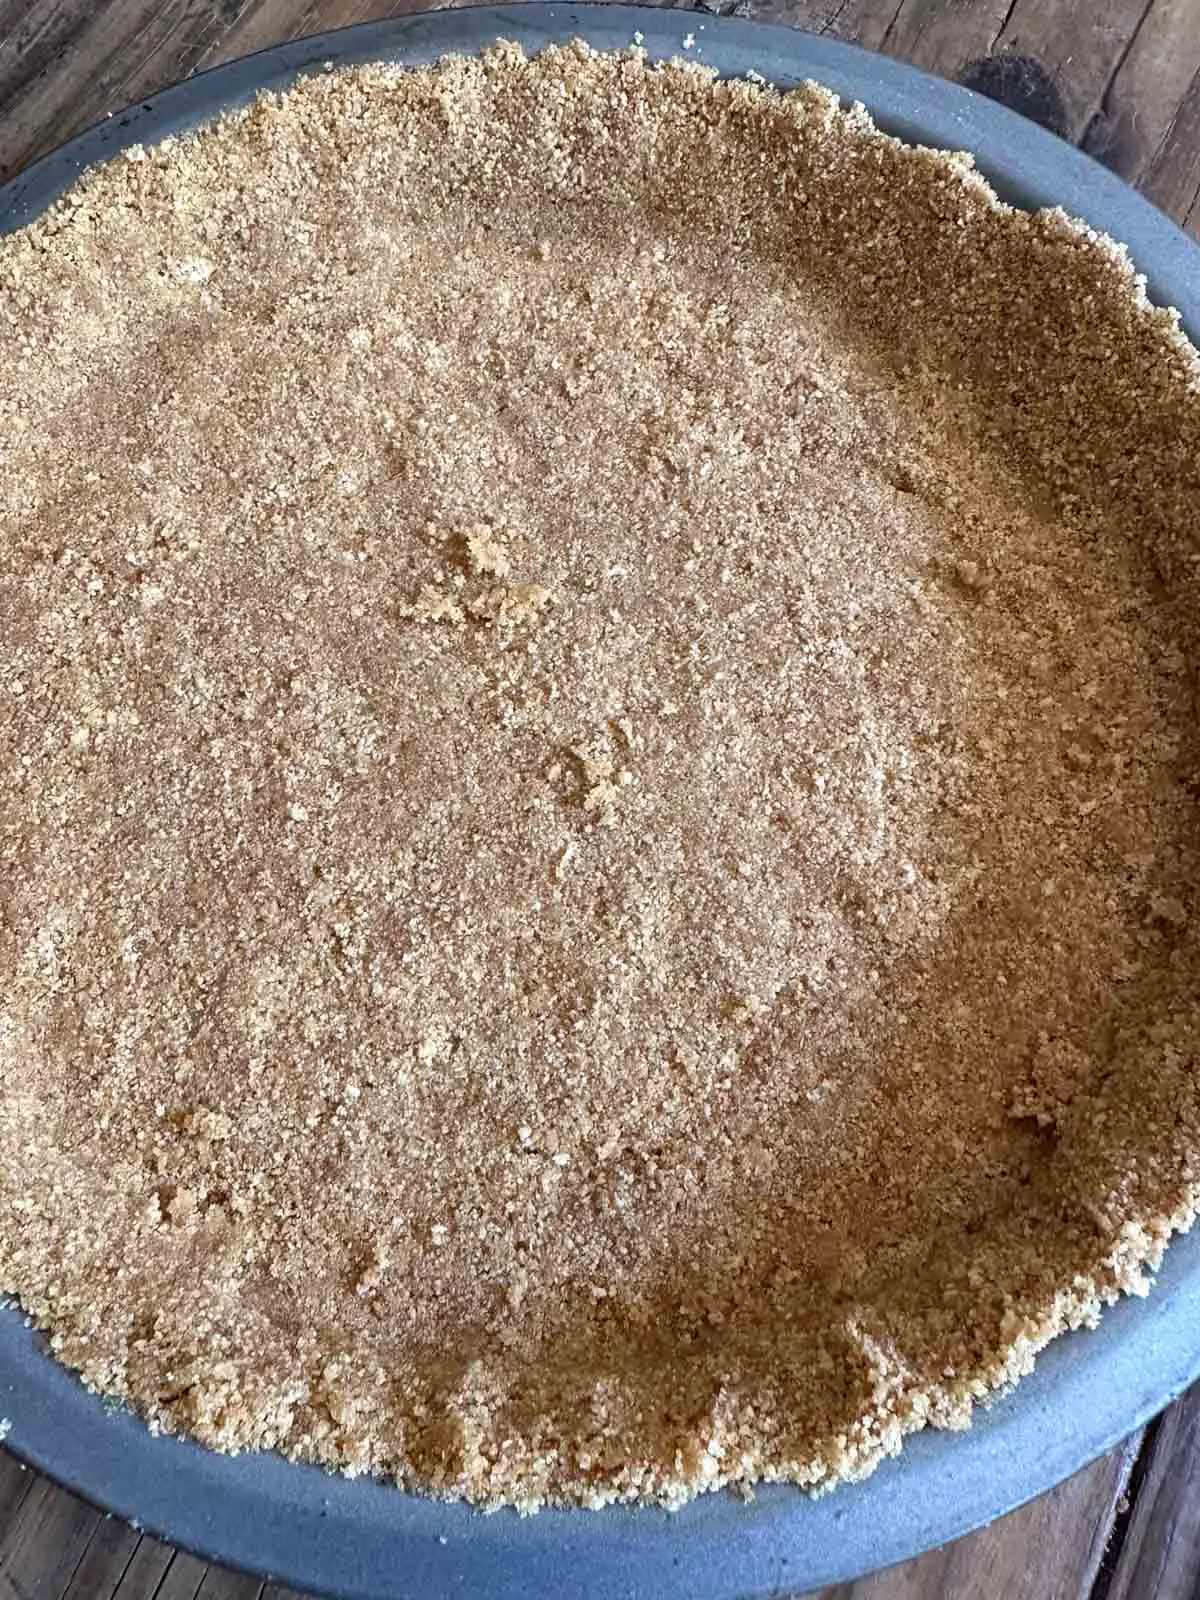
Buttery Graham Cracker Crust
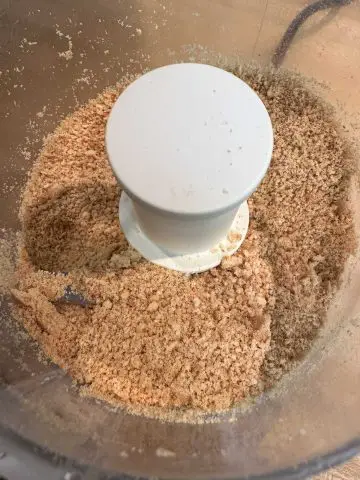
While the can of condensed milk is on the stove, we will make a graham cracker crust for our base. The easiest way to do this is to crush up graham crackers in your blender or food processor. Blend or process until you achieve fine crumbs.
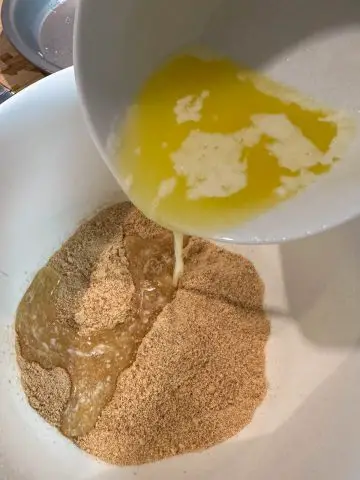
Then add the crushed up graham crackers to a medium bowl, and mix well to thoroughly incorporate melted butter.
By the way, you could also substitute English Digestive Biscuits, such as McVitie's, for the graham crackers if you prefer.

Then, press down firmly in a pie pan and there you have your graham cracker pie crust! You can use a measuring cup to help pack the crust down. Place this in your refrigerator until ready to use.
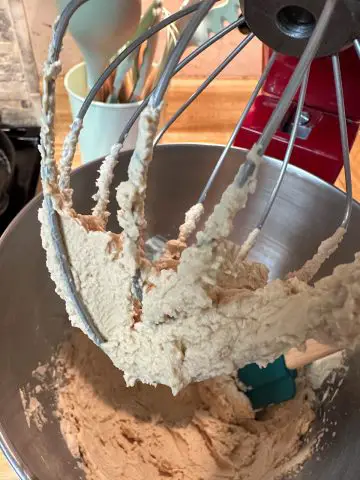
Making Whipped Cream
It's super easy to make whipped cream! All you need is some heavy cream and an electric mixer or stand mixer! Add ins will be sugar and some instant coffee. The original recipe from The Hungry Monk included coffee, so I'd like to pay homage to that recipe by including it here.

You'll beat or whip the heavy cream, sugar, and instant coffee on medium to high speed until peaks start to form. Either stiff peaks or soft peaks will do just fine.
You can use an electric hand mixer, or a stand mixer with a whisk attachment to make your homemade whipped cream.
It may take around 3-5 minutes. Just take the time to dream about your first bite of Banoffee Pie while waiting for those peaks!!
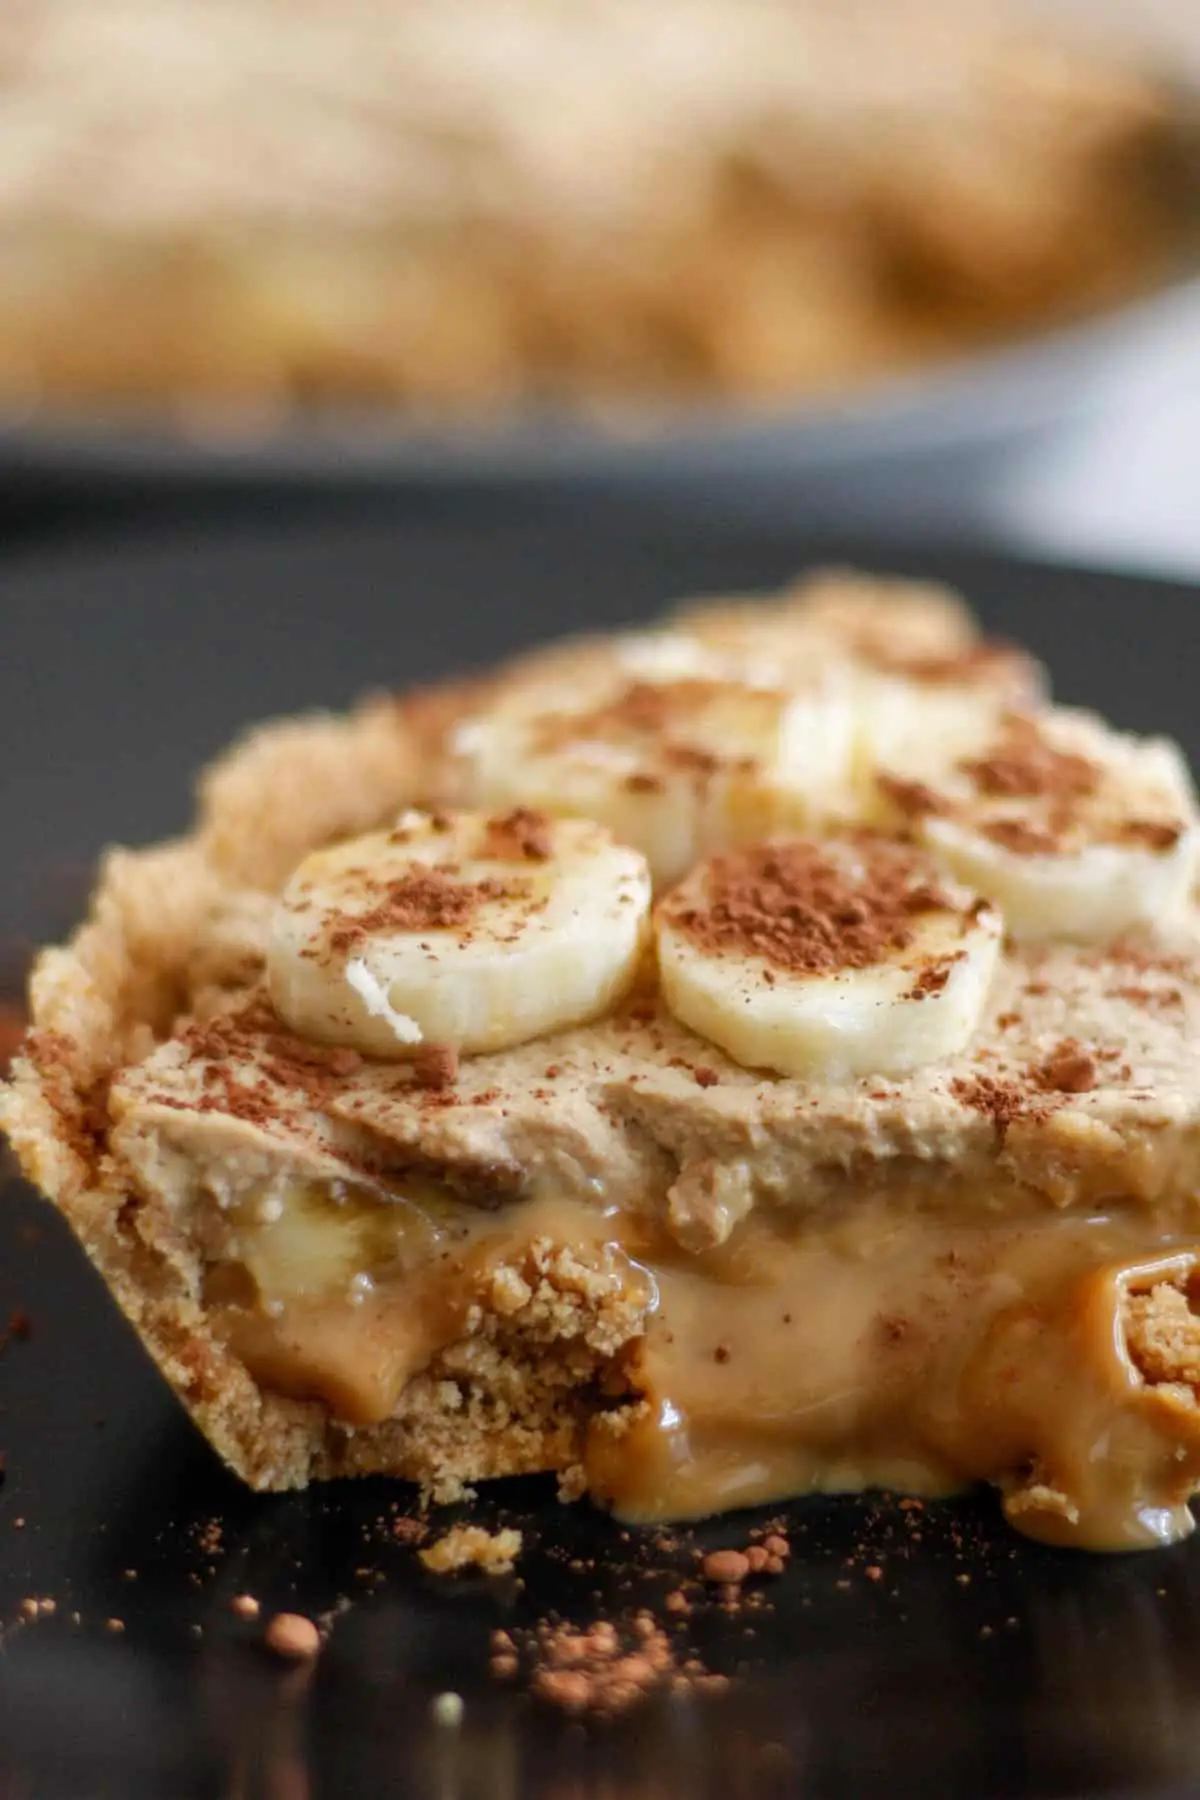
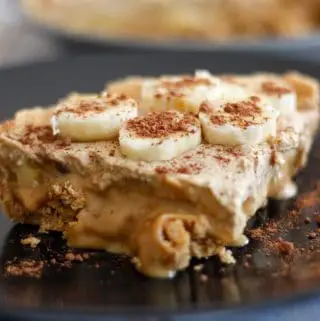
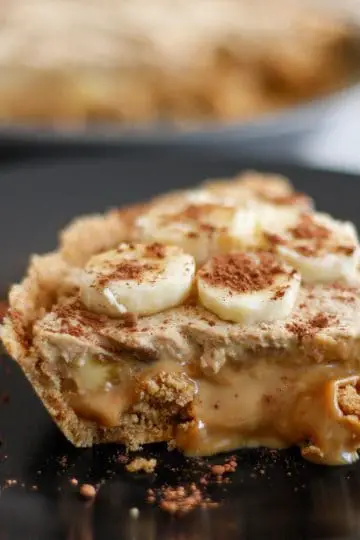
Let's Layer Our Delicious Pie!
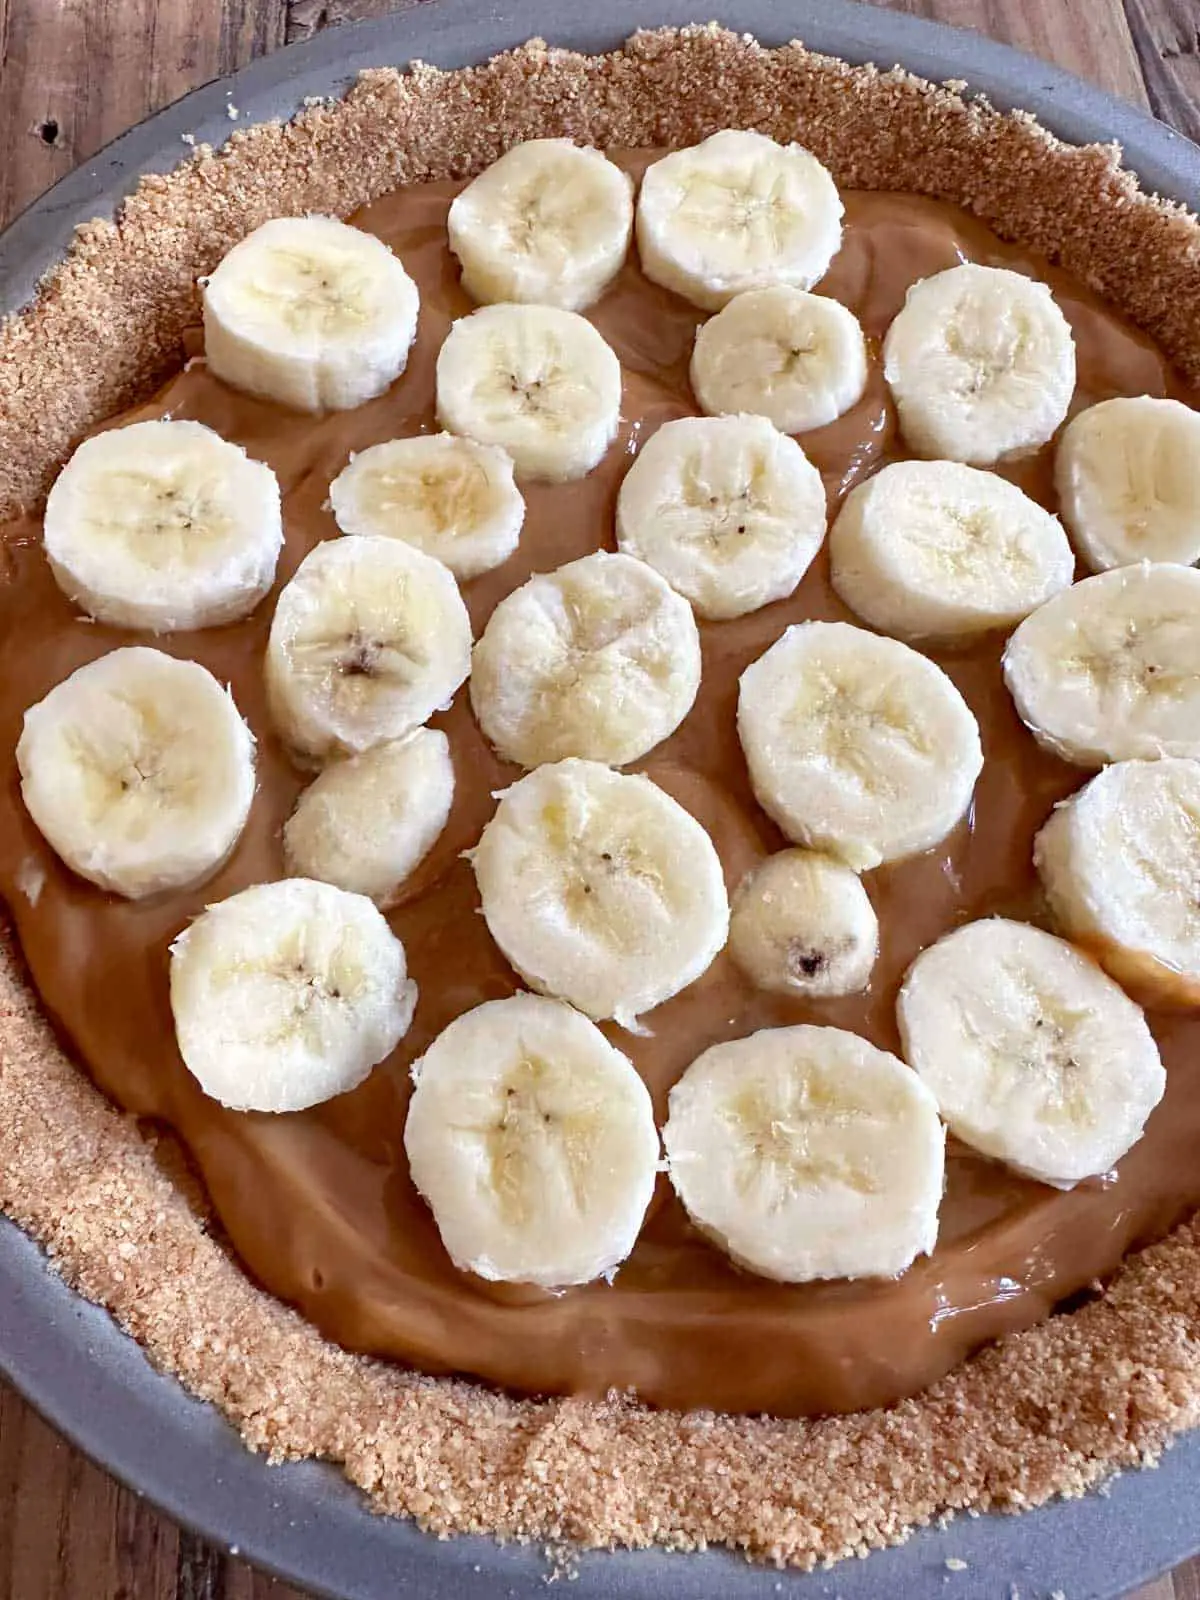
To assemble your pie, simply evenly pour the cooled toffee filling into your graham cracker crust and then add fresh banana slices.
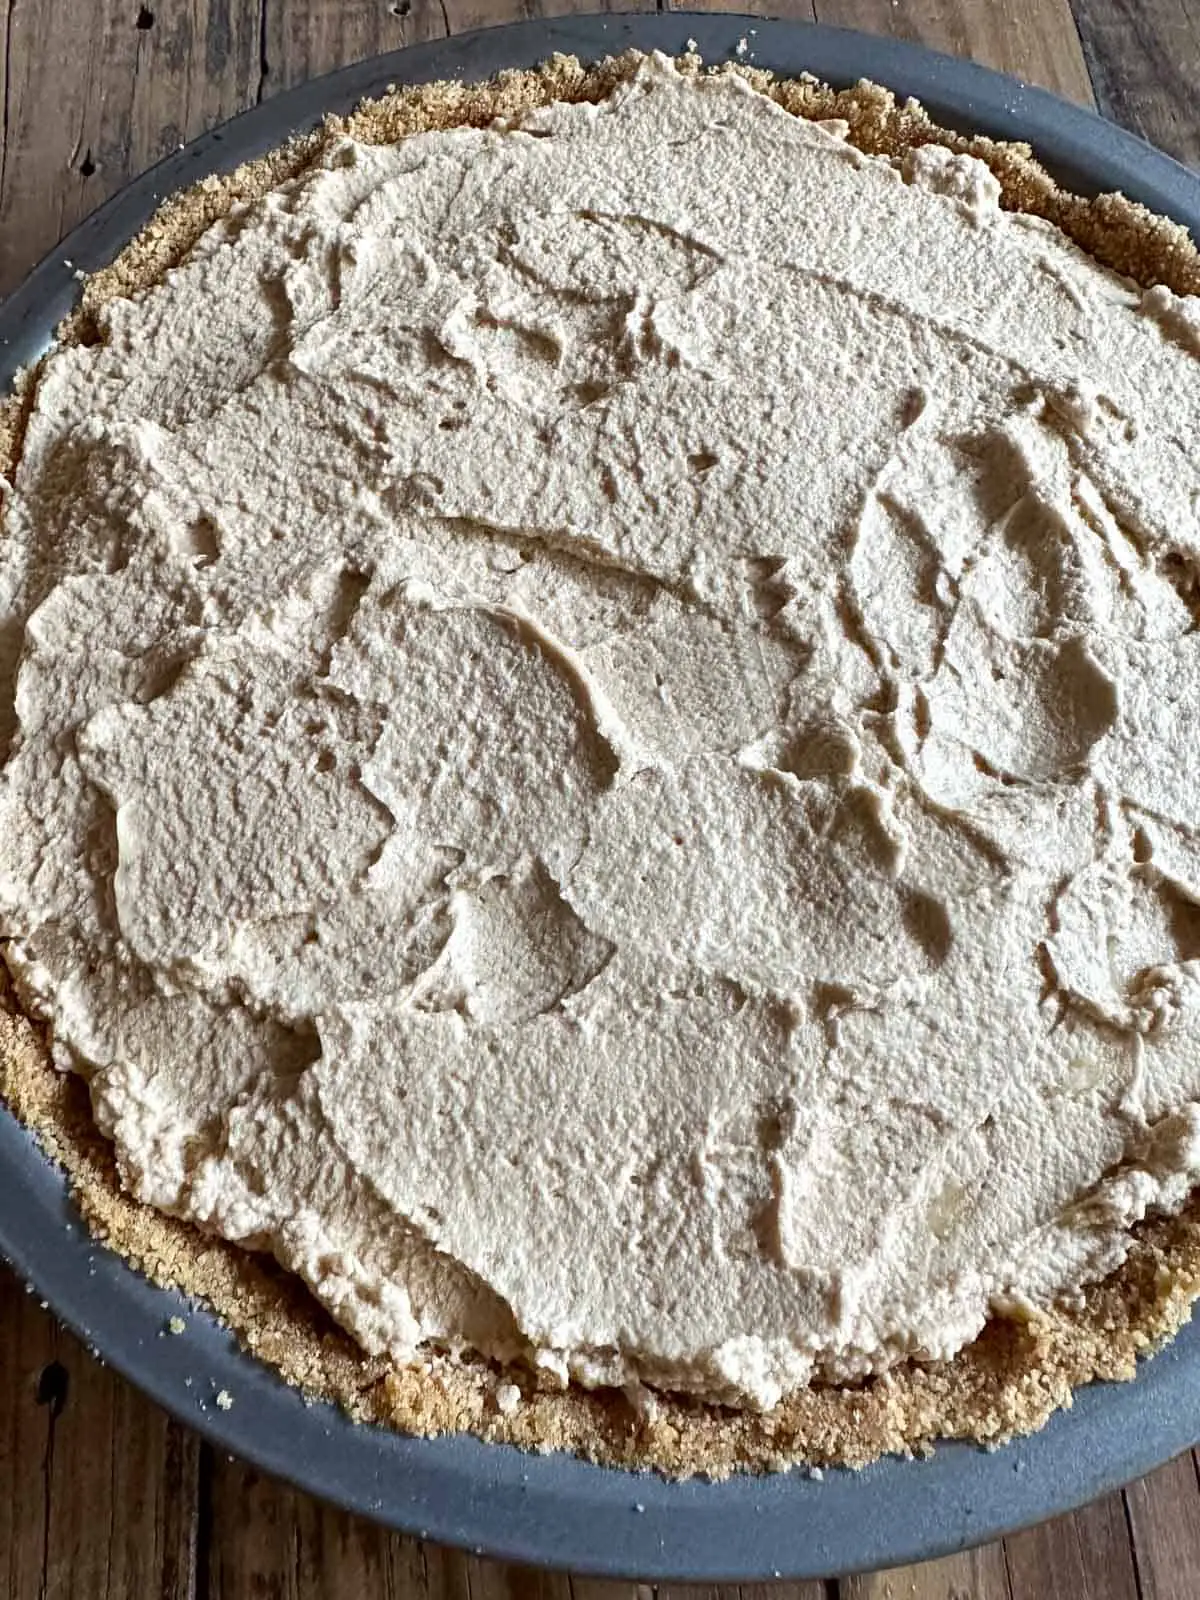
Then, top with your pillowy soft whipped cream and another layer of sliced bananas!
Some people like to add chocolate shavings or cocoa powder on top of the pie...purely optional but highly recommended.
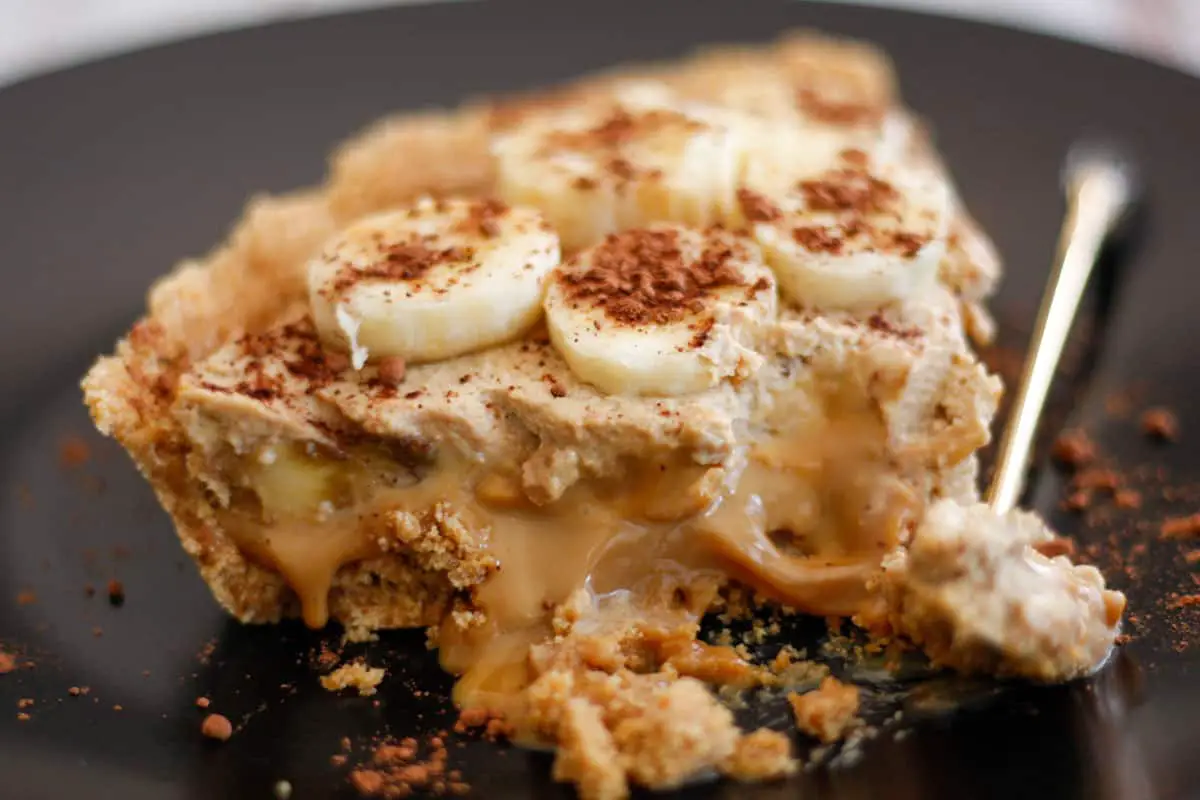
Enjoy this most popular English dessert! But be careful! This is so tempting that you may find it disappears way too quickly!
FAQ
Banoffee Pie, a popular British dessert, comes from England. It was invented by Nigel Mackenzie and Ian Dowding of the Hungry Monk Restaurant, in East Sussex, England.
You should first bring to the boil a large amount of water with a very well submerged can of condensed milk. Then simmer for 2.5 hrs to get the toffee for banoffee pie.
A Banoffee pie is best enjoyed within 2-3 days, and should be stored in your refrigerator.
Some Other Recipes You May Enjoy!
Here are some other dessert recipes you may enjoy:
- Unique and Scrumptious Icelandic Rye Bread Ice Cream
- Wide Awake No Bake Brownies
- South Carolina Benne Wafers
Join Me On A Fun Food Journey!
If you'd like to come along with me on a fun food journey, please sign up to get the latest recipes and inspiration for you to expand your food comfort zone! It's an incredible journey, please join me by signing up here. 😊
Cheers!
Grace
How To Make Scrumptious Banoffee Pie!
Equipment
- 9" pie pan
- electric hand mixer
Ingredients
- 10 sheets graham crackers finely crushed
- 6 tablespoon butter melted
- 3 bananas sliced; 1.5 of the banana slices will be placed on top of the toffee, and the other 1.5 banana slices on top of the whipped cream
- 14 oz sweetened condensed milk I used one can of Eagle Brand
- 1 cup heavy cream
- 1 ts instant coffee I used one packet of Folger's Classic Roast instant coffee (0.07 oz packet)
- 1 tablespoon sugar
- ½ tablespoon cocoa powder you can vary the amount of cocoa powder to your tastes, the ½ tablespoon is a recommended amount.
Instructions
Toffee
- Submerge the can of sweetened condensed milk (remove the label) in a large and deep stock pot. Add plenty of water (never allow the can to be out of water). Bring to the boil, then reduce to a simmer for 2.5 hrs. Every so often check to make sure that the can is still submerged. If it's not, then top up with water. After 2.5 hrs, carefully remove the hot can using tongs and place on the side to cool. Allow to completely cool before opening! (Very important.)

Graham Cracker Crust
- Make the graham cracker crust by finely crushing the graham crackers. An easy way to do this is to add to your blender or food processor.
- Add 6 tbsps of melted butter, and stir to completely incorporate.
- Press the crumb mixture down firmly into the pie pan. You can use a measuring cup to assist you in doing this! Once the crust is made, place in your refrigerator until ready to use.

Whipped Cream Topping
- Place heavy cream in a mixing bowl, and add sugar and instant coffee. Whip or beat using an electric hand mixer, until peaks form. You could also use a stand mixer with whisk attachment if you have one.
Assemble the Pie!
- Layer the cooled toffee onto the graham cracker crust. Top the toffee with half of the sliced bananas, and then place the pillowy clouds of whipped cream on top of the bananas.
- Add the remaining banana slices on top of the whipped cream and sprinkle with some cocoa powder. Chill the pie for about an hour before enjoying and then tuck in!!


June barrera
If you are a toffee lover you will love this pie! I literally scarfed this down in 10 seconds! It was really the best pie I have ever tasted ! And to be mixed with bananas was a plus!! You have to try it!
Grace
Hi June! Thanks so much for your comments! I'm super happy that you enjoyed the pie and hope that you will make it sometime! Thanks again!! Grace