• Skip to primary navigation
  • Skip to main content
  • Skip to primary sidebar
  • Skip to footer

Explore Cook Eat

  • Recipes Home
  • 1,000 Foods to Eat Project
  • MUST Try Korean Dishes!
  • About Me
  • Recipes
    • USA
    • Asia
    • Salads
    • Soups
    • Europe
  • Travel
    • USA
      • New Mexico
      • Texas
      • Utah
      • North Carolina
    • Japan
  • Navigation Menu: Social Icons

    • Facebook
    • Instagram
    • Pinterest
    • YouTube
Home

Recipes

The Best Most Delicious Dishes To Serve With White Rice!

September 5, 2023 by Grace Leave a Comment

This page may contain affiliate links. So, I receive a small commission at no cost to you when you make a purchase using my link. This post is about The Best Most Delicious Dishes To Serve With White Rice!

A collage containing Japanese Pork Katsudon, New Orleans Red Beans and Rice, Crawfish Étouffée, and Korean Short Ribs with a text overlay that says The Best Most Delicious Dishes To Serve With White Rice!

Are you a riceaholic like I am? If so, rice may grace your table very often! I love all types of rice including brown rice, jasmine rice, and basmati rice.

However, it's typically plain white rice that is my go to rice. Which is great, because plain rice is the perfect accompaniment to so many dishes.

Here I want to share with you some of the BEST and most DELICIOUS dishes to enjoy with your cooked rice!

I include some main dishes, as well as a perfect side dish to serve with your fluffy white rice. Many of these are Asian dishes, but you'll also find a few that hail from the USA.

I've also included a delicious side dish that pairs perfectly with rice.

You'll find plenty of options here that will satisfy your whole family! So without further ado, let's move onto these delicious dishes!

1. Japanese Pork Katsudon and Rice Bowl

Japanese Pork Katsudon in a bowl. The pork has been garnished with green onions and sprinkled with a chili powder. There is a pair of chopsticks resting on the side of the bowl.

Katsudon is a very popular Japanese dish. It gets its name from "donburi" which means rice bowl dish, and "tonkatsu" which means pork cutlet.

So tonkatsu is pork cutlets, breaded and fried. Later it will be added to a sweet and savory sauce, which includes soy sauce, along with onions. Then the tonkatsu is placed on top of the onions. To finish, beaten egg is added around the tonkatsu and onions and cooked until set.

The delicious tonkatsu and egg and onion mixture is then placed on top of a steaming bowl of rice for your enjoyment!

You can use Japanese rice (which is a short-grain rice) for this dish, however regular white rice works just perfectly for this dish.

2. Japanese Teriyaki Chicken

A bowl containing white rice and Japanese Chicken Teriyaki. The chicken is garnished with green onions and a chili powder. There is a pair of chopsticks resting on the bowl.

Another Japanese dish that begs for white rice is Teriyaki Chicken. "Teriyaki" comes from two words in the Japanese. "Teri" which means "shine" and "yaki" which means "grill".

My easy recipe for Teriyaki Chicken is no fuss, quick to make, and only requires 6 ingredients.

Be sure to start cooking rice in your rice cooker before starting to make the teriyaki chicken. More than likely your rice will take longer to cook than the time it will take you to make this dish!

3. Korean Short Ribs (Galbi)

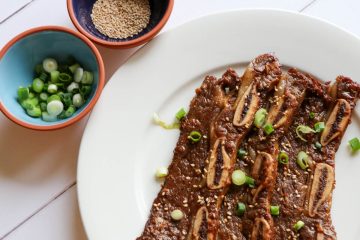
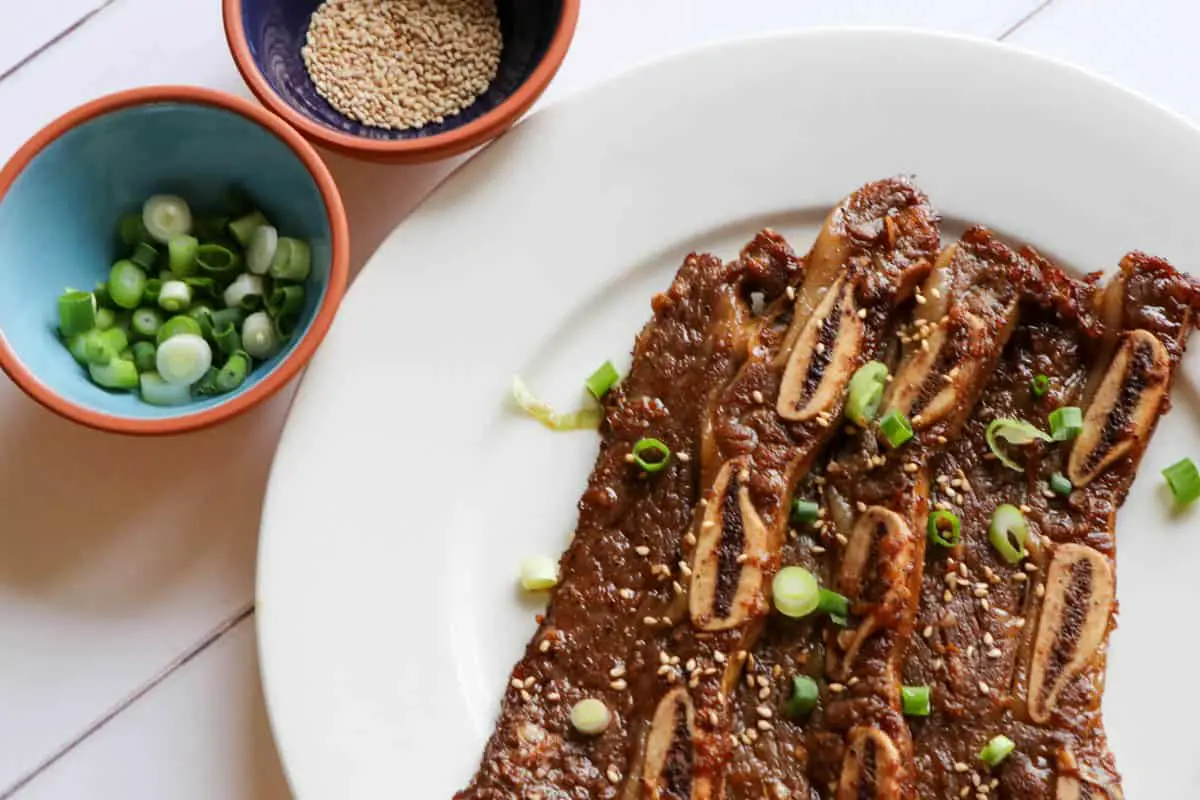
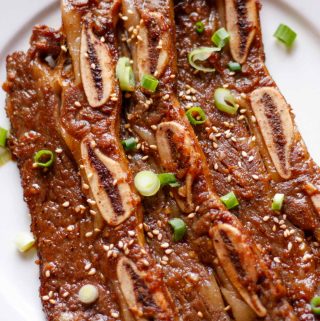
A gold rimmed serving dish containing Korean Short Ribs garnished with sesame seeds and green onions.

Korean short ribs, also known as galbi, is absolutely mouthwatering! Achingly tender meat and the wonderful savory flavors have made this Korean dish a global favorite.

I think there is a law that galbi has to be accompanied by rice 😂. Whether law or not, a side of rice is a must. And do as the Koreans do for a complete meal serve some simple side dishes called "banchan." For some great banchan recipes please visit "The 10 Best Side Dishes To Serve With Korean Short Ribs (Kalbi)." One of which is plain old rice, of course!

4. Mouthwatering Shrimp With Black Bean Sauce!

Shrimp With Black Bean Sauce with onions, green onions, and dried red chilies in a cast iron pan.

Shrimp with Black Bean Sauce is a classic Chinese dish! It's salty, spicy, and absolutely delectable!

This stir fry is a great option for when you are pressed for time and need a quick meal. It takes all of 15 minutes to make and when accompanied by white rice it makes for a delicious meal!

5. New Orleans Red Beans and Rice

New Orleans Red Beans and Rice in a white bowl, garnished with green onions. There is a bowl of red beans in the background.

When the word "rice" is in the name of the dish, it's a given that it's a rice dish!

New Orleans Red Beans and Rice is a classic dish from Louisiana. It's pretty much a one-pot meal which includes red beans, the Holy Trinity (green bell pepper, onion, and celery), and smoked sausage. Add a ham hock and cook it in chicken broth for tremendous flavor, and serve it over some perfect rice that you've cooked up!

Enjoy this amazing dish, which was Louis Armstrong's favorite meal! This is one of the greatest white rice meals ever!

6. Easy and Delicious Crawfish Étouffée!

Crawfish Étouffée garnished with green onions in a cast iron pan. There is a blue spoon with a wooden handle in the pan.

Another classic dish from Louisiana is Crawfish Étouffée. This dish is rich, elegant, and features a delectably creamy sauce. You could use crusty bread to mop up the sauce. But I think the best way is to serve this over cooked long-grain rice for an unforgettable meal!

You'll love cooking this meal which uses fresh ingredients and is easy to make!

7. Creamy Chicken and Leeks

A cast iron pan containing creamy chicken breasts and leeks. There is a blue spoon with a wooden handle in the bowl.

Another dish with a creamy texture that is perfect to serve over white rice is Creamy Chicken and Leeks.

You'll enjoy moist cooked chicken enveloped with a creamy and mustardy sauce and surrounded by tender and tasty leeks!

This main course dish is ideal for a busy weeknight as it's quick and easy to make. You can have dinner on the table in about 30 minutes.

8. Vietnamese Lemongrass Chicken

Vietnamese Lemongrass Chicken garnished with green onions in a bowl. There is a pair of chopsticks resting on the side of the bowl.

Vietnamese Lemongrass Chicken is absolutely fragrant and delicious! You'll adore the zingy taste of the lemongrass and this recipe is super easy to create!

Simply cut chicken thighs into small pieces, and make a marinade which includes lemongrass, vegetable oil, garlic, shallots, oyster sauce, fish sauce, chili flakes, lemon juice, and sugar. Marinate the chicken for about an hour and then do a quick stir fry until the chicken is cooked through.

Finish off with freshly ground black pepper, then serve alongside your white rice with your favorite pair of chopsticks.

It's as good as you'll get at your local Vietnamese restaurant!

9. Scrumptious Vegetarian Thai Panang Curry

Thai Panang Curry with vegetables garnished with cilantro and green onions in a silver bowl. There is a plate with bread, bowl with olives, and bottle of hot sauce in the background.

It's time to introduce a creamy and delicious Thai-inspired dinner! This Thai Panang Curry includes Panang curry paste, coconut milk, and plenty of healthy and nutritious ingredients such as chickpeas, eggplant, and butternut squash.

This nutritious meal is perfect served over white rice. You'll be in Thai curry heaven when dining on this Panang curry!

10. Easy Spicy Korean Braised Tofu

A white serving dish containing Dubu Jorim which is Korean Braised Tofu garnished with green onions and sesame seeds. There is a pair of silver chopsticks resting on the side of the dish.

And here's a great side dish that pairs perfectly with white rice! The tofu in this Easy Spicy Korean Braised Tofu if first pan fried, and then simmered in a spicy braising sauce.

The Korean name for this is "dubu jorim", which means simmered tofu.

Garnish with sesame seeds and sliced green onions, grab your favorite chopsticks and a bowl of steaming white rice, and enjoy this delicious dubu jorim!

Which Dishes Will You Make To Serve With Your White Rice?

So I hope you've discovered some great options for dishes to serve with white rice! Whether you have leftover rice to use up or you make it fresh, any one of these dishes will pair superbly with your rice.

Which dishes will you make? Serve one or more and enjoy a delicious and complete meal featuring some steaming white rice!

FAQ

What foods pair well with white rice?

Rice pairs well with so many foods! It goes especially well with dishes that are creamy or saucy such as Thai or Indian curries, and many Asian dishes as well.

What do Asians eat with rice?

Rice is an essential component to most every Asian meal, including breakfast! Koreans love to eat rice with banchan (Korean side dishes). Indians and Thais will enjoy their curries with rice. Japanese will eat rice with miso soup and use it as part of their rice bowls, and Chinese will enjoy steaming white rice with stir fries!

Join Me On A Fun Food Journey!

I invite you to come along on this food journey with me! Please sign up to get the latest recipes and inspiration for you to expand your food comfort zone! It's an incredible journey, please join me by signing up here.

Cheers!

Grace

Awesome Side Dishes That Go With Tilapia!

September 2, 2023 by Grace Leave a Comment

This page may contain affiliate links. So, I receive a small commission at no cost to you when you make a purchase using my link. This post is about Awesome Side Dishes That Go With Tilapia!

A picture of Cilantro Lime Rice and limes in a bowl. A picture of mashed sweet potato with melting butter and chives in a gold rimmed bowl. A picture of green beans and tomatoes in a white bowl. A picture of white asparagus with melted cheese and Italian parsley.

So do you love tilapia as much as I do? This mild fish shows up frequently on my plate at home. It's so easy to prepare and very versatile as there are so many different ways to prepare it.

I like to serve both a starch and a vegetable to accompany this popular white fish to make a complete and wholesome meal.

Here you will find some great ideas for the best side dishes to serve with tilapia!

Great Vegetable Side Dishes

1. Fresh Green Beans With Tomatoes, Chili, and Garlic

Green beans and tomatoes in a white dish.

This green bean dish is out of this world delish and makes the perfect side dish to tilapia fillets.

The garlic and chili in this easy side dish give it bold flavors, and this side is a great accompaniment to tilapia, which is a mild white fish.

It's quick and easy and a wonderful healthy side to go with your fish!

2. Incredibly Delicious Brussels Sprouts

Brussels sprouts that have been cooked and browned in a gold rimmed bowl garnished with pepper.

Another great side dish is delicious brussels sprouts. Whether roasted or pan fried, this member of the cabbage family is a great option to include as part of a healthy meal.

These brussels sprouts have been pan fried in a mixture of butter and olive oil. They are then simply and simply seasoned with salt, pepper, and garlic powder.

You'll love how this healthy side dish complements your tilapia fish!

3. Easy And Elegant White Asparagus Side Dish Recipe

White asparagus spears in a white serving dish with melted Parmesan cheese garnished with Italian parsley.

This Easy and Elegant White Asparagus side dish is very special indeed. This recipe uses jarred white asparagus rather than fresh asparagus spears.

It's super easy to make. All you need to do is place drained asparagus under the broiler with some Parmesan cheese, butter, and some seasonings, and enjoy this along with any of your favorite tilapia recipes as part of a delicious meal!

4. Roasted Carrots With Berbere Spice

Multicolored carrots cut into slivers and wedges on a white dish.

You can't go wrong with carrots as a good choice for a side! Make your favorite roast carrot recipe, or try this Roasted Carrots With Berbere Spice to add an exotic flair to your meal!

Berbere spice is a spice mix used in Eritrean and Ethiopian cuisines. It's a mixture of spices and blends typically differ but may include paprika, salt, coriander, ginger, cinnamon, chili peppers, black pepper, and/or cumin. Using this spice is a great way to spice up your meal, and a great choice as an accompaniment to tilapia fish fillets!

5. Middle Eastern Style Cabbage Salad

Middle Eastern Cabbage Salad in a blue dish.

Another simple side dish to go along with your healthy fish dinner is this Middle Eastern Style Cabbage Salad.

Any salad would be great to accompany tilapia, but why not try this cabbage salad for a change? It's a light, delicious, and refreshing salad! It's a bit tangy, garlicky, and peppery to taste, with a lovely salty flavor as well.

This is simply made with either red or green cabbage, olive oil, fresh lemon juice, fresh garlic, salt and pepper. You'll love how this great recipe pairs with fresh tilapia that you have baked or pan fried!

6. Delicious Balsamic Red Onions

Balsamic red onions in a casserole dish.

If you love onions and would enjoy something sweet and tangy with mild and delicate tilapia, then try this Balsamic Red Onion Recipe! Red onion never tasted so good!

These balsamic red onions have a great flavor and this recipe couldn't be easier to make.

The mild flavor of tilapia definitely gets a boost when paired with these balsamic roasted red onions!

7. Easy and Creamy Mashed Sweet Potatoes

Sweet mashed potatoes in a gold rimmed bowl garnished with chopped chives with melting butter on the top.

One of the best sides to serve with tilapia is sweet potatoes. And a favorite way of mine to prepare sweet potatoes is by mashing them up with Parmesan cheese, butter, and cream.

You'll fall head over heels for this fluffy sweet potato mash! It's fantastic to pair with your favorite baked tilapia recipe. Try dunking a piece of tilapia into the mash and enjoying a mouthful of tender fish and creamy potatoes together. It's a pure delight!

Tasty Starchy Side Dishes

8. Cilantro Lime Rice

Cilantro lime rice and lime wedges in a bowl.

Rice is a perfect side dish to serve with tilapia. Some options are white rice, brown rice, and jasmine rice. And if you'd like to try a delicious seasoned rice dish, consider serving the ever popular Cilantro Lime Rice with your fish!

This rice is delightfully easy to create. A generous amount of lime juice and cilantro mixed into the rice gives this a superb tangy flavor which pairs well with the delicate flavor of the fish.

9. Southern Macaroni Salad

Southern macaroni salad with eggs and mayo garnished with green onions in a white dish, with the handle of a spoon visible in the background.

Macaroni salad is not just for barbecues and fried chicken! This is one of the most popular dishes and for good reason! This salad pleases everyone, including picky eaters, and is a great side to accompany your fish dinner.

Classic southern macaroni salad contains macaroni that is cooked al dente (firm). It also typically contains lots of creamy mayonnaise, hard-boiled eggs, sweet pickle relish, and onions. Green bell pepper or fresh crunchy celery is also included for some nice crunch.

Why not serve this macaroni salad with some easy baked tilapia as part of a most delicious dinner your family will LOVE?

10. Basmati Rice With Saffron

Basmati rice garnished with cilantro and saffron threads with a yellow tinge to the rice from saffron.

Highly aromatic, fluffy and with a delicate texture, basmati rice is the king of rices! Infused with some beautiful saffron it becomes an elegant side to any type of fish, including delicious tilapia cooked your favorite way!

Which Side Dishes Will You Make To Go With Your Tilapia?

So there you have some AWESOME Side Dishes To Serve With Tilapia!

Which ones will you make? Serve one or more and enjoy a delicious and complete meal featuring delicious tilapia!

FAQ

What side dishes go with tilapia?

Tilapia pairs well with so many different side dishes! For a complete meal serve a vegetable side along with a starchy side. Some great vegetable sides include green beans, mashed sweet potatoes, and salads. Consider rice or a delicious macaroni salad for your starch as part of a great fish meal!

What does tilapia taste like?

Tilapia has a very mild and delicate taste, not "fishy" at all. There is a slight sweet taste to this fish as well.

Join Me On A Fun Food Journey!

I invite you to come along on this food journey with me! Please sign up to get the latest recipes and inspiration for you to expand your food comfort zone! It's an incredible journey, please join me by signing up here.

Cheers!

Grace

Easy Cheesy New Mexico Calabacitas Recipe

August 29, 2023 by Grace Leave a Comment

This page may contain affiliate links. I receive a small commission at no cost to you when you make a purchase using my link. This post is about an Easy Cheesy New Mexico Calabacitas Recipe!

Sliced squash cooked with chopped onion, green chilies and corn covered with melted cheese in a cast iron pan.

I discovered an amazing dish called Calabacitas when I was in New Mexico. This is one of the most famous New Mexican dishes and it's also beloved in the southwest region of the United States.

Let me tell you a little about this vegetable side dish, which you will absolutely love!

[feast_advanced_jump_to]

What Is Calabacitas?

Calabacitas is the Spanish word for "little squashes". This dish may have originated from Mexican cuisine, but it has become a traditional dish in the state of New Mexico.

There are many variations of this dish, but it typically contains seasonal ingredients such as yellow summer squash (and other varieties of summer squash), corn, and green chilies.

Why You Will Love This New Mexico Calabacitas Recipe!

Here are a few reasons why you will LOVE this Easy Cheesy New Mexico Calabacitas recipe:

  • This vegetarian dish has great flavors, and is the perfect side dish to accompany all your favorite mains! The tender squash, sweet corn, and chiles combine to give you wonderful depth of flavor.
  • Calabacitas is very versatile and easy. You could even make this a main dish by adding some cooked ground beef, chicken or turkey to it which will make meat lovers happy!
  • You will have this ready in less than 30 minutes for your whole family to enjoy!
  • It's CHEESY! The gooey melted cheese is a pure delight!

So now let me tell you what you'll need to make this fabulous dish!

🥘 Ingredients

Bowls containing corn, shredded cheddar cheese, butter and olive oil, seasoning, green chilies and garlic. There are also half an onion and 3 different squashes pictured.

Here are the ingredients you will need for this easy recipe:

  • Summer Squash - it's lovely to use a variety of squashes if you can! Some recommendations are yellow squash, Mexican zucchini or Mexican squash, and Italian squash that we commonly call zucchini; if you can find an 8-Ball zucchini be sure to include it!
  • Olive oil
  • Butter
  • Onion
  • Green chiles - to keep things simple, I used a can of Hatch Diced Green Chiles. The Hatch brand, out of Albuquerque, New Mexico, offers a hot Hatch green chile product (pictured below), as well as a mild New Mexican green chile that is diced and canned. It's more work, but you could also use poblano peppers which are roasted, peeled, deveined and deseeded, and chopped.
  • Sweet Corn - I used canned corn which I drained; you could also use frozen corn after defrosting it or even fresh corn kernels
  • Fresh garlic cloves
  • Salt
  • Black Pepper
  • Dried oregano (or dried Mexican oregano)
  • Cheese - I used sharp cheddar cheese; some other options that would be great to make calabacitas con queso are cotija cheese, queso fresco, or Monterey Jack. The queso fresco and cotija won't really melt, but they could be used as more of a finishing touch by crumbling or sprinkling on top.
An 8-Ball zucchini on display in a grocery store.
8-Ball Zucchini!
Yellow summer squash on display in a grocery store.
Summer Squash Yellow Calabacitas
A can of HOT Hatch Select Diced Green Chiles.
Hatch Diced Green Chiles

You should be able to find all the ingredients you will need for this green chile calabacitas at your local grocery store.

So let's have some fun making this traditional dish of New Mexico!

🔪 Instructions

Prepare your squash, onion, and garlic. Chop the onion, mince the garlic, and slice the squash into discs. If one of your squashes is very large, you can cut the pieces in a way that they are similar in size to your smaller squash discs.

A squash which has been cut up into halves and smaller pieces on a wooden cutting board.
Cut larger squashes into pieces similar in size to your smaller sliced squashes.
Chopped onion and sliced zucchini both green and yellow on a white plate.
Prepared onions and squashes ready for cooking calabacitas.

Add the butter and olive oil to your large skillet and heat on medium. Once the butter is melted and the pan is hot, add the chopped onion and minced garlic. Sauté for around 2 minutes, stirring constantly.

Chopped onion and minced garlic being cooked in butter and oil in a cast iron pan.

Keep your skillet on a medium heat. Add the squash, and cook for around 10 minutes until the squash is tender. Stir every once in awhile, but it's nice to let the squash sit undisturbed for a bit without turning so that you get some browning on the squash.

Sliced cooked squash and chopped onion being cooked in a cast iron pan.

Now add the green chiles, corn, and seasonings (salt, pepper, and oregano) to your sauteed zucchini mixture. Stir to combine, and let this cook for around 2 minutes. Taste and add additional salt and pepper if you like.

Sliced squash and chopped onion in a cast iron pan topped with green chilies, seasonings, and corn.

Turn the heat to low. Now add the shredded cheddar cheese and let this melt. Cover the skillet if you can to help the cheese melt quickly.

Sliced squash cooked with chopped onion, green chilies and corn covered with shredded cheese in a cast iron pan.

Behold your beautiful creation, and enjoy right away!

Sliced squash cooked with chopped onion, green chilies and corn covered with melted cheese in a cast iron pan.

Suggestions For Serving

Sliced squash cooked with chopped onion, green chilies and corn covered with melted cheese in a cast iron pan.

This dish is beautiful served as a side to accompany your favorite main meals. You could also enjoy it in a soft taco with a side of Mexican borracho beans. DELISH!

Add some ground beef, chicken or turkey to turn this into a main meal.

Buen provecho!

FAQ

How should I store leftover calabacitas?

If you have leftover calabacitas, store it in an airtight container in your refrigerator and enjoy within 3 days.

What are some variations or additions for this recipe?

You could add some chopped Roma tomatoes or red pepper for some additional texture and color if you like. Consider adding some chili powder, serrano peppers or hot sauce to make this spicier if you like!

Some Other Recipes You May Enjoy!

Here are some other recipes you may enjoy:

  • An Easy and Delicious Green Chile Burger Awaits!
  • Easy Cheesy Air Fryer Zucchini
  • Roasted Broccoli With Parmesan

Join Me On A Fun Food Journey!

I invite you to come along on this food journey with me! Please sign up to get the latest recipes and inspiration for you to expand your food comfort zone! It's an incredible journey, please join me by signing up here.

Cheers!

Grace

Sliced squash cooked with chopped onion, green chilies and corn covered with melted cheese in a cast iron pan.

Easy Cheesy New Mexico Calabacitas Recipe

Grace Stewart
This Easy Cheesy New Mexico Calabacitas Recipe features squash cooked until tender with corn, green chiles, and onion. The finishing touch is melted cheese which makes for an amazing dish which your family will absolutely love!
Print Recipe Pin Recipe
Prep Time 10 minutes mins
Cook Time 16 minutes mins
Total Time 26 minutes mins
Course Side Dish
Cuisine American, New Mexican
Servings 4 people
Calories 280 kcal

Equipment

  • cast iron skillet cast iron is preferred, but a large skillet can also be used

Ingredients
  

  • 1.5 lb squash this is around 3-4 squash; it's nice to use different varieties and colors if you can
  • 1 tablespoon olive oil
  • 1 tablespoon butter
  • ½ onion chopped
  • 4 oz green chiles I used a 4 oz can and did not drain them; New Mexico Hatch Green Chiles are perfect for this dish!
  • 1 cup corn I used canned corn
  • 4 cloves garlic minced
  • ¼ ts salt plus additional to taste
  • ¼ ts pepper plus additional to taste
  • ¼ ts oregano plus additional to taste (can sub Mexican oregano)
  • 1 cup cheddar cheese shredded; I used sharp cheddar; feel free to sub Monterey Jack or another cheese that you enjoy

Instructions
 

  • Prepare your squash, onion, and garlic. Chop the onion, mince the garlic, and slice the squash into discs. If one of your squashes is very large, you can cut the pieces in a way that they are similar in size to your smaller squash discs.
    Chopped onion and sliced zucchini both green and yellow on a white plate.
  • Add the butter and olive oil to your skillet and heat on medium. Once the butter is melted and the pan is hot, add the chopped onion and minced garlic. Sauté for around 2 minutes, stirring constantly.
    Chopped onion and minced garlic being cooked in butter and oil in a cast iron pan.
  • Keep your skillet on a medium heat. Add the squash, and cook for around 10 minutes until the squash is tender. Stir every once in awhile, but it's nice to let the squash sit for a bit without turning so that you get some browning on the squash.
    Sliced cooked squash and chopped onion being cooked in a cast iron pan.
  • Now add the green chiles, corn, and seasonings (salt, pepper, and oregano). Stir to combine, and let this cook for around 2 minutes. Taste and add additional salt and pepper if you like.
    Sliced squash and chopped onion in a cast iron pan topped with green chilies, seasonings, and corn.
  • Turn the heat to low. Now add the shredded cheese and let this melt. Cover the skillet if you can to help the cheese melt quickly.
    Sliced squash cooked with chopped onion, green chilies and corn covered with shredded cheese in a cast iron pan.
  • Behold your beautiful creation, and enjoy right away!
    Sliced squash cooked with chopped onion, green chilies and corn covered with melted cheese in a cast iron pan.

Notes

It's so much fun to use different varieties and colors of squash when making calabacitas!  
Sharp cheddar is wonderful with the calabacitas, however feel free to sub another cheese if you wish. 
This is a perfect side dish to accompany all your favorite main dishes!
 

Nutrition

Calories: 280kcalCarbohydrates: 33gProtein: 10gFat: 14gSaturated Fat: 6gPolyunsaturated Fat: 1gMonounsaturated Fat: 5gCholesterol: 29mgSodium: 437mgPotassium: 743mgFiber: 6gSugar: 7gVitamin A: 18474IUVitamin C: 43mgCalcium: 297mgIron: 2mg
Keyword squash, vegetable side dish
Tried this recipe?Let us know how it was!

How To Roast Whole Beets In The Oven

August 12, 2023 by Grace Leave a Comment

This page may contain affiliate links. I receive a small commission at no cost to you when you make a purchase using my link. This post is about How To Roast Whole Beets In The Oven!

Several pieces of sliced beets cut into heart shapes on a black plate.

I am overjoyed to write about something I love...beets! Beets show up on my table for enjoyment almost everyday and I am a true beet lover!

And my favorite way (and also the best way) of cooking beets is to roast them.

So allow me to spend a little time here raving about why we should eat wonderful and amazing beets!

[feast_advanced_jump_to]

Why Should We Eat Beets?

A golden beet and red beet next to some white flowers.

What's so great about beets? Well, let's start with the health benefits of beets.

Health Benefits of Beets

I have sourced this information from an article by Healthline called: "Everything To Know About the Health Benefits of Beets."

Beets may be considered a superfood because they have a very high nutritional density. Beetroot is rich in vitamins and minerals, including folate, and is low in calories.

Studies also show that this healthy root vegetable could help to lower our blood pressure, and therefore may reduce our risk of strokes and heart disease.

Furthermore, if you are seeking to have better athletic performance and endurance, I've got good news for you! Studies show that consuming beets may help improve these!

For more details and further information on the health benefits of beets, please read the article I linked to above.

Beets Are Delicious!

Another reason to eat beets is that quite simply, they are delicious! Beets have a slightly sweet taste as well as some earthy notes to them. Some people might actually say that "earthy" means they taste like dirt 😅.

If you think beets taste like dirt, no worries! You can just add them to your salad and drown them in dressing. But seriously, there are many ways to dress up beets. You can even use them to make beet hummus!

Why Cook Beets By Oven Roasting Them?

It's considered that eating raw beets is the best way to get the most nutrients out of them.

However, if you would like to cook them, roasting beets whole in the oven rather than boiling them is the next best way to enjoy as many nutrients from your beets as you can.

Roasting beetroot is also the easiest way to cook them! All you need is your oven, some beets, and aluminum foil!

🥘 Ingredients

The only ingredient you will need for this beets recipe is fresh beets.

Now, you can most likely find both beets with beet greens and raw beets without the greens at your grocery store.

Furthermore, you may be lucky enough to find both red beets and golden beets. If you do find both colors, I recommend buying and roasting both red and golden as the color combination is especially beautiful.

Golden beets and red beets with their greens.
Photo by Christina Rumpf on Unsplash

We will use large beets for our roasted beet recipe. Please select beets approximately ½ pound in weight (this weight only includes the root and not the greens).

The size of the beets that you select is important because it does have an impact on the cooking time. Small beets will cook faster than larger beets.

🔪 Instructions

So here's your step-by-step guide to making roasted beetroot!

Preheat your oven to 400F.

If you have purchased beets with greens, use a sharp knife to remove the greens as we will only roast the beet root.

Rinse and pat dry the beets using paper towels.

Wrap each beet individually in aluminum foil. Place the wrapped beets on a cookie sheet or large baking sheet, and roast beets for approximately 1 hr and 15 minutes.

It's best to place the foil wrapped beets on top of a cookie sheet because sometimes beet juice leaks out and if you don't have something to catch it you will have a big mess to clean up in your oven!

Beets wrapped in foil in the background and a beet placed on top of a sheet of foil.
Wrap each beet individually in foil.
3 beets wrapped in foil placed on a silicone mat and cookie sheet in an oven.
Place the foil wrapped beets on a cookie sheet and roast in your oven.

After 1 hr 15 minutes, remove the beets from the oven. Check to see if they are cooked properly by inserting a fork into one of the beets.

Be careful opening the foil packet as it's HOT! If the beet is fork tender, then they are finished cooking. If not, place them back in the oven for 10 minute intervals until they are cooked through.

A beet pierced with a fork to show the beet is fork tender. The beet has released some of its juices and is in a piece of aluminum foil.

Allow the beets to cool while still wrapped in foil. Once cool, you can peel the beets if you desire. The peel should come right off using your hands. If some of the peel is not easily removed, you can use a knife to cut off these areas.

You may want to wear gloves to avoid your hands getting beet stained. 😊

A whole beet that has been roasted in the oven on a sheet of aluminum foil, and a hand holding some of the skin of the beet which has been peeled off.

Suggestions For Serving

Enjoy your beets chopped or sliced and added into salads.  They also make a wonderful and simple side dish when sliced, seasoned with salt and black pepper, and drizzled with a bit of olive oil and/or balsamic vinegar.

Try them in this Beautiful Roasted Beets and Spinach Salad or include them in your favorite beet recipes.

FAQ

Can you eat roasted beets with the skin on?

I typically peel the skin off of beets before consuming them, however it's perfectly fine to eat the skin if you would like to!

Is roasting beets better than boiling them?

Roasting beets is better than boiling them because you can retain more nutrients using this method.

Should you wash beets before cooking them?

It's best to rinse and wash your beets before you cook them. Be sure to remove and dirt and debris from beets prior to roasting them.

Some Other Recipes You May Enjoy!

Here are some other recipes you may enjoy:

  • Roasted Carrots With Berbere Spice
  • Roasted Broccoli With Parmesan
  • The BEST Indian Spiced Roasted Cauliflower

Join Me On A Fun Food Journey!

I invite you to come along on this food journey with me! Please sign up to get the latest recipes and inspiration for you to expand your food comfort zone! It's an incredible journey, please join me by signing up here.

Cheers!

Grace

Several pieces of sliced beets cut into heart shapes on a black plate.

How To Roast Whole Beets In The Oven

Grace Stewart
Roasting whole beets in the oven is the best and easiest way to prepare beets!
Print Recipe Pin Recipe
Prep Time 5 minutes mins
Cook Time 1 hour hr 15 minutes mins
Total Time 1 hour hr 20 minutes mins
Course accompaniment, Side Dish, vegetable side dish
Cuisine American
Servings 12 servings
Calories 9 kcal

Equipment

  • Oven
  • cookie sheet or baking tray

Ingredients
  

  • 3 beets select beets approximately ½ lb in weight

Instructions
 

  • Preheat your oven to 400F. Rinse and pat dry the beets.
    A golden beet and red beet next to some white flowers.
  • Wrap each beet individually in foil. Place the wrapped beets on a cookie sheet or oven proof container, and roast for approximately 1 hr and 15 minutes.
    3 beets wrapped in foil placed on a silicone mat and cookie sheet in an oven.
  • After 1 hr 15 minutes, remove the beets from the oven. Check to see if they are cooked properly by inserting a fork into one of the beets. Be careful opening the foil packet as it's HOT! If the beet is fork tender, then they are finished cooking. If not, place them back in the oven for 10 minute intervals until they are cooked through.
    A beet pierced with a fork to show the beet is fork tender. The beet has released some of its juices and is in a piece of aluminum foil.
  • Allow the beets to cool while still wrapped in foil. Once cool, you can peel the beets if you desire. The peel should come right off using your hands. If some of the peel is not easily removed, you can use a knife to cut off these areas.
    A foil wrapped beet and a peeled beet with the beet peels on a white plate.
  • Enjoy your delicious and healthy beets!
    Red beets that have been cut in half so that you can see striations in the beets.

Notes

 Enjoy your beets chopped and added into salads.  They are also wonderful sliced, seasoned with salt and pepper, and drizzled with olive oil.
Try them in this Beautiful Roasted Beets and Spinach Salad.
Cheers!

Nutrition

Calories: 9kcalCarbohydrates: 2gProtein: 0.3gFat: 0.03gSaturated Fat: 0.01gPolyunsaturated Fat: 0.01gMonounsaturated Fat: 0.01gSodium: 16mgPotassium: 67mgFiber: 1gSugar: 1gVitamin A: 7IUVitamin C: 1mgCalcium: 3mgIron: 0.2mg
Keyword Beets, roasted beets
Tried this recipe?Let us know how it was!

Easy Korean Broccoli Side Dish Recipe

August 5, 2023 by Grace Leave a Comment

This page may contain affiliate links. I receive a small commission at no cost to you when you make a purchase using my link. This post is about an Easy Korean Broccoli Side Dish Recipe!

Broccoli florets seasoned in a Korean style sauce and flecked with red pepper flakes in a white bowl. There is a pair of silver chopsticks resting on the bowl in the background.

Are you searching for a way to jazz up plain old steamed broccoli? If so, you have come to the right place!

Allow me to introduce this Korean Broccoli Side Dish to you. It's kind of like a Korean broccoli salad and is considered a banchan. Banchan are Korean side dishes, and this broccoli dish is as good as what you would get at Korean restaurants!

If you love Korean cuisine and Korean cooking, you've got to add this delicious and healthy side dish to your repertoire!

[feast_advanced_jump_to]

Why You Will Love This Easy Recipe

You will love this recipe and this great side dish because:

  • It's delicious! The tender broccoli tastes nutty with the sesame oil, and has a bit of a spicy kick due to the Korean red pepper flakes. There is a hint of sweetness with the sugar we include and if you are a fan of garlic, you will love the garlic flavor!
  • Preparing this Korean banchan is super easy. You can add this to your list of go-to simple recipes for Korean food.
  • This is not only a tasty side dish, but it's healthy too! Read about the health benefits of broccoli at an article from Healthline.com called "Top 14 Health Benefits of Broccoli."
  • You can enjoy this healthy Asian broccoli salad as part of a delicious Korean meal, or as an accompaniment to any main course!

🥘 Ingredients

A white bowl containing broccoli florets and small bowls containing minced garlic, soy sauce, sesame oil, salt and pepper, Korean red pepper flakes, rice vinegar, and sugar.

So here are the simple ingredients you will need to make this Korean broccoli banchan:

  • Fresh broccoli
  • Sesame oil
  • Gochugaru (Korean red pepper flakes)
  • Fresh garlic
  • Salt
  • Black pepper
  • Rice vinegar
  • Sugar
  • Soy sauce
  • Sesame seeds (optional)

You should be able to buy most of these ingredients at your local grocery store with the exception of the Korean red pepper flakes. These can be purchased at Asian markets, and I have provided links to buy some of these items from Amazon for your convenience.

🔪 Instructions

It's SUPER SIMPLE to make this delicious side dish!

Start by preparing your broccoli. Remove the tough bottom end of the broccoli crown. Cut the broccoli into long and thin pieces with florets and a little of the broccoli stems attached as pictured in the INGREDIENTS section.

Steam the broccoli for around 10 minutes, or until the broccoli is nice and tender. Remove from the heat and allow to cool for a bit.

Broccoli florets steaming in a steamer on top of a stove.

While the broccoli is steaming, combine the remaining ingredients (dressing ingredients) in a large bowl. Stir or whisk until the ingredients are well combined.

A Korean style spicy sauce including sesame oil, salt and pepper, garlic and Korean red pepper flakes in a blue bowl.
Add the dressing ingredients to a large bowl.
A Korean style spicy sauce including sesame oil, garlic and Korean red pepper flakes in a blue bowl.
Stir or whisk the dressing ingredients until well combined.

Add the steamed broccoli to the dressing and stir to dress the broccoli with the sauce.

Broccoli florets dressed with a Korean style sauce which includes garlic and Korean red pepper flakes in a blue bowl. There is a blue spoon in the bowl.

Last but not least, add some sesame seeds if desired for some extra nutty flavor!

Suggestions For Serving

Broccoli florets seasoned in a Korean style sauce and flecked with red pepper flakes in a white bowl. There is a pair of silver chopsticks resting on the bowl in the background.

You can enjoy this chilled, at room temperature, or even lightly warmed.  

Truthfully I could eat this and a bowl of rice and be perfectly happy. However, why not serve it alongside some Korean short ribs, or with Korean fried chicken?

However you decide to serve it, I know you and your family will love this great way with broccoli!

FAQ

How can I store leftover Korean broccoli salad?

Store any leftovers in your fridge in an airtight container and enjoy within 3-4 days.

What is the healthiest way to serve broccoli?

Steaming broccoli may be one of the healthiest ways to cook broccoli because you won't experience the loss of vitamins and nutrients that occurs when boiling.

Can I leave out the Korean red pepper flakes if I don't like spicy food?

You can omit the Korean red pepper flakes if you don't like spicy food. However, you could reduce the amount called for in the recipe and still include a small amount. I love including gochugaru because the red color of the red pepper flakes goes well with the green broccoli for some vibrant colors!

Some Other Korean Recipes You May Enjoy!

Here are some other recipes that you may enjoy:

  • Korean Green Onion Kimchi
  • How To Make Spicy Korean Fish Cake Side Dish
  • Korean Spicy Bean Sprouts

Join Me On A Fun Food Journey!

I invite you to come along on this food journey with me! Please sign up to get the latest recipes and inspiration for you to expand your food comfort zone! It's an incredible journey, please join me by signing up here.

Cheers!

Grace

Broccoli florets seasoned in a Korean style sauce and flecked with red pepper flakes in a white bowl.

Easy Korean Broccoli Side Dish Recipe

Grace Stewart
You'll love this Easy Korean Broccoli Side Dish Recipe! This delicious broccoli is perfect served alongside your favorite Korean foods or as a side dish with any meal!
Print Recipe Pin Recipe
Prep Time 5 minutes mins
Cook Time 10 minutes mins
Total Time 15 minutes mins
Course Side Dish, vegetable side dish
Cuisine Korean
Servings 4 people
Calories 55 kcal

Equipment

  • Steamer
  • large pot

Ingredients
  

  • ½ lb broccoli use fresh broccoli and cut into florets with a little of the stem attached

Dressing Ingredients

  • 1 tablespoon sesame oil
  • 1 ts gochugaru Korean red pepper flakes
  • 2 each garlic minced
  • ¼ ts salt
  • ⅛ ts black pepper
  • 1 ts rice vinegar
  • ½ ts sugar
  • 1 ts soy sauce

Optional Ingredient

  • sesame seeds

Instructions
 

  • Start by preparing your broccoli. Remove the tough bottom end of the broccoli crown. Cut the broccoli into long and thin pieces with florets and a little of the broccoli stems attached as pictured. Steam the broccoli for around 10 minutes, or until the broccoli is nice and tender. Remove from the heat and allow to cool for a bit.
    Broccoli florets steaming in a steamer on top of a stove.
  • While the broccoli is steaming, combine the remaining ingredients (dressing ingredients) in a large bowl. Stir or whisk until the ingredients are well combined.
    A Korean style spicy sauce including sesame oil, garlic and Korean red pepper flakes in a blue bowl.
  • Add the steamed broccoli to the dressing and stir to dress the broccoli with the sauce. Add some sesame seeds if desired. Enjoy!
    Broccoli florets dressed with a Korean style sauce which includes garlic and Korean red pepper flakes in a blue bowl. There is a blue spoon in the bowl.

Notes

You can enjoy this chilled, at room temperature, or even lightly warmed.  
Add some sesame seeds for extra nutty flavor!  
Mashita! 

Nutrition

Calories: 55kcalCarbohydrates: 5gProtein: 2gFat: 4gSaturated Fat: 1gPolyunsaturated Fat: 2gMonounsaturated Fat: 1gSodium: 252mgPotassium: 190mgFiber: 2gSugar: 2gVitamin A: 428IUVitamin C: 51mgCalcium: 29mgIron: 1mg
Keyword Banchan, Korean side dish
Tried this recipe?Let us know how it was!

Easy Zucchini Kimchi Recipe

July 29, 2023 by Grace 2 Comments

This page may contain affiliate links. I receive a small commission at no cost to you when you make a purchase using my link. This post is about an Easy Zucchini Kimchi Recipe!

Two bowls containing Korean zucchini kimchi which is kimchi, sliced onions, and green onions in a spicy red sauce.

Did you know that there are around 200 different types of kimchi's in Korean cuisine? Kimchi's are Korean side dishes, known as banchan.

The most popular and well known kimchi is made with napa cabbage. However you can also enjoy cucumber kimchi, green onion kimchi, and bok choy kimchi among others!

One kimchi that is not as well known as the ones mentioned is hobak kimchi, which is zucchini kimchi.

"Hobak" means zucchini in Korean. And hobak kimchi is one of the most delicious kimchi's that you will enjoy! If you love Korean food, you've got to try this vegetable side dish!

[feast_advanced_jump_to]

Why You Will LOVE This Korean Zucchini Recipe!

You will fall head over heels for this zucchini kimchi recipe because:

  • The savory taste is amazing! It's a bit salty, sweet, spicy, and sour with some great umami flavor!
  • This kimchi is super easy to make. The most difficult part is slicing up the veggies and mincing the garlic, and that's not hard!
  • This hobak kimchi is quick to prepare. It's ready in about 40 minutes, 30 minutes of which is salting the zucchini.
  • It's ready to enjoy immediately, no fermentation is required. I do recommend allowing at least a couple of hours for the flavors to meld, but if you can't wait that long you can dig in right away!
  • The dish is beautiful with the vibrant green color of the zucchini paired with the red gochugaru.
  • This is a great way to use up some of the ton of zucchinis that you may have growing in your garden in the summer time!

Now let's roll up our sleeves and enjoy making this exquisite kimchi!

🥘 Ingredients

A white plate with slices of onion, a whole zucchini, and slices of zucchini. Small bowls containing salt, gochugaru, green onions, minced garlic, sesame oil, mirin, fish sauce, and rice vinegar.

So here's what you'll need to make this Korean zucchini kimchi:

  • Fresh Zucchini - you can use either the North American variety of zucchini (which I show here), or the Korean variety called aehobak. The Korean zucchini differs from the North American regular zucchini in that the flesh is more delicate and has smoother or thinner skin. You should be able to find aehobak at Korean grocery stores.
  • Coarse salt - this is for salting the zucchini so that we can remove the excess water from it
  • Onion
  • Fresh garlic
  • Green onions
  • Sesame oil
  • Gochugaru (Korean red pepper flakes)
  • Rice vinegar
  • Mirin (can sub sugar)
  • Fish sauce

You'll love how these simple ingredients combine to give you a most delicious Korean side dish!

🔪 Instructions

It couldn't be simpler to make this kimchi. Begin by cutting the ends off your zucchini.  Slice zucchini in half lengthwise, and then cut widthwise into half moon shapes.

A zucchini on a wooden cutting board which has been sliced down the middle, then a few slices were cut across into half moon shapes.

Place in a colander or large bowl and sprinkle salt over the sliced zucchini.  Leave for 30 minutes. At the end of this time you can see how much excess moisture is released from the zucchini. Discard this excess water and place the zucchini in a colander and rinse with water.

Slices of zucchini in a silver bowl that have been sprinkled with salt.
Sprinkle coarse salt over the zucchini.
A silver bowl containing slices of zucchini and water drawn out from the zucchini. There is a yellow spoon in the bowl.
Leave for 30 minutes. Notice how much moisture is released from the zucchini.

Squeeze the zucchini firmly to remove as much water as you can and place in a large mixing bowl.

Slices of zucchini that have been squeezed so that the water has been removed from the zucchini.

Add all of the remaining ingredients to the zucchini slices.

A silver bowl containing slices of onion, green onion, and zucchini along with minced onion and gochugaru.

Stir well to thoroughly combine all of the ingredients. Taste and adjust any seasoning as necessary. If the taste is bitter for you, add a little sugar until you are happy with the taste.

Zucchini kimchi which is slices of zucchini, sliced onion and green onions in a spicy red kimchi sauce. There is a yellow spoon with a wooden handle resting in the bowl.

Suggestions For Serving

Two bowls containing Korean zucchini kimchi which is kimchi, sliced onions, and green onions in a spicy red sauce.

Your zucchini kimchi is ready to enjoy immediately! There is no fermentation required.

However, it tastes better after spending the night in your fridge so the flavors have some time to meld together.  It is much tastier the next day.

When ready to enjoy, place the kimchi in a pretty bowl or serving plate and display it proudly for your family.

This Korean side dish is wonderful simply served with rice as part of a delicious Korean meal! Enjoy it with some Korean barbecue, such as kalbi, or pan fried yellow croaker.

It's so delicious and a great option to serve alongside your favorite main dishes for a little extra spice!

I hope this will become one of your favorite Korean recipes! Mashita!

FAQ

How long will my Korean zucchini kimchi last?

Your zucchini kimchi will last a couple of weeks when stored in an airtight container in your refrigerator. However, it's best enjoyed within a week.

Is Korean zucchini the same as American zucchini?

The North American variety of zucchini is different from the Korean variety called aehobak. The Korean zucchini differs from the American zucchini in that the flesh is more delicate and has thinner or smoother skin.

How should I store zucchini kimchi?

Store your zucchini kimchi in an airtight container in your refrigerator.

Some Other Recipes You May Enjoy!

Here are some other recipes that you may enjoy:

  • Korean Zucchini Side Dish - called Hobak Namul, this recipe calls for stir-fried zucchini and is served at room temperature or chilled
  • Spicy Korean Fish Cake Side Dish
  • Korean Spicy Bean Sprouts

Join Me On A Fun Food Journey!

I invite you to come along on this food journey with me! Please sign up to get the latest recipes and inspiration for you to expand your food comfort zone! It's an incredible journey, please join me by signing up here.

Cheers!

Grace

A bowl containing Korean zucchini kimchi which is kimchi, sliced onions, and green onions in a spicy red sauce.

Easy Zucchini Kimchi Recipe

Grace Stewart
Try this Easy Zucchini Kimchi Recipe! This delicious kimchi will delight your taste buds, and is the perfect side dish to spice up any meal!
5 from 1 vote
Print Recipe Pin Recipe
Prep Time 10 minutes mins
Salting the zucchini 30 minutes mins
Total Time 40 minutes mins
Course Side Dish, vegetable side dish
Cuisine Korean
Servings 6 people
Calories 38 kcal

Equipment

  • large mixing bowl
  • colander

Ingredients
  

  • 2 zucchini cut lengthwise, and then across widthwise to make half moon shapes
  • 1 tablespoon coarse salt this is for salting the zucchini
  • ½ onion sliced thinly
  • 4 cloves garlic minced
  • 1 green onion sliced thinly
  • 2 ts sesame oil
  • 1.5 tablespoon gochugaru Korean red pepper flakes; you can adjust the amount to suit your tolerance for spicy food
  • 1 ts rice vinegar
  • 2 ts mirin can sub 1 ts of sugar
  • 1 ts fish sauce

Instructions
 

  • Cut the ends off your zucchini.  Slice in half lengthwise, and then cut widthwise into half moon shapes. Place in a colander or large bowl and sprinkle 1 tablespoon of coarse salt over the zucchini.  Leave for 30 minutes. At the end of this time you can see how much excess moisture is released from the zucchini. Discard this excess water and place the zucchini in a colander and rinse with water. Squeeze the zucchini firmly to remove as much water as you can and place in a large mixing bowl.
    Slices of zucchini that have been squeezed so that the water has been removed from the zucchini.
  • Add all of the remaining ingredients to the zucchini.
    A silver bowl containing slices of onion, green onion, and zucchini along with minced onion and gochugaru.
  • Stir well to thoroughly combine all of the ingredients. Taste and adjust any seasoning as necessary. If the taste is bitter for you, add a little sugar until you are happy with the taste.
    Zucchini kimchi which is slices of zucchini, sliced onion and green onions in a spicy red kimchi sauce. There is a yellow spoon with a wooden handle resting in the bowl.
  • Mashita! Enjoy!
    Two bowls containing Korean zucchini kimchi which is kimchi, sliced onions, and green onions in a spicy red sauce.

Notes

Please note that the nutrition info calculates the salt used in salting the zucchini.  The actual sodium content will be less than you see in the nutrition info, because we will rinse off most of the salt after salting the zucchini.
Feel free to adjust the amount of gochugaru (Korean red pepper flakes) to suit your tolerance for spicy foods.  
If the kimchi tastes bitter to you, try adding sugar a little at a time to take the bitter taste away.
This kimchi tastes better after spending the night in your fridge so the flavors have some time to meld together.  However, you can enjoy it immediately!

Nutrition

Calories: 38kcalCarbohydrates: 5gProtein: 1gFat: 2gSaturated Fat: 0.3gPolyunsaturated Fat: 1gMonounsaturated Fat: 1gSodium: 1217mgPotassium: 237mgFiber: 2gSugar: 2gVitamin A: 744IUVitamin C: 13mgCalcium: 25mgIron: 1mg
Keyword Banchan, Korean side dish, vegetable side dish, zucchini
Tried this recipe?Let us know how it was!

Carolina Reaper Spicy Roasted Almonds Recipe

July 13, 2023 by Grace Leave a Comment

This page may contain affiliate links. I receive a small commission at no cost to you when you make a purchase using my link. This post is about a Carolina Reaper Spicy Roasted Almonds Recipe!

Small bowls filled with roasted almonds garnished with sea salt flakes, and bottle of Carolina Reaper powder on the side.

Have you tried the Blue Diamond XTREMES Carolina Reaper Almonds? To be honest, I haven't tried them yet. However, I love that I can make my own spicy reaper almonds and enjoy them as HOT HOT as I want them to be!

Carolina Reaper Chili Peppers are, at the time of this writing, the world's hottest chili pepper! If you are as enamored with this spicy pepper as I am, then you'll love this easy recipe for almonds spiced up with the hottest pepper in the world!

[feast_advanced_jump_to]

What Is The Carolina Reaper?

Carolina Reapers were created and bred by Ed Currie (aka Smokin' Ed) of the PuckerbuttPepperCompany of South Carolina.

The Reaper peppers have the distinction of holding the Guinness World Records award for World's Hottest Chili since 2013. These measure between 1.5 million - 2.2 million SHU (Scoville Heat Units) on the Scoville Scale.

From Wikipedia: "The Scoville scale is a measurement of the pungency (spiciness or "heat") of chili peppers, as recorded in Scoville Heat Units (SHU), based on the concentration of capsaicinoids, among which capsaicin is the predominant component." Basically, the lower the number on the scale, the less "hot or spicy" the pepper will be.

For comparison, cayenne pepper, which is often used in spicy nut recipes, measure from 30,000 - 50,000 SHU on the Scoville scale. And jalapeno peppers come in at 2,500 - 8,000 SHU!

🥘 Ingredients

Bowls containing raw almonds, salt, butter, Carolina Reaper powder, and sea salt flakes.

You only need 5 ingredients to make this spicy and perfect snack! They are:

  • Raw whole almonds
  • Butter (you could use olive oil if you prefer)
  • Salt
  • Carolina Reaper Powder (I love and used Sonoran Spice Brand)
  • Sea salt flakes

All of these ingredients, with the exception of the Carolina Reaper Powder, should be available at your local grocery store.

Making your own Reaper almonds is so amazing, because you can control the amount of chili powder to produce the perfect level of heat to suit you!

Ok, let's move on to making this spicy and great snack!

🔪 Instructions

Preheat your oven to 350F. Place your raw almonds in a roasting tin or on a rimmed baking sheet, in a single layer taking care not to crowd them too much. You can line your tin or baking sheet with parchment paper if you like, but it's not necessary.

Roast at 350F for around 13-15 minutes (tossing halfway through) until they have turned a lovely shade of golden brown.

Raw almonds in a roasting tin.
Place the almonds in a single layer trying not to crowd them.
Roasted almonds in a roasting tin.
Roast for around 15 minutes at 350F until they turn golden brown.

When you have about 5 minutes left of roasting time, prepare your seasoning. Melt the butter in a mixing bowl (or saucepan and then transfer to your mixing bowl). Add the Carolina Reaper powder and the salt to the melted butter, and then stir to combine.

A glass bowl containing melted butter, salt, and Carolina Reaper powder.

Combine almonds with the melted butter and seasonings, and stir well.

At this point, I recommend you taste the almonds (after allowing them to cool a bit) to see whether you want to add more Carolina Reaper powder. If so, add a little at a time, stirring to mix everything until well combined, until you reach the heat level you are after.

A glass bowl containing Carolina Reaper spicy roasted almonds and a yellow spoon.

Allow about 10 minutes for the almonds to cool down to room temperature, and then add sea salt flakes to taste. Now it's time to enjoy your spicy almonds!

Small bowls filled with roasted almonds garnished with sea salt flakes, and bottle of Carolina Reaper powder on the side.

Suggestions For Serving

Small bowls filled with roasted almonds garnished with sea salt flakes, and a container of sea salt flakes and bottle of Carolina Reaper powder in the background.

Enjoy this delicious snack with your favorite ice cold beverage! If you are concerned that they may be overly spicy, then you may want that beverage to be an ice cold glass of milk. 😃

These spicy nuts make a great addition to your charcuterie board, and of course they are perfect for game day.

Enjoy them as a cocktail nibble, or they make a great gift for your chili head friends!

Variations

If you want to mix things up a bit, you may want to consider:

  • Adding garlic powder to the spice mixture - I haven't tried this but I think it would be delicious!!
  • Adding a little maple syrup for a sweet heat!

Also, I have also roasted the almonds after tossing them with melted butter and spices.  This also works well, but if you are sensitive to strong odors the smell of the Carolina Reaper when roasting may affect you.

However you decide to enjoy these almonds, I hope this will become one of your favorite recipes for spicy nuts!

FAQ

Do I need to soak the almonds before roasting them?

It's not necessary to soak the almonds before roasting them. According to Healthline.com, soaking them may make their digestibility better and also help you absorb the nutrients better. However, roasting them without soaking the almonds is perfectly fine!

Are spicy almonds healthy?

Almonds pack a serious nutritional punch! According to WebMD.com, some of the health benefits of almonds include lowering blood pressure and lower blood sugar levels. They may even help with weight loss (as long as you don't eat too many) as they help you feel full quicker due to the their protein and fiber content!

How many almonds should I eat per day?

Almonds are a great healthy snack! Almonds.com states that 1 ounce of almonds, or 23 almonds a day, is the perfect portion, as recommended in the Dietary Guidelines for Americans.

How should I store the roasted almonds?

Store roasted almonds in an airtight container on your countertop. These are best enjoyed the day you make them, but they'll keep for 3-4 days (if they last that long!).

Some Other Recipes You May Enjoy!

Here are some other recipes that you may enjoy:

  • Easy Carolina Reaper Salsa Recipe
  • Mouthwatering Everything Bagel Cashews
  • Easy Ghost Pepper Salsa Recipe

Join Me On A Fun Food Journey!

I invite you to come along on this food journey with me! Please sign up to get the latest recipes and inspiration for you to expand your food comfort zone! It's an incredible journey, please join me by signing up here.

Cheers!

Grace

Small bowls filled with Carolina Reaper Spicy roasted almonds garnished with sea salt flakes and a container of sea salt flakes and bottle of Carolina Reaper powder in the background.

Carolina Reaper Spicy Roasted Almonds Recipe

Grace Stewart
Experience the burn with this Carolina Reaper Spicy Roasted Almonds Recipe! Great for snacking and perfect for us chili heads!
Print Recipe Pin Recipe
Prep Time 3 minutes mins
Cook Time 15 minutes mins
Cooling down time 10 minutes mins
Total Time 28 minutes mins
Course Snack
Cuisine American
Servings 3 people
Calories 279 kcal

Equipment

  • Oven for roasting almonds
  • roasting tin or rimmed baking sheet for roasting the almonds
  • microwave or small saucepan for melting butter
  • mixing bowl for combining seasonings, butter, and almonds

Ingredients
  

  • 1 cup almonds raw whole almonds, which we will roast
  • 1 tablespoon butter you could sub olive oil if you prefer
  • ¼ ts salt
  • ¼ ts Carolina Reaper Powder can adjust the amount to suit your tolerance for heat
  • sea salt flakes add to taste

Instructions
 

  • Preheat your oven to 350F. Place your raw almonds in a roasting tin or on a rimmed baking sheet, in a single layer taking care not to crowd them too much. Roast at 350F for around 13-15 minutes (tossing halfway through) until they have turned a lovely shade of golden brown.
    Roasted almonds in a roasting tin.
  • When you have about 5 minutes left of roasting time, prepare your seasoning. Melt the butter in a mixing bowl (or saucepan and then transfer to your mixing bowl). Add the Carolina Reaper powder and the salt to the melted butter, and then stir to combine.
    A glass bowl containing melted butter, salt, and Carolina Reaper powder.
  • Add the roasted almonds to the melted butter and seasonings, and stir to combine. At this point, I recommend you taste the almonds (after allowing them to cool a bit) to see whether you want to add more Carolina Reaper powder.  If so, add a little at a time, stirring to mix everything until well combined, until you reach the heat level you are after.
    A glass bowl containing Carolina Reaper spicy roasted almonds and a yellow spoon.
  • Allow about 10 minutes for the almonds to cool down, and then add sea salt flakes to taste. Now it's time to enjoy your spicy almonds!
    Small bowls filled with roasted almonds garnished with sea salt flakes.

Notes

Please note that the Nutrition Information does not include info for the Carolina Reaper powder or the sea salt flakes you may add to taste.  Please accept apologies for any inconvenience this may cause.
I have a high tolerance for chili, so the ¼ ts of Reaper Powder that I recommend using gives me a nice heat that's not overpowering.  If you have a high tolerance as well, feel free to add more Reaper Powder if you really want a blow your head off type of heat!  Alternatively if you are chili sensitive, you can adjust the amount of Reaper powder down. 
The Reaper powder can be unpleasant if you happen to inhale it, so take care not to inhale it and definitely don't touch your eyes after handling! ☺️
I have also roasted the almonds after tossing them with melted butter and spices.  This also works well, but if you are sensitive to strong odors the smell of the Carolina Reaper when roasting may affect you.
Above all, enjoy!!

Nutrition

Calories: 279kcalCarbohydrates: 11gProtein: 10gFat: 24gSaturated Fat: 2gPolyunsaturated Fat: 6gMonounsaturated Fat: 15gTrans Fat: 0.01gCholesterol: 1mgSodium: 200mgPotassium: 356mgFiber: 6gSugar: 2gVitamin A: 9IUCalcium: 134mgIron: 2mg
Keyword almonds, spicy almonds, spicy food
Tried this recipe?Let us know how it was!

Easy Chicken Tinga Recipe

July 8, 2023 by Grace Leave a Comment

This page may contain affiliate links. I receive a small commission at no cost to you when you make a purchase using my link. This post is about an Easy Chicken Tinga Recipe!

Shredded chicken cooked with tomatoes, onions, and chipotle peppers in an adobo sauce which is chicken tinga placed into a flour tortilla. It's garnished with lime slices, cilantro, and cotija cheese. There is a small bowl in the background containing cheese and a 2nd taco adjacent to the main taco.

If you love Mexican food or spicy foods, you have come to the right place. Here you will find an Easy Chicken Tinga recipe which will tickle your taste buds and leave you hungry for more!

[feast_advanced_jump_to]

What Is Chicken Tinga?

Chicken tinga, or tinga de pollo, is a Mexican dish which hails from the Puebla region in Mexico. Puebla is famous for many dishes including mole poblano, chiles en nogada, and chalupas poblanas. It's also where the Cinco de Mayo celebration is mostly celebrated in Mexico.

This flavorful dish includes shredded chicken in a chipotle tomato sauce. The sauce includes chipotle chiles in adobo sauce combined with crushed tomatoes, and seasoned with salt, pepper, and oregano. Other ingredients include white onion and garlic.

There is a wonderful smoky flavor to this dish that is irresistible!

Why You Will LOVE This Easy Recipe

You'll fall head over heels for this versatile recipe because:

  • It's DELISH! There's so much flavor and it's a huge crowd pleaser!
  • Tinga de pollo is incredibly versatile. Enjoy it in tacos (as I demonstrate here in this recipe). Or in many other ways, as described below!
  • It's easy to make and it uses mostly fresh and easy to find ingredients.
  • If you have a busy weeknight you can count on this to make a delicious family dinner ready in about 40 minutes (less if you use leftover or purchased cooked and/or shredded chicken)!

🥘 Ingredients

Bowls containing crushed tomatoes, sliced white onions, shredded chicken, chopped chipotle chilies in adobo sauce, olive oil, minced garlic, and seasonings.

This recipe uses mostly fresh ingredients and canned chipotle chiles to create one of the most mouthwatering Mexican recipes you will enjoy!

Here's what you'll need:

  • Boneless skinless chicken breasts - we'll cook and shred the chicken; you can also use rotisserie chicken if you prefer
  • Olive oil
  • Fresh garlic
  • White onion
  • Chipotle peppers in adobo sauce (affiliate link)
  • Salt
  • Black pepper
  • Oregano (can also use Mexican oregano)
  • Crushed tomatoes
  • Flour tortillas (can sub corn tortillas or tostada shells)
  • Lime (optional ingredient but highly recommended!)
  • Cotija cheese (can sub queso fresco) - optional garnish
  • Fresh cilantro - optional garnish

So gather your ingredients together and let's have fun making this delicious Mexican dish!

🔪 Instructions

Start with pre-purchased cooked shredded chicken or if you need to cook and shred your chicken then follow these instructions. Place the chicken breasts in a skillet and cover with water. Bring to the boil, and then simmer for 15 minutes or until the chicken is cooked through. Remove the chicken from the water, and then shred it using forks. Or if you have a stand mixer, use the flat beater to shred the chicken on a low speed.

A stand mixer bowl with shredded chicken in it. The stand mixer has the flat beater attached to it.

Place your skillet on a medium heat and add the olive oil. Fry the sliced white onion for around 5 minutes until it is softened, and then add the minced garlic and saute for 2 more minutes.

Fried sliced onions and minced garlic in a cast iron pan.

Add the tomatoes, salt, pepper, oregano, and chopped chipotle peppers with some of the adobo sauce to the onion and garlic mixture and stir.

Crushed tomatoes, sliced onions, chopped chipotle chilies in adobo sauce, and seasonings in a cast iron pan.

Now place the shredded chicken in the skillet and stir well to combine. Bring this mixture to the boil, and then cover and simmer on a low heat for 20 minutes. Taste and add additional salt, pepper, or oregano if desired.

Shredded chicken cooked with tomatoes, onions, and chipotle peppers in an adobo sauce in a cast iron pan.

Your chicken tinga is now ready to enjoy!

Suggestions For Serving
Shredded chicken cooked with tomatoes, onions, and chipotle peppers in an adobo sauce which is chicken tinga placed into a flour tortilla. It's garnished with lime slices, cilantro, and cotija cheese. There are small bowls in the background and a 2nd taco adjacent to the main taco.

My favorite way to enjoy this chicken dish is to make chicken tinga tacos. Piling the tender chicken tinga into warm tortillas and garnishing with cilantro, cotija cheese with a generous squeeze of lime juice is a pure delight!

You could also top tostadas with the mixture to make chicken tinga tostadas, or make delicious chicken tinga burritos or burrito bowls with it as well!

I also love pairing this simply with some white rice topped with some sour cream for an easy meal when I have busy weeknights.

My hope is that this Tinga de pollo recipe will become one of your favorite recipes! Buen provecho!

💭 Top tip

Use leftover or purchased cooked and/or shredded chicken to save time! You'll have dinner ready in less than half an hour this way!

FAQ

What is tinga sauce made of?

Tinga sauce is made of chipotle chiles in adobo sauce combined with crushed tomatoes, and seasoned with salt, pepper, and oregano. Other ingredients include white onion and garlic.

What ethnicity is Chicken Tinga?

Chicken Tinga hails from Mexico! In Spanish it is called Tinga de pollo, and it comes from the state of Puebla in Mexico which is close to Mexico City.

How can I store leftover chicken tinga?

Store any leftover chicken tinga in an airtight container in your refrigerator, and consume within 3 days. I'll bet it doesn't last that long though!

Some Other Recipes You May Enjoy!

Here are some other recipes that you may enjoy:

  • Easy Ghost Pepper Salsa Recipe
  • Easy and Scrumptious Pork Carnitas Tacos
  • Easy Cheesy Vegetarian Quesadilla Recipe

Join Me On A Fun Food Journey!

I invite you to come along on this food journey with me! Please sign up to get the latest recipes and inspiration for you to expand your food comfort zone! It's an incredible journey, please join me by signing up here.

Cheers!

Grace
Shredded chicken cooked with tomatoes, onions, and chipotle peppers in an adobo sauce which is chicken tinga placed into a flour tortilla. It's garnished with lime slices, cilantro, and cotija cheese. There is a small bowl in the background containing cheese and a 2nd taco adjacent to the main taco.

Easy Chicken Tinga Recipe

Grace Stewart
You'll fall in love with this Easy Chicken Tinga Recipe! Shredded chicken in a sauce made of tomatoes and chipotle peppers in adobo sauce is mouthwateringly delicious and perfect for your tacos!
Print Recipe Pin Recipe
Prep Time 20 minutes mins
Cook Time 20 minutes mins
Total Time 40 minutes mins
Course Main Course
Cuisine Mexican
Servings 6 people
Calories 336 kcal

Equipment

  • 1 stand mixer this is optional, but sure helps making the task of shredding chicken so easy!
  • 1 Skillet with a cover

Ingredients
  

  • 1 lb chicken breast you can also purchase chicken that has already been shredded to save time, or use rotisserie chicken
  • 1.5 tablespoon olive oil
  • 4 cloves garlic minced
  • 1 white onion thinly sliced
  • 5 each chipotle peppers in adobo sauce chopped; I'll recommend 5 of the chipotle peppers to use, but feel free to reduce this number or add the whole can! Be sure to also add some of the adobo sauce to your skillet when cooking
  • ½ ts salt plus additional to taste
  • ½ ts pepper plus additional to taste
  • ½ ts oregano can sub Mexican oregano; plus additional to taste
  • 15 oz crushed tomatoes
  • 12 flour tortillas I am assuming 2 tacos per person for 6 servings; can sub corn tortillas or tostadas if you prefer.

Optional But Oh So Good Garnishes!

  • ½ lime sliced
  • cotija cheese can sub queso fresco
  • cilantro

Instructions
 

  • Start with pre-purchased shredded chicken or if you need to shred your chicken then follow these instructions. Place the chicken breasts in a skillet and cover with water. Bring to the boil, and then simmer for 15 minutes or until the chicken is cooked through. Remove the chicken from the water, and then shred it using forks. Or if you have a stand mixer, use the flat beater to shred the chicken on a low speed.
    A stand mixer bowl with shredded chicken in it. The stand mixer has the flat beater attached to it.
  • Place your skillet on a medium heat and add the olive oil. Fry the sliced white onion for around 5 minutes until it is softened, and then add the minced garlic and saute for 2 more minutes.
    Fried sliced onions and minced garlic in a cast iron pan.
  • Add the tomatoes, salt, pepper, oregano, and chopped chipotle peppers with some of the adobo sauce to the onion and garlic mixture and stir.
    Crushed tomatoes, sliced onions, chopped chipotle chilies in adobo sauce, and seasonings in a cast iron pan.
  • Now place the shredded chicken in the skillet and stir well to combine. Bring this mixture to the boil, and then cover and simmer on a low heat for 20 minutes. Taste and add additional salt, pepper, or oregano if desired.
    Shredded chicken cooked with tomatoes, onions, and chipotle peppers in an adobo sauce in a cast iron pan.
  • Your chicken tinga is now ready for your tortillas! Add some of the tinga mixture to your tortillas and garnish with cilantro, cotija cheese, and squeeze a generous amount of lime juice over. Buen provecho!
    Shredded chicken cooked with tomatoes, onions, and chipotle peppers in an adobo sauce which is chicken tinga placed into a flour tortilla. It's garnished with lime slices, cilantro, and cotija cheese. There are small bowls in the background with cheese and cilantro and a 2nd taco adjacent to the main taco.

Notes

The nutrition information does not include info on the cotija cheese and the cilantro, please accept apologies for any inconvenience.
I love serving chicken tinga on flour tortillas, but feel free to use corn tortillas or tostadas. 
Buen provecho!

Nutrition

Calories: 336kcalCarbohydrates: 38gProtein: 23gFat: 10gSaturated Fat: 3gPolyunsaturated Fat: 2gMonounsaturated Fat: 4gTrans Fat: 0.01gCholesterol: 48mgSodium: 818mgPotassium: 605mgFiber: 4gSugar: 6gVitamin A: 180IUVitamin C: 11mgCalcium: 127mgIron: 4mg
Keyword chicken tinga, tacos, tinga
Tried this recipe?Let us know how it was!

Easy Ghost Pepper Salsa Recipe

June 29, 2023 by Grace Leave a Comment

This page may contain affiliate links. I receive a small commission at no cost to you when you make a purchase using my link. This post is about an Easy Ghost Pepper Salsa Recipe!

Ghost pepper salsa in a bowl surrounded by tortilla chips and dried Ghost chilies.

If you are looking to spice up your salsa game, I highly recommend Ghost peppers to do it! These spicy peppers are tremendously flavorful so your salsa will be both DELICIOUS and HOT!

I'm thrilled to share this easy recipe for Ghost Pepper Salsa with you! First, a little background on this amazing hot pepper!

[feast_advanced_jump_to]

Ghost Pepper - The World's Hottest Pepper in 2007

These hot peppers originate from Northeast India, where they were cultivated. The main regions where they are grown in India are the Assam, Manipur, and Nagaland regions. In fact, "bhut" means "ghost" in Assamese, which is where the name ghost pepper comes from (sourced from Wikipedia).

The Ghost Pepper, also known as bhut jolokia, was certified by the Guinness Book of World Records as the world's hottest chili pepper in 2007. These measure between 600,000 - 1.04 million SHU (Scoville Heat Units) on the Scoville Scale.

Since then, other peppers have surpassed the bhut jolokia as the hottest chile. As of this writing, the Carolina Reaper Pepper from South Carolina, is currently the world's hottest pepper (since 2013).

Ghost chili peppers are still some of the hottest peppers on planet Earth!  To give you some perspective, jalapeño peppers are rated between 2,500 - 8,000 SHU on the Scoville heat scale. That's quite some difference!

Why You Will Love This Ghost Pepper Hot Sauce

If you are a chili head, you will LOVE this salsa because:

  • We are using fresh and natural ingredients in this wonderful recipe
  • Not only is the salsa SPICY, but it's got a great flavor to it
  • I will give you a recommendation for the amount of Ghost peppers to use, but you can easily vary the heat level in this sauce to suit your tastes
  • We'll use dried Ghost peppers, which may be easier to acquire than fresh ones (although you can sub fresh chilies if you have them)

Ok, now it's time to enjoy a hot and fiery experience! Let's make some blow your mind delicious Ghost pepper salsa!

🥘 Ingredients

Bowls containing salt, pepper, and oregano, garlic cloves, and dried Ghost peppers. Also in the image is a jalapeno, key lime, red onion, 2 Roma tomatoes, and some cilantro.

So here's what you will need for this Ghost Pepper Salsa recipe, most of which are fresh ingredients:

  • Fresh tomatoes - I recommend Roma tomatoes for this recipe
  • Red onion
  • Jalapeno - adds a little extra heat and nice texture
  • Fresh garlic
  • Salt
  • Black Pepper
  • Dried Oregano (or dried Mexican oregano)
  • Ghost peppers - I used dried Ghost peppers that I rehydrated; you can also use 2 fresh Ghost peppers if you are fortunate enough to have them! I love and recommend Sonoran Spice brand of dried Ghost Peppers
  • Fresh cilantro
  • Fresh lime juice

All of these ingredients, with the exception of the Ghost peppers, should be available at your local grocery store.

Ok, now let's get ready to make some spicy salsa!

🔪 Instructions

If you are using dried Ghost peppers, rehydrate them for use by adding them to warm water for around 15 minutes. You can use spoons to hold the Ghost peppers under the water.

2 dried Ghost chili peppers in water in a bowl with the chilies being held down under the water by spoons.

Meanwhile, prep your tomatoes, cilantro, red onion, and jalapeno. These can be roughly chopped and the garlic cloves can be left whole.

A white plate containing chopped red onion, chopped tomatoes, chopped jalapeno, cilantro, garlic cloves, and a slice of key lime.

After 15 minutes when the peppers have softened, remove the Ghost peppers from the water and chop them up or cut them with scissors. It's highly recommended to wear gloves when handling them as they may irritate your skin.

Sliced pieces of Ghost chilies in a bowl.

Add chopped red onion, chopped jalapeno, and garlic cloves to your food processor. Then add the cilantro and the dry seasonings (salt, pepper, oregano, and the chopped up Ghost Peppers.

A food processor containing chopped red onion, chopped jalapeno and Ghost chilies, garlic cloves, and cilantro.

Now add the chopped tomato, followed by a generous squeeze of lime juice from a fresh lime.

A food processor containing Ghost pepper salsa ingredients including chopped tomatoes. Someone is holding a slice of key lime over the food processor.

Pulse a few times to get the consistency that you want, but make sure that all of the ingredients are well combined.

A food processor containing Ghost pepper salsa.

Et voila! Your delicious spicy Ghost pepper salsa is now ready to enjoy!
Suggestions For Serving

Ghost pepper salsa in a bowl surrounded by tortilla chips and dried Ghost chilies. There is someone holding a tortilla chip which had been dipped into the salsa.

I hope you'll agree with me that this salsa is wonderfully spicy and absolutely amazingly delicious!

It's the perfect dip for your favorite tortilla chips, and a must to add that beautiful heat to your tacos and favorite Mexican foods.

You may want to have a glass of milk close by, but I hope you will love this hot salsa as much as our family does!

FAQ

What can you do with dried Ghost peppers?

Dried ghost peppers are extremely versatile! They can be rehydrated for use in salsas, such as in this Ghost pepper salsa recipe. Add them to spice up your chili, or add to any dish that you want to fire up!

How hot are Ghost peppers?

The Ghost Pepper, also known as bhut jolokia, was certified by the Guinness Book of World Records as the world's hottest chili pepper in 2007. These measure between 600,000 - 1.04 million SHU (Scoville Heat Units) on the Scoville Scale.

What does a Ghost pepper taste like?

Bhut jolokia (Ghost pepper) has an excellent flavor! They are fruity and sweet in addition to being HOT and SPICY!

Some Other Recipes You May Enjoy!
Here are some other recipes that you may enjoy:

  • Easy Carolina Reaper Salsa Recipe
  • Delicious Spicy Guacamole!
  • Belizean Hot Pepper Onion Sauce

Join Me On A Fun Food Journey!

I invite you to come along on this food journey with me! Please sign up to get the latest recipes and inspiration for you to expand your food comfort zone! It's an incredible journey, please join me by signing up here.

Cheers!

Grace

Ghost pepper salsa in an orange rimmed bowl.

Easy Ghost Pepper Salsa Recipe

Grace Stewart
This Easy Ghost Pepper Salsa Recipe will make your taste buds tingle! Utterly delicious and the perfect salsa for chiliheads!
Print Recipe Pin Recipe
Prep Time 10 minutes mins
Total Time 10 minutes mins
Course accompaniment, Condiment
Cuisine Mexican
Servings 1 cup
Calories 48 kcal

Equipment

  • 1 Food Processor

Ingredients
  

  • 2 Roma tomatoes select large sized tomatoes, remove the insides of the tomatoes and discard or save for another use; chop the outside fleshy part for use in this salsa
  • ¼ red onion chopped (can sub white onion)
  • 1 jalapeno deseeded, pith removed, and chopped
  • 2 cloves garlic
  • ⅛ ts salt
  • ⅛ ts pepper
  • ⅛ ts oregano dried; can also use Mexican oregano
  • 2 Ghost peppers I used dried Ghost peppers that I rehydrated; you can also use 2 fresh Ghost chilis if you are fortunate enough to have them!
  • ¼ cup cilantro chopped (use leaves only)
  • lime juice a squeeze of lime juice from a slice of fresh lime

Instructions
 

  • If you are using dried Ghost peppers, rehydrate them for use by adding them to warm water for around 15 minutes. You can use spoons to hold the Ghost peppers under the water.
    2 dried Ghost chili peppers in water in a bowl with the chilies being held down under the water by spoons.
  • Meanwhile, prep your tomatoes, cilantro, red onion, and jalapeno. These can be roughly chopped and the garlic cloves can be left whole.
    A white plate containing chopped red onion, chopped tomatoes, chopped jalapeno, cilantro, garlic cloves, and a slice of key lime.
  • After 15 minutes when the peppers have softened, remove the Ghost peppers from the water and chop them up or cut them with scissors. It's highly recommended to wear gloves when handling them as they may irritate your skin.
    Sliced pieces of Ghost chilies in a bowl.
  • Add chopped red onion, chopped jalapeno, and garlic cloves to your food processor. Then add the cilantro and the dry seasonings (salt, pepper, oregano, and the chopped up Ghost Peppers.
    A food processor containing chopped red onion, chopped jalapeno and Ghost chilies, garlic cloves, and cilantro.
  • Now add the chopped tomato, followed by a generous squeeze of lime juice from a fresh lime.
    A food processor containing Ghost pepper salsa ingredients including chopped tomatoes. Someone is holding a slice of key lime over the food processor.
  • Pulse a few times to get the consistency that you want, but make sure that all of the ingredients are well combined.
    A food processor containing Ghost pepper salsa.
  • Enjoy with your favorite tortilla chips and have a glass of milk close by! LOL
    Ghost pepper salsa in a bowl surrounded by tortilla chips and dried Ghost chilies. There is someone holding a tortilla chip which had been dipped into the salsa.

Notes

It's highly recommended to wear gloves when handling them as they may irritate your skin.  And of course take care not to rub or wipe your eyes!
The nutritional information does not include info on the dried Ghost peppers or the lime juice.  Please refer to the brand of dried Ghost peppers you are using for information on this ingredient.
I recommend using 2 Ghost peppers. This will produce a very spicy salsa. If you want to try the Ghost peppers but aren't sure that you will tolerate that much spice, then you can vary the heat level by starting with 1 Ghost pepper and add additional if you want more spice.
Consider adding it as a topping or use as an accompaniment to your tacos, burritos, or quesadillas. Try stirring it into some Mexican borracho beans as well, to kick your beans up a notch!
Also whip up some small batches of this hottest sauce for your spicy food loving friends to give as gifts, they will love it!

Nutrition

Calories: 48kcalCarbohydrates: 11gProtein: 2gFat: 0.4gSaturated Fat: 0.1gPolyunsaturated Fat: 0.1gMonounsaturated Fat: 0.1gSodium: 301mgPotassium: 417mgFiber: 3gSugar: 5gVitamin A: 1458IUVitamin C: 39mgCalcium: 37mgIron: 1mg
Keyword ghost pepper, salsa, spicy foods
Tried this recipe?Let us know how it was!

Easy Hawaiian Spam Musubi Recipe

June 22, 2023 by Grace Leave a Comment

This page may contain affiliate links. I receive a small commission at no cost to you when you make a purchase using my link. This post is about an Easy Hawaiian Spam Musubi Recipe!

Several Spam Musubi's which are Spam slices on top of a bed of rice wrapped in nori.

Ok, so I haven't been to Hawaii. But, I have been to Hawaiian Bros Island Grill! This fast food restaurant is where I was introduced to the iconic Spam Musubi. I fell in love with this delicious Hawaiian snack, and relished the idea of making these for myself at home so that I could enjoy them anytime!

So allow me to tell you a little bit about Hawaiian Spam Musubi!

[feast_advanced_jump_to]

What is Hawaiian Spam Musubi?

Spam, a precooked pork shoulder and ham product, was introduced by Hormel Foods Corporation in 1937. It became a very popular food in Hawaii during World War II, when many American troops were sent to Hawaii when America entered the war after the attack on Pearl Harbor.

Spam has a very long shelf life and could easily be included in a soldier's rations as fresh meat was not always feasible. So, soldiers could get their protein by consuming this high calorie, salty, and quite delicious canned meat.

Eventually residents of Hawaii started to enjoy Spam, and sometime during the 1980's Spam musubi was invented and became extremely popular!

The Spam musubi was influenced by the Japanese onigiri, which is rice that is pressed and wrapped in nori (seaweed).

Today, Spam musubi can be found all over Hawaii in grocery stores, local convenience stores, and supermarkets. This local favorite is a delicious, inexpensive, and portable snack, and most everyone who tries Spam musubi loves Spam musubi!

So if you are ready to make this quintessential easy snack that is so beloved in Hawaiian cuisine, then please read on and I'll tell you what you'll need!

🥘 Ingredients

A can of Spam, a yellow bowl with cooked rice, a pink musubi maker, strips of nori, and a glass bowl with soy sauce.

Here are the simple ingredients that you will need to make this Hawaiian-style Spam musubi:

  • Spam - I've used regular Classic Spam for this recipe.  If you are watching your salt, there is a less sodium version of Spam that you can use. 
  • Nori seaweed - I used 2 sheets of nori and cut the seaweed into 7" x 1" strips; there are approximately 5 strips of nori per sheet, so you'll need 2 sheets and will have a little nori leftover if you cut the sheets to this size
  • Teriyaki sauce - you can use a prepared sauce like Kikkoman's or see the notes in the recipe card for an easy recipe to make your own teriyaki sauce
  • Cooked rice - this refers to cooked short grain rice like you would use for sushi rice; it's best to use this as this short grain rice will stick together better than long grain rice

If you need a recipe for cooking short grain or sushi rice in the rice cooker, please visit my sister Tami's Sushi Rice Recipe For The Rice Cooker. Just omit the sushi vinegar dressing. 😉

Ok, now let's get ready to make this tasty snack from the Hawaiian islands!

Musubi Maker (Musubi Mold)

Pink musubi maker or musubi mold with a rice paddle.

Before I jump into the instructions, I want to recommend using a musubi mold (also known as a musubi maker) to create your Spam musubi. The one I ordered on Amazon (link provided) also comes with a cute little rice paddle, as well as 2 triangle molds for rice balls. 😃

The musubi maker consists of the mold (which is the size of Spam slices), and a hand held portion with a handle that you use to press down on the rice.

You don't absolutely have to have one of these to make this Spam musubi, however it really helps to form your musubi.

If you don't have the Spam musubi mold, then you can use your hands to shape the rice into a rice bed that is the size of your sliced Spam.

🔪 Instructions

Slice the Spam into 8 equal slices, and prepare 3 cups of cooked short grain rice/sushi rice (without the vinegar).

Cut a nori sheet into strips approximately 7" x 1". Scissors are a great way to cut the nori!

A can of Spam alongside slices of Spam.
Cut the Spam into 8 slices.
A can of Spam, slices of nori, and a container of Teriyaki sauce.
Cut the nori sheet into strips approximately 7" x 1".

Fry the slices of Spam in a large skillet on medium high heat for around 3-4 minutes per side until they are golden brown. If your Spam starts to stick to your pan, you can add a little bit of oil to loosen it up.

Slices of fried Spam in a large skillet.

Lower the heat to medium, and then add the teriyaki sauce. Cook the Spam in the teriyaki sauce for about 30 seconds per side.

A skillet containing slices of fried Spam. There is a hand holding a small bowl with teriyaki sauce poised above the skillet.

Lay a piece of nori down and place the musubi mold over the nori as pictured. This should be placed perpendicularly to the strip of nori in the middle of the strip.

Add 2 to 3 spoonfuls of cooked rice into the musubi mold, and then use the presser to press firmly down on the rice.

A slice of nori on a wooden cutting board, topped with part of a musubi maker.
Lay the musubi mold across the nori strip.
A strip of nori topped with a pink musubi maker. There is a bed of rice in the musubi maker and there is the presser part of the musubi maker poised over the bed of rice ready to press it down.
Add some rice and press down with the musubi press.

Now add a slice of Spam on top of the rice in the musubi mold.

Remove the mold. Use water to moisten the top of the nori strip, and then wrap the nori strip over the Spam and rice. The moistened part should lay on top of the other part of the strip so that the ends will stick together.

A strip of nori topped with a pink musubi maker containing a bed of rice topped with a slice of Spam.
Place a slice of Spam on top of the rice.
Strip of nori topped with a bed of rice and a slice of Spam. There is a finger pressing down at the top edge of the nori.
Moisten the nori so that when you wrap it over the musubi it will stick together.

And now, it's time to enjoy your Spam musubi IMMENSELY!

Several Spam Musubi's which are Spam slices on top of a bed of rice wrapped in nori.

Suggestions For Serving

Several Spam Musubi's which are Spam slices on top of a bed of rice wrapped in nori.

It's time to gobble up these delightful musubi! You can eat these either warm (my preference) or at room temperature.

If you have extra teriyaki sauce, you can drizzle some over the musubi for extra deliciousness. Or, serve it with some soy sauce or Japanese mayo (like Kewpie)

I like eating the whole thing all at once. It's a bit messy, but totally delicious! Enjoy!
FAQ

How can I store leftover Spam musubi?

Wrap leftovers in cling wrap and store in your refrigerator. Allow it to come to room temperature or warm them up for a few seconds before eating them. Best enjoyed within a couple of days!

What other ingredients can I add to Spam musubi for enjoyment?

Try adding some sesame seeds or sprinkle furikake onto the top of the rice before adding your piece of Spam.

Some Other Recipes You May Enjoy!

Here are some other recipes that you may enjoy:

  • Super Easy Japanese Teriyaki Chicken
  • Tami's Sushi Rice Recipe For The Rice Cooker
  • Japanese Fried Chicken Recipe For Yurinchi Chicken

Join Me On A Fun Food Journey!
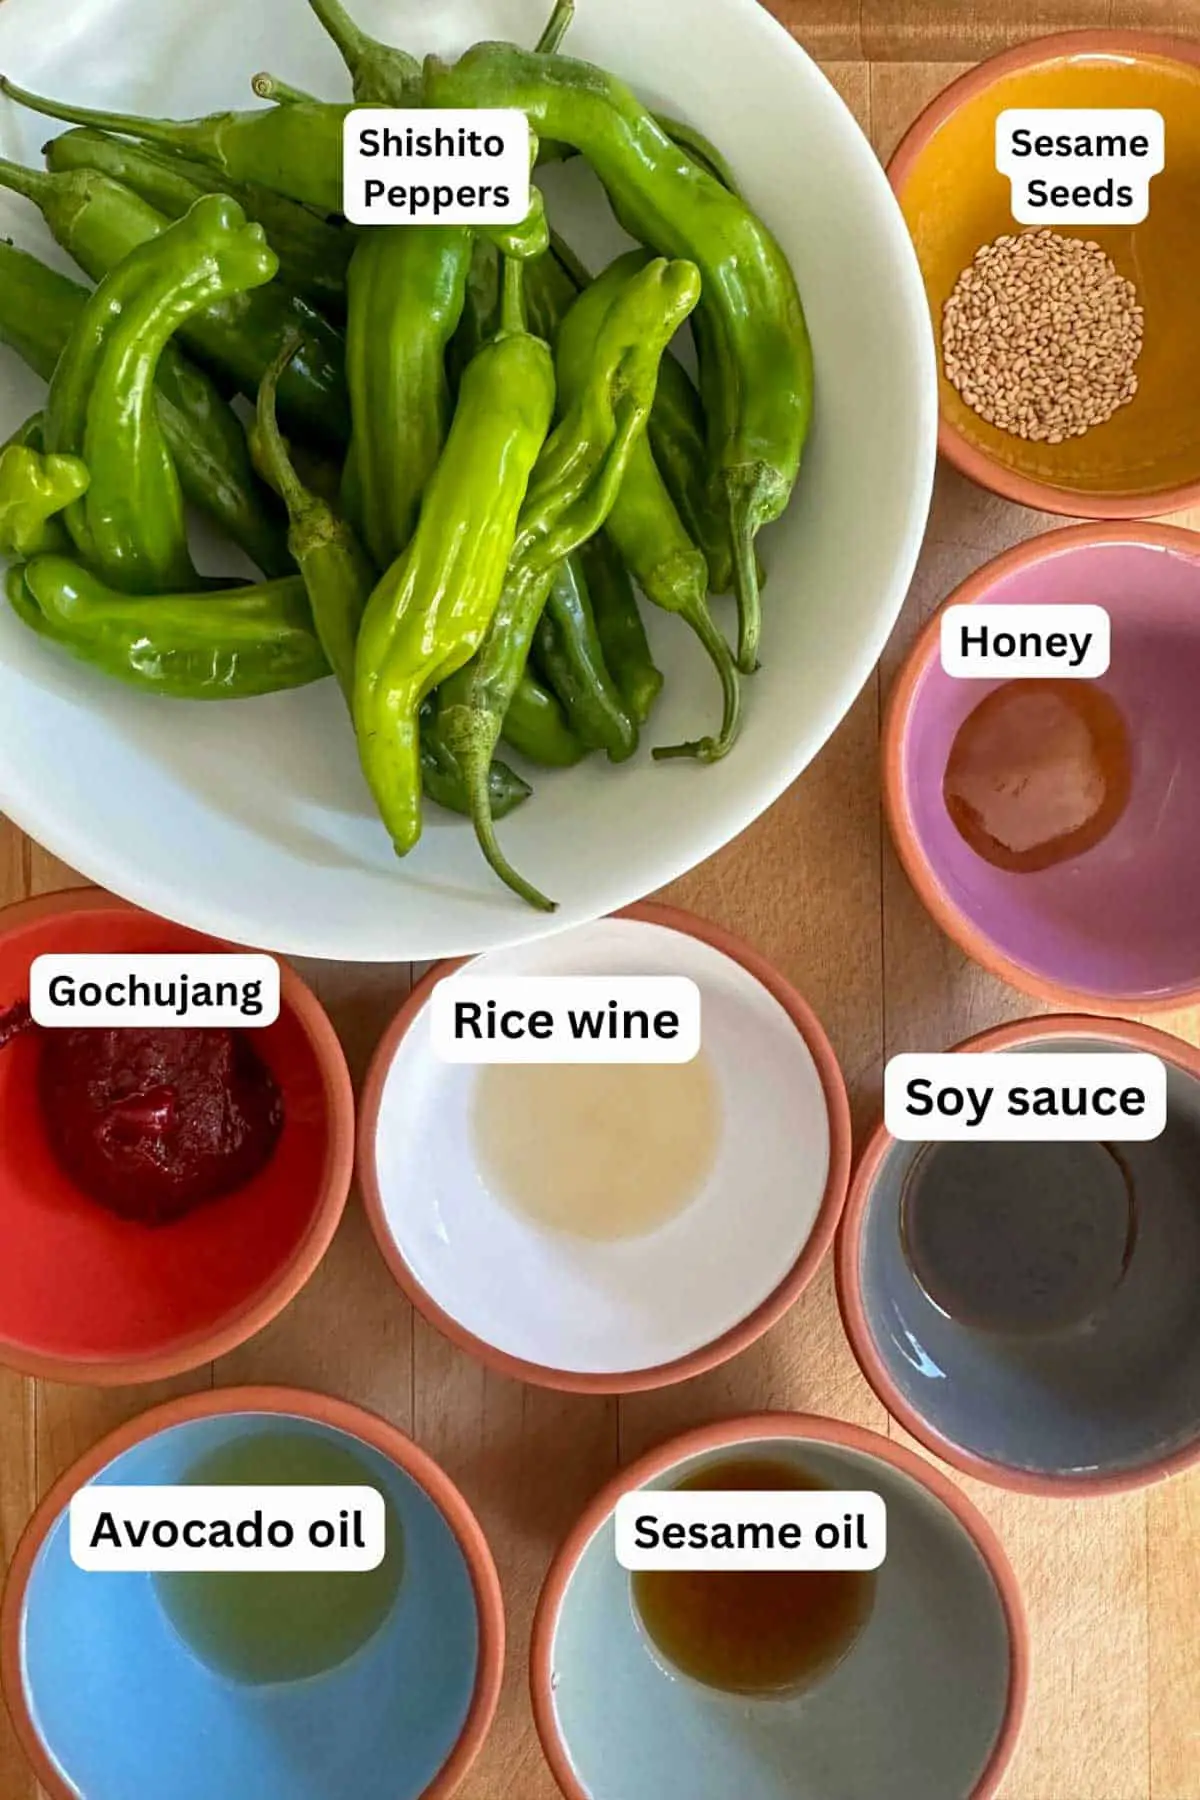
I invite you to come along on this food journey with me! Please sign up to get the latest recipes and inspiration for you to expand your food comfort zone! It's an incredible journey, please join me by signing up here.
Cheers!

Grace

Several Spam Musubi's which are Spam slices on top of a bed of rice wrapped in nori.

Hawaiian Spam Musubi Recipe

Grace Stewart
You'll love the sweet and salty flavors of this iconic Hawaiian tasty snack! This Hawaiian Spam Musubi Recipe is super easy to make and it's ready to enjoy in about 15 minutes!
Print Recipe Pin Recipe
Prep Time 6 minutes mins
Cook Time 9 minutes mins
Total Time 15 minutes mins
Course Snack
Cuisine American, Hawaiian
Servings 4 people
Calories 799 kcal

Equipment

  • 1 Skillet
  • 1 rice mold musubi maker this is optional, but it makes making your Spam musubi just that much easier!

Ingredients
  

  • 1 can Spam cut into 8 equal slices
  • 8 strips nori I used 2 sheets of nori and cut the seaweed into 7" x 1" strips; there are approximately 5 strips of nori per sheet, so you'll need 2 sheets and will have a little nori leftover if you cut the sheets to this size
  • 6 tablespoon teriyaki sauce you can use a prepared sauce like Kikkoman's or see the notes below for an easy recipe to make your own teriyaki sauce
  • 3 cups rice this refers to cooked short grain rice like you would use for sushi rice; it's best to use this as this short grain rice will stick together better than long grain rice
  • olive oil optional - you most likely will not need oil to cook the Spam, but if your Spam slices start to stick in your skillet when frying you can add a little bit to loosen them up

Instructions
 

  • Slice the Spam into 8 equal slices, and prepare 3 cups of cooked short grain rice/sushi rice (without the vinegar).
    A can of Spam alongside slices of Spam.
  • Cut the nori into strips approximately 7" x 1". Scissors are a great way to cut the nori!
    A can of Spam, slices of nori, and a container of Teriyaki sauce.
  • Fry the slices of Spam in a large skillet on medium high heat for around 3-4 minutes per side until they are golden brown. If your Spam starts to stick to your pan, you can add a little bit of oil to loosen it up.
    Slices of fried Spam in a large skillet.
  • Lower the heat to medium, and then add the teriyaki sauce. Cook the Spam in the teriyaki sauce for about 30 seconds per side.
    A skillet containing slices of fried Spam. There is a hand holding a small bowl with teriyaki sauce poised above the skillet.
  • Lay the nori down and place the musubi mold over the nori as pictured. This should be placed perpendicularly to the strip of nori in the middle of the strip.
    A slice of nori on a wooden cutting board, topped with part of a musubi maker.
  • Add 2 to 3 spoonfuls of cooked rice into the musubi mold, and then use the presser to press firmly down on the rice.
    A strip of nori topped with a pink musubi maker. There is a bed of rice in the musubi maker and there is the presser part of the musubi maker poised over the bed of rice ready to press it down.
  • Now add a slice of Spam on top of the rice in the musubi mold.
    A strip of nori topped with a pink musubi maker containing a bed of rice topped with a slice of Spam.
  • Remove the mold. Use water to moisten the top of the nori strip, and then wrap the nori strip over the Spam and rice. The moistened part should lay on top of the other part of the strip so that the ends will stick together.
    Strip of nori topped with a bed of rice and a slice of Spam. There is a finger pressing down at the top edge of the nori.
  • Enjoy your Spam musubi IMMENSELY!
    Several Spam Musubi's which are Spam slices on top of a bed of rice wrapped in nori.

Notes

I've used regular Classic Spam for this recipe.  If you are watching your salt, there is a less sodium version of Spam that you can use. 
If you'd like to make your own teriyaki sauce, combine 3 tablespoon of soy sauce, 1.5 tablespoon of sugar, and 1.5 tablespoon of mirin and mix well for use in this recipe. 
I highly recommend using a musubi mold as it makes making your Spam musubi that much easier!  However if you don't have a musubi mold, simply use your hands to shape the rice into a bed of rice that mimics the shape of the slice of Spam.  
I've used both long grain and short grain rice for my musubi making.  From my experience I can certainly recommend short grain over long grain!

Nutrition

Calories: 799kcalCarbohydrates: 119gProtein: 23gFat: 24gSaturated Fat: 9gPolyunsaturated Fat: 2gMonounsaturated Fat: 12gCholesterol: 60mgSodium: 2240mgPotassium: 575mgFiber: 2gSugar: 4gVitamin A: 104IUVitamin C: 1mgCalcium: 47mgIron: 2mg
Keyword hand held snack, musubi, spam musubi
Tried this recipe?Let us know how it was!
  • Go to page 1
  • Go to page 2
  • Go to page 3
  • Interim pages omitted …
  • Go to page 31
  • Go to Next Page »

Primary Sidebar

Grace holding a lobster

Hi I’m Grace Stewart! I'm married and a mom to my fur baby, Toby, and food and travel are two of my greatest passions!  Since our bank account does not allow us to travel or eat out as much as we'd like, I decided I would cook delicious meals that could give us a taste of all the places we'd like to go.  My goal is to get you in the kitchen, and inspire you to cook and taste delightful meals that will transport you too.  

More about me →

Popular

  • A collage containing Japanese Pork Katsudon, New Orleans Red Beans and Rice, Crawfish Étouffée, and Korean Short Ribs.
    The Best Most Delicious Dishes To Serve With White Rice!
  • A picture of Cilantro Lime Rice and limes in a bowl. A picture of mashed sweet potato with melting butter and chives in a gold rimmed bowl. A picture of green beans and tomatoes in a white bowl. A picture of white asparagus with melted cheese and Italian parsley.
    Awesome Side Dishes That Go With Tilapia!
  • Sliced squash cooked with chopped onion, green chilies and corn covered with melted cheese in a cast iron pan.
    Easy Cheesy New Mexico Calabacitas Recipe
  • Several pieces of sliced beets cut into heart shapes on a black plate.
    How To Roast Whole Beets In The Oven

Sign up so that you never miss the greatest recipes!

About Me

Hi I’m Grace! I'm married and a mom to my fur baby, Toby, and food and travel are two of my greatest passions! Since our bank account does not allow us to travel or eat out as much as we'd like, I decided I would cook delicious meals that could give us a taste of all the places we'd like to go. My goal is to get you in the kitchen, and inspire you to cook and taste delightful meals that will transport you too. Let’s throw some actual travel in from time to time, all with an emphasis on keeping your wallet full and happy as well. Let’s get cooking and let’s start exploring!! I'm excited to be on this journey with you!!

By the way most of these recipes are Toby taste tested and Toby approved!!

Chief Taste Tester Toby

Toby Chief Taste Tester

Recent Posts

  • The Best Most Delicious Dishes To Serve With White Rice!
  • Awesome Side Dishes That Go With Tilapia!
  • Easy Cheesy New Mexico Calabacitas Recipe
  • How To Roast Whole Beets In The Oven
  • Easy Korean Broccoli Side Dish Recipe

Recent Comments

  • Grace on Unique and Scrumptious Icelandic Rye Bread Ice Cream!
  • Patricia on Unique and Scrumptious Icelandic Rye Bread Ice Cream!
  • Grace on Easy Haitian Rice and Beans
  • Trenda on Easy Haitian Rice and Beans
  • Grace on Easy Zucchini Kimchi Recipe

Archives

Categories

Meta

  • Log in
  • Entries feed
  • Comments feed
  • WordPress.org

Footer

Amazon Associates Disclosure

We are a participant in the Amazon Services LLC Associates Program, an affiliate advertising program designed to provide a means for us to earn fees by linking to Amazon.com and affiliated sites. As an Amazon Associate I earn from qualifying purchases.

Footer

↑ back to top

About

  • Privacy Policy
  • Disclaimer
  • Terms & Conditions
  • Accessibility Policy

Newsletter

  • Sign Up! for emails and updates

Contact

  • Contact
  • Services
  • Media Kit
  • FAQ

As an Amazon Associate I earn from qualifying purchases.

Copyright © 2020 Brunch Pro on the Brunch Pro Theme

Copyright © 2023 Explore Cook Eat on the Foodie Pro Theme