• Skip to primary navigation
  • Skip to main content
  • Skip to primary sidebar
  • Skip to footer

Explore Cook Eat

  • Recipes Home
  • 1,000 Foods to Eat Project
  • MUST Try Korean Dishes!
  • About Me
  • Recipes
    • USA
    • Asia
    • Salads
    • Soups
    • Europe
  • Travel
    • USA
      • New Mexico
      • Texas
      • Utah
      • North Carolina
    • Japan
  • Navigation Menu: Social Icons

    • Facebook
    • Instagram
    • Pinterest
    • YouTube

Home

Snacks!

How To Cook Frozen Egg Rolls In Your Air Fryer

February 4, 2023 by Grace Leave a Comment

This page may contain affiliate links. So I receive a small commission at no cost to you when you make a purchase using my link. This post is about How To Cook Frozen Egg Rolls In Your Air Fryer!

Cooked Egg rolls on a white plate. One is cut in half and there are 2 bowls with dipping sauces.

An air fryer is such a versatile kitchen appliance and can cook so many different types of food. I was delighted to learn that the air fryer makes the PERFECT crunchy egg rolls in record time.

Air fryer egg rolls are one of the BEST things ever! If you love this delectable Chinese food, then you will definitely want to try making them in your air fryer!

[feast_advanced_jump_to]

Why You Will Love This Easy Air Fryer Recipe

As far as easy air fryer recipes go, this has got to be one of the most effortless! You will love cooking frozen egg rolls in your air fryer because:

  • It's super easy and almost effortless! No defrosting and no deep frying necessary to make these frozen egg rolls!
  • The air fryer, which is like a mini convection oven, will give you deliciously crispy and crunchy egg rolls!
  • Cooking time is less than 15 minutes. So you can enjoy this perfect appetizer in record time!
Cooked egg rolls with crunchy and crispy exterior and 2 small bowls in the background.
Just look at how crispy and golden brown this egg roll is!

So now let me tell you what you'll need to make these egg rolls, which are also a great snack!

🥘 Ingredients

Here's what you will need to make this easy recipe:

  • Frozen egg rolls
  • Cooking spray
  • Your favorite dipping sauce
A package of Tai Pei Pork Egg Rolls, bottle of Pam Olive Oil Cooking Spray, frozen egg rolls on a white plate and 2 small bowls with dipping sauces.

Egg Rolls

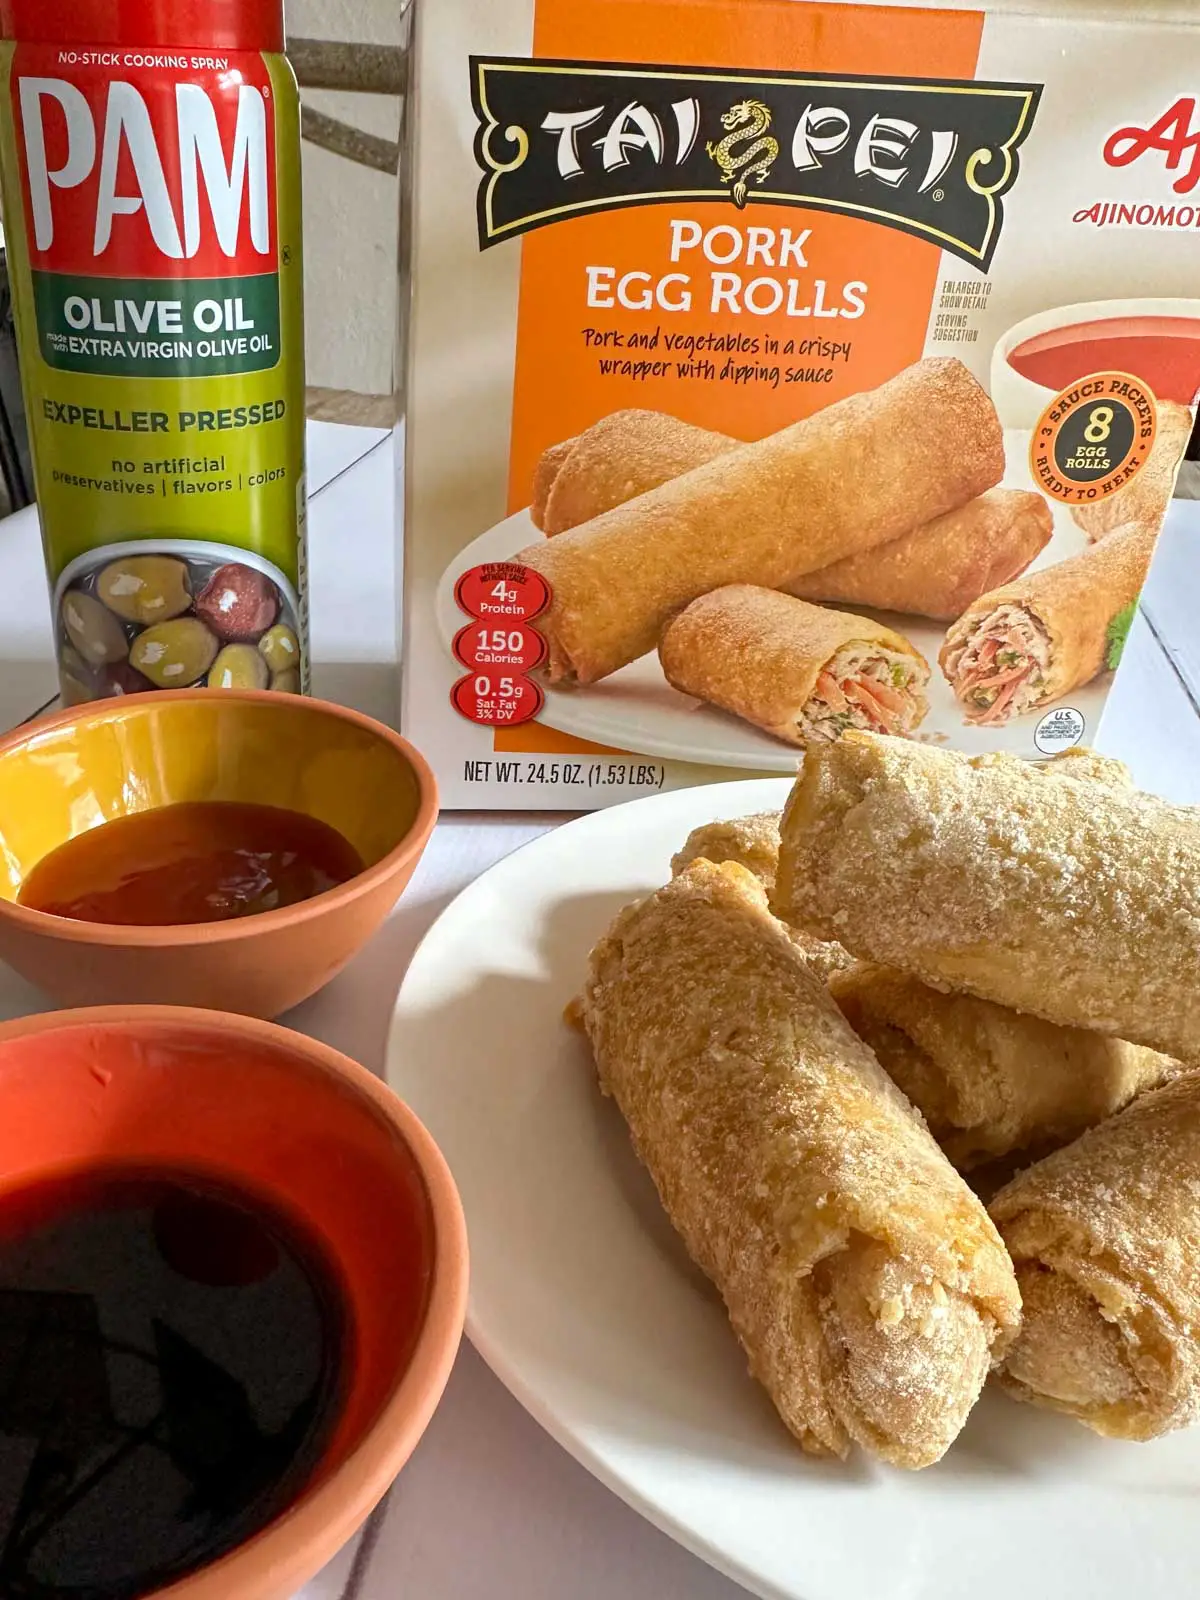
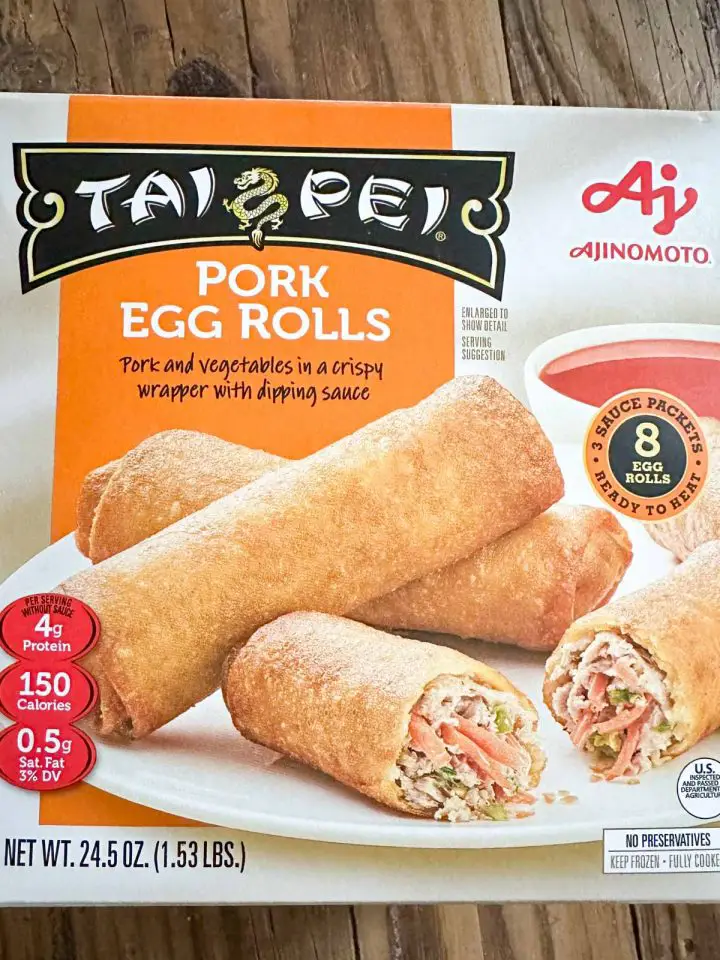
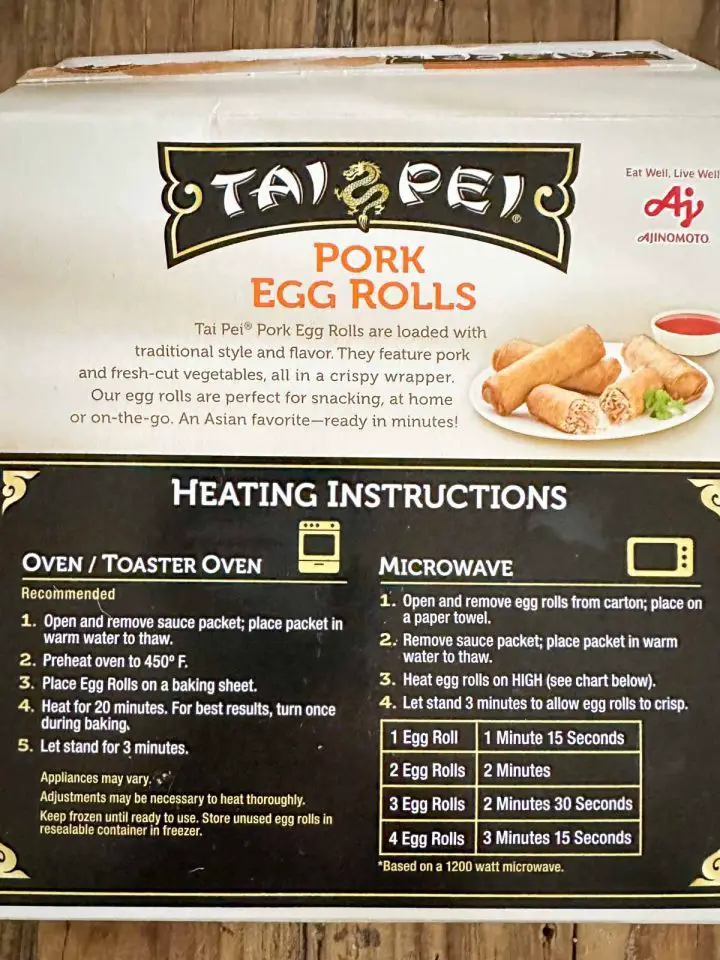
My favorite brand of frozen egg rolls is Tai Pei Egg Rolls. I've used the Tai Pei Pork Egg Rolls for this recipe. The description of these pork egg rolls from TaiPeiFood.com is: "Yummy seasoned pork and veggies tucked inside crispy wrappers make our Pork Egg Rolls burst with flavor. They’re perfect for dunking in our delicious dipping sauce." They are definitely yummy!

Tai Pei has a great selection of various egg rolls to choose from. Their brand also includes Mini Vegetable Spring Rolls, Vegetable Egg Rolls, Chicken Egg Rolls, and Shrimp Egg Rolls in their line of appetizers.

So I can highly recommend Tai Pei Egg Rolls for this recipe, or feel free to sub your favorite brand of frozen egg roll.

The front of a package of Taipei Pork Egg Rolls with a picture of the egg rolls, description of the product, and nutritional information.
Front of the Tai Pei Pork Egg Rolls Package
The back of a package of Taipei Pork Egg Rolls with a description of the product and heating instructions.
Back of the Tai Pei Pork Egg Rolls Package

Cooking Spray

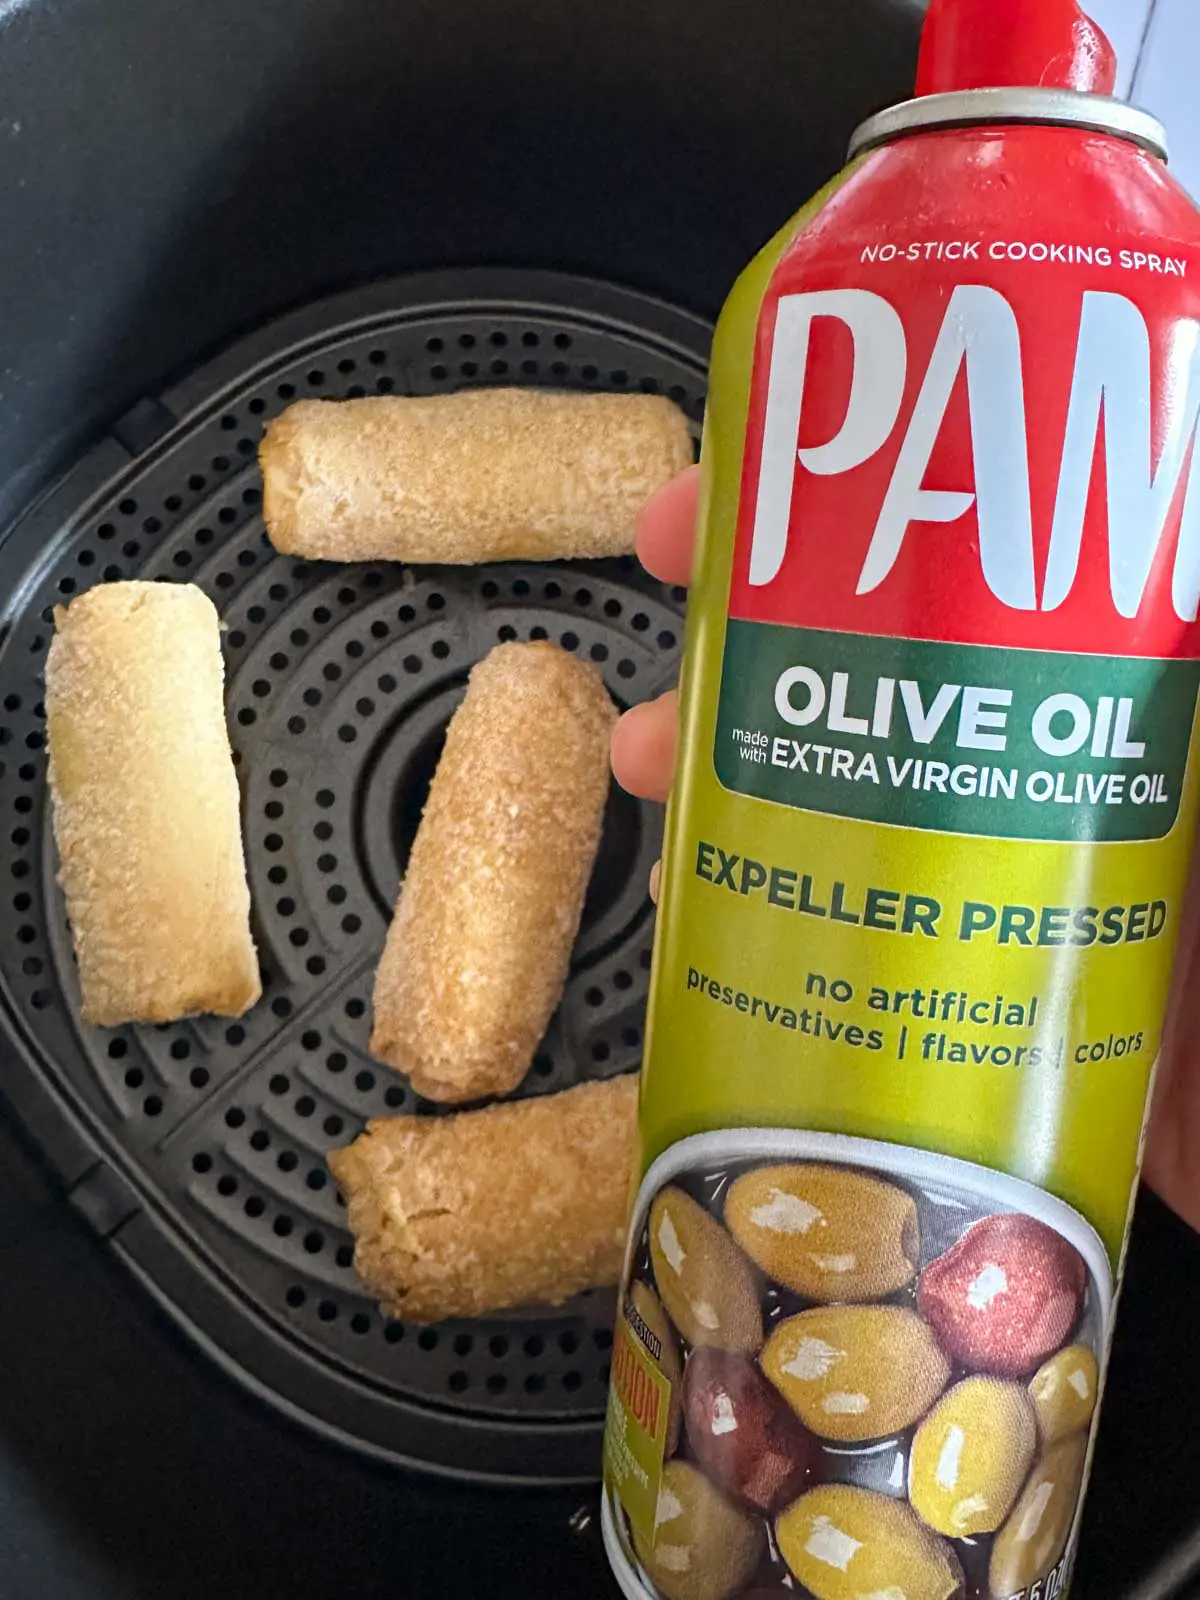
For best results you will also need a cooking spray. A great option is an olive oil cooking spray. You can also use a vegetable oil or avocado oil cooking spray. Spraying the egg rolls with the cooking spray will help to crisp and crunch them up, so you'll definitely want to use this!

I have read that aerosol cooking sprays, like the one I used, can damage your air fryer basket. So, you may want to use a cooking spray that comes in a mister bottle instead. If you use the aerosol, don't spray the food while it's in the air fryer. Spray the food outside of the air fryer and then transfer the food to the basket.

Dipping Sauce

The last item you will need is your favorite sauce to dip your crunchy rolls in. Tai Pei Egg Rolls include dipping sauce to accompany the egg rolls.

Some recommended dipping sauces include sweet chili sauce, sweet and sour sauce, soy sauce, spicy mustard, or even duck sauce.

Ok, now let's fire up your air fryer and make these delicious Asian appetizers!

🔪 Instructions

Start by spraying your egg rolls liberally with your cooking spray. If you use an aerosol like the one pictured below, do not spray the food when it's in the basket. Spray the food outside of the basket, and then transfer it to the air fryer.

Egg rolls in an air fryer basket. There is someone holding a bottle of Pam Olive Oil Cooking Spray in the foreground.
Spray the egg rolls liberally with your cooking spray.

We will air fry the egg rolls at 380 degrees F. If your air fryer needs to be preheated, then preheat it to 380F.

Then place the egg rolls in the bottom of your air fryer basket. They need to be in a single layer and not crowded, with space between the egg rolls.

5 egg rolls in an air fryer basket.

Set the timer for 6 minutes. Air fry for 6 minutes, and then flip the egg rolls over. Cook an additional 6 minutes for a total of 12 minutes.

Now, I use the GoWise air fryer which is a basket style air fryer. Please note, that there are variations amongst different air fryers so you may need to adjust your cooking time just a bit.

What you are looking for is a crispy golden brown exterior with a lovely and hot interior. You may need to reduce or extend the cooking time just a bit to get your desired result.

5 cooked egg rolls in an air fryer basket.

Feel free to open your air fryer basket and take a peek at anytime during the cooking process. This will help you determine whether you may need to adjust the cooking time for your egg rolls. And it's super fun to take a peek at the crisping that's going on in your air fryer!

Let the egg rolls rest for 1 minute in your air fryer, and then they are ready to serve!

Suggestions For Serving

Making these egg rolls is so quick and easy, which makes them the perfect quick snack! Just dip the cooked egg rolls into your sauces of choice and munch away!

Egg rolls on a white plate. There are small bowls with dipping sauces in the background and one of the egg rolls is cut in half.
These crispy and crunchy Tai Pei egg rolls are just begging to be eaten!

They are also great as an accompaniment to any meal...whether Asian or not!

FAQ

Can you cook Tai Pei Egg Rolls in the air fryer?

Cooking Tai Pei Egg Rolls in the air fryer is the BEST way to cook them! Air frying them with a coating of cooking spray gives you the crispiest and crunchiest egg rolls!

How long do I put frozen egg rolls in the air fryer?

The time to cook frozen egg rolls in your air fryer may vary according to the particular air fryer that you are using. But typically if you air fry them at 380F somewhere between 10-12 minutes you should get a great result!

Can I reheat leftover egg rolls in the air fryer?

Reheating leftover egg rolls in your air fryer is a great option! Set your air fryer to 360F and heat for around 4-5 minutes until the inside is nice and hot!

Some Other Air Fryer Recipes You May Enjoy!

Here are some other easy Air Fryer Recipes that you may enjoy:

  • Super Easy Air Fryer Toast
  • How To Make BBQ Chicken Drumsticks In The Air Fryer
  • Easy Air Fryer Ribeye Steak With Cilantro Garlic Sauce

Join Me On A Fun Food Journey!

If you'd like to come along on this food journey with me, please sign up to get the latest recipes and inspiration for you to expand your food comfort zone! It's an incredible journey, please join me by signing up here.

Cheers!

Grace

Crispy cooked egg rolls on a white plate with 2 small bowls containing dipping sauces in the background.

How To Cook Frozen Egg Rolls In Your Air Fryer

Grace
Using your air fryer to cook frozen egg rolls is the best way to give you crispy and crunchy egg rolls with a hot and savory filling!
Print Recipe Pin Recipe
Prep Time 2 mins
Cook Time 12 mins
Total Time 14 mins
Course accompaniment, Appetizer, Snack
Cuisine Asian, Chinese
Servings 2 people

Equipment

  • air fryer

Ingredients
  

  • 5 each frozen egg rolls I used Taipei Brand
  • cooking spray I used Pam Olive Oil Cooking Spray

Dipping Sauce

  • dipping sauce some suggestions are the sauce included in your frozen egg roll packet, sweet chili sauce, sweet and sour sauce, soy sauce, spicy mustard, or even duck sauce!

Instructions
 

  • Start by spraying your egg rolls liberally with your cooking spray. If you are using an aerosol cooking spray, don't spray the food when it is in your air fryer. Spray the egg rolls outside of the air fryer, and then transfer them to your air fryer basket.
    Egg rolls in an air fryer basket. There is someone holding a bottle of Pam Olive Oil Cooking Spray in the foreground.
  • We will air fry the egg rolls at 380 degrees F. If your air fryer needs to be preheated, then preheat it to 380F. Place the egg rolls in the bottom of your air fryer basket. They need to be in a single layer and not crowded, with space between the egg rolls.
    5 egg rolls in an air fryer basket.
  • Set the timer for 6 minutes. Air fry for 6 minutes, and then flip the egg rolls over. Cook an additional 6 minutes for a total of 12 minutes. Please note, that there are variations amongst different air fryers so you may need to adjust your cooking time just a bit.
    5 cooked egg rolls in an air fryer basket.
  • Let the egg rolls rest for 1 minute in your air fryer, and then they are ready to serve!
    Cooked egg rolls with crunchy and crispy exterior and 2 small bowls in the background.

Notes

Please note, that there are variations amongst different air fryers so you may need to adjust your cooking time just a bit.
What you are looking for is a crispy golden brown exterior with a lovely and hot interior. You may need to reduce or extend the cooking time just a bit to get your desired result.
After cooking, let the egg rolls rest for 1 minute in your air fryer, and then they are ready to serve!
Keyword air fryer, egg rolls
Tried this recipe?Let us know how it was!

Easy Everything Bagel Breadsticks Recipe

November 9, 2022 by Grace Leave a Comment

This page may contain affiliate links. I receive a small commission at no cost to you when you make a purchase using my link. This post is about an Easy Everything Bagel Breadsticks Recipe!

Thin breadsticks coated with everything bagel seasoning, salt and red chili flakes standing in a glass jar.
[feast_advanced_jump_to]

I recently discovered Everything Bagel seasoning. My grocery store had an offer for buying a particular item and they would give you a bottle of this seasoning for free.

Honestly I had never tried it before and had no idea what I would use it on. But...I'm a superfan now! I first tried it on Everything Bagel Cashews, which were MOUTHWATERING. Now I've paired them with some thin Italian breadsticks, and our household has another snack that disappears PRONTO!

What Is Everything Bagel Seasoning?

You may be familiar with the "Everything But the Bagel Sesame Seasoning Blend" that Trader Joe's introduced in 2017. There are now many versions of Everything Bagel seasonings. The one I have from my local grocery store is actually called "Bagel Not Included."

This delicious and beautiful spice blend typically includes the following ingredients:

  • White sesame seeds
  • Black sesame seeds
  • Poppy seeds
  • Dried garlic (garlic flakes)
  • Dried onion (onion flakes)
  • Sea salt flakes

These simple ingredients combine to give exceptional savory flavors. And despite the name, its not just for bagels!

People also like to use it stirred into cream cheese, added to avocado toast, and I've even seen an "Everything Bagel Hummus" from Boar's Head.

The Perfect Breadstick Seasoning

Everything Bagel Seasoning is an absolutely fantastic seasoning for breadsticks. What we'll do here is add a little extra salt and some red chili flakes to spice things up.

This recipe is inspired by and adapted from the fantastic book "365 Easy Italian Recipes" by Rick Marzullo O'Connell.

I'm fairly convinced that this combo is the perfect breadstick seasoning. 😃 So, allow me to show you the few and simple ingredients you will need for this easy recipe!

🥘 Ingredients

Thin breadsticks, glass bowl with egg wash, and 3 bowls filled with Everything Bagel seasoning, red chili flakes, and coarse salt.

Here are the ingredients you will need for this fast and easy snack:

  • Thin breadsticks from a package; I used Alessi Thin Breadsticks
  • Everything Bagel Seasoning
  • Coarse salt
  • Red chili flakes
  • Egg white

So as you can see, we will use ready made breadsticks so there's no dough kneading involved in this recipe. 😊

🔪 Instructions

This recipe is super easy and quick!

Begin by preheating your oven to 350F.

Now, combine and mix the seasonings together, then place on a large plate that is big enough that it exceeds the length of the breadsticks.

Make an egg wash by combining the egg white from one egg with one tablespoon of water. Baste the breadsticks (all sides) with the egg wash, and then gently roll the breadsticks in the seasoning.

Red chili flakes, coarse salt, and everything bagel seasoning in a yellow bowl.
Combine the seasonings.
Breadsticks being basted with egg wash and a glass bowl with egg wash.
Baste with eggwash.
Everything bagel seasoning, salt, and red chili flakes on a dish with a thin breadstick being rolled in the seasoning so that it will coat the breadstick.
Roll the breadsticks in the seasonings to coat.

Place the seasoned breadsticks on a wire rack in a roasting tray, and bake for around 5 minutes, or until the breadsticks have turned a golden brown.

Thin breadsticks coated with everything bagel seasoning, salt and red chili flakes on a wire rack in a roasting tin with one of the breadsticks being featured in the foreground.
Golden brown Everything Bagel Seasoned Breadsticks.

Voila! Just like that, your Everything Bagel Breadsticks are ready to enjoy!

Suggestions For Serving

These delicious breadsticks are the perfect nibble or snack. You'll love the savory and spicy flavors of these breadsticks. If you don't want them to disappear fast, it may be best to hide (reserve) some of them. 😁

Thin breadsticks coated with everything bagel seasoning, salt and red chili flakes standing in a glass jar with white roses to the right of the jar, and a white plate with a green leaf salad and purple radishes and 2 breadsticks.

These are also perfect accompaniments to a salad, or some soup.

I very much hope that you will give these a try. And if so, I'd be delighted to hear how they turn out!

Some Other Recipes That You May Enjoy!

Here are some other recipes that you may enjoy:

  • Mouthwatering Everything Bagel Cashews
  • How To Roast Carnival Squash Seeds
  • How To Eat French Breakfast Radishes

Join Me On A Fun Food Journey!

I invite you to come along on this food journey with me! Please sign up to get the latest recipes and inspiration for you to expand your food comfort zone! It's an incredible journey, please join me by signing up here.

Cheers!

Grace

Thin breadsticks coated with everything bagel seasoning, salt and red chili flakes on a white plate with some green leaf salad.

Easy Everything Bagel Breadsticks Recipe

Grace
Everything Bagel Seasoning, salt, and red chili flakes is the PERFECT combo to season your breadsticks! This super easy recipe uses packaged breadsticks so your delicious snack will be ready PRONTO!
Print Recipe Pin Recipe
Prep Time 10 mins
Cook Time 5 mins
Total Time 15 mins
Servings 6 people
Calories 56 kcal

Equipment

  • Oven
  • Roasting tray with wire rack

Ingredients
  

  • 3 oz Thin breadsticks I used packaged breadsticks from Alessi
  • ¼ cup Everything Bagel Seasoning
  • 1 tablespoon red chili flakes
  • ½ ts Coarse salt feel free to adjust the amount of salt to your tastes
  • 1 egg white
  • 1 tablespoon water

Instructions
 

  • Begin by preheating your oven to 350F. Now, combine and mix the seasonings together, then place on a large plate that is big enough that it exceeds the length of the breadsticks.
    Red chili flakes, coarse salt, and everything bagel seasoning in a yellow bowl.
  • Make an egg wash by combining the egg white from one egg with one tablespoon of water. Baste the breadsticks (all sides) with the egg wash.
    Breadsticks being basted with egg wash and a glass bowl with egg wash.
  • Gently roll the breadsticks in the seasoning.
    Everything bagel seasoning, salt, and red chili flakes on a dish with a thin breadstick being rolled in the seasoning so that it will coat the breadstick.
  • Place the seasoned breadsticks on a wire rack in a roasting tray, and bake for around 5 minutes, or until the breadsticks have turned a golden brown.
    Thin breadsticks coated with everything bagel seasoning, salt and red chili flakes on a wire rack in a roasting tin with one of the breadsticks being featured in the foreground.

Notes

These delicious breadsticks are great on their own as a snack, or are perfect accompaniments to soups or salads.
This recipe is inspired by and adapted from the fantastic book "365 Easy Italian Recipes" by Rick Marzullo O'Connell.

Nutrition

Calories: 56kcalCarbohydrates: 12gProtein: 1gFat: 1gSaturated Fat: 0.3gPolyunsaturated Fat: 0.1gMonounsaturated Fat: 0.04gSodium: 1143mgPotassium: 34mgFiber: 1gSugar: 1gVitamin A: 395IUVitamin C: 0.01mgCalcium: 5mgIron: 1mg
Tried this recipe?Let us know how it was!

How To Roast Carnival Squash Seeds

November 5, 2022 by Grace Leave a Comment

This page may contain affiliate links. I receive a small commission at no cost to you when you make a purchase using my link. This post is about how to roast Carnival Squash seeds!

Seasoned Roasted Carnival Squash Seeds in a purple and terracotta bowl.

I recently discovered the delights of the Carnival Squash! This squash drew me to it because of its beautiful colors. So I snapped one up and enjoyed some amazing Balsamic and Fennel Roasted Carnival Squash.

Part of the fun of roasting squash is the bonus that you get...the seeds! Squash seeds are FAB for roasting, so I saved my carnival squash seeds and made this moreish snack. 😋

You'll absolutely love that with minimal effort here, you will get a maximal return on a snack that will most likely be enjoyed in a very short time indeed!

🥘 Ingredients

Carnival squash seeds in a white bowl, Nunu's Cajun Seasoning, and butter in a white dish.

So here's what you will need to make this delicious crunchy snack:

  • Carnival squash seeds, cleaned up and pith/pulp removed
  • Butter
  • Cajun seasoning (I used Nunu's); you can sub another seasoning of your choice, but Cajun spice is nice!
  • Salt, to taste

I've chosen butter rather than olive oil for this recipe because I think the butter adds a richer flavor than olive oil.

The Cajun seasoning gives these seeds a bit of a kick! However, you can substitute All Purpose Seasoning or simply salt and pepper if you prefer.

So now let me show you how to roast carnival squash seeds!

🔪 Instructions

Begin by preheating your oven to 325F.

Now, the hardest about this recipe is cleaning the seeds up. The best way to do this is place the seeds in a colander under some running water. Use your hands to detach the pith/pulp and stringy bits from the seeds.

Squash seeds and orange pith in a white bowl.

You don't have to worry about removing every last bit of the pith from the seeds, just remove as much as you can.

Use paper towels to pat the seeds dry. Then place the seeds in a roasting pan or on a baking tray. Give them space so that they don't overlap.

Carnival squash seeds on a roasting tray.

Place the tray in your oven heated to 325F for around 10 minutes or, until the seeds turn a light golden brown.

What may happen is that the seeds start to pop. My seeds started to pop 10 minutes in, so at that point I knew they were ready! It's best to stay close by when the seeds are in the oven roasting. Once you hear them pop, they pop fast so you'll have to move fast to get them out of the oven at that point.

Now place the seeds in a small bowl.

Roasted carnival squash seeds on a roasting tray.
Roasted Carnival Squash Seeds

Melt the butter in a heatproof dish right when you take the seeds out of the oven. I find this easiest to do by placing the butter in a microwave for just a few seconds.

Then add the seasoning to the butter and stir to combine. Pour this mixture over the seeds and mix this together.

A glass bowl with melted butter in the background and a measuring spoon containing cajun spices in the foreground.
Stir your seasoning into the melted butter.
Roasted Carnival Squash Seeds in a white bowl with a glass bowl containing melted butter and seasoning positioned over the seeds so that the butter can pour over them.
Pour the butter and seasoning over the seeds and mix.

The last step is to add salt to taste. And now it's time to enjoy your delicious roasted Carnival Squash seeds!!

Roasted Squash Seeds Are The Perfect Nibble!

Seasoned Roasted Carnival Squash Seeds in a purple and terracotta bowl.

My delicious nibble didn't last long. Once you try one, it's hard to stop eating them!

Anyway, enjoy as the perfect nibble along with a favorite drink. Or, these are great added as a crunchy topping for salads.

If you make these, I'd love to know how they turned out and value your comments! You can comment below, underneath the recipe card. 😊

Some Other Recipes You May Enjoy!

Here are some other recipes you may enjoy!

  • Balsamic and Fennel Roasted Carnival Squash
  • Mouthwatering Everything Bagel Cashews
  • Roasted Rutabaga and Carrots

Join Me On A Fun Food Journey!

I invite you to come along on this food journey with me! Please sign up to get the latest recipes and inspiration for you to expand your food comfort zone! It's an incredible journey, please join me by signing up here.

Cheers!

Grace

Seasoned Roasted Carnival Squash Seeds in a purple and terracotta bowl.

Roasted Carnival Squash Seeds

Grace
Roasted Carnival Squash seeds are the perfect crunchy snack! Be aware though that once you start nibbling on these it will be almost impossible to stop!
Print Recipe Pin Recipe
Prep Time 5 mins
Cook Time 10 mins
Total Time 15 mins
Course Snack
Cuisine American
Servings 2 people

Equipment

  • Oven
  • 1 roasting tray or baking tray

Ingredients
  

  • ⅓ cup carnival squash seeds this amount was from a 2 lb carnival squash
  • ½ tablespoon butter
  • ¼ ts Cajun seasoning you can sub another seasoning of your choice, such as all purpose seasoning
  • salt to taste

Instructions
 

  • Begin by preheating your oven to 325F. Clean the seeds up. The best way to do this is to place the seeds in a colander under some running water. Use your hands to detach the pith/pulp and stringy bits from the seeds.
    Squash seeds and orange pith in a white bowl.
  • Use paper towels to pat the seeds dry. Then place the seeds in a roasting pan or on a baking tray. Give them space so that they don't overlap.
    Carnival squash seeds on a roasting tray.
  • Place the tray in your oven heated to 325F for around 10 minutes, until the seeds turn a light golden brown, or they start to pop! Then place the seeds in a small bowl.
    Roasted carnival squash seeds on a roasting tray.
  • Melt the butter in a heatproof dish right when you take the seeds out of the oven. I find this easiest to do by placing the butter in a microwave for just a few seconds. Then add the seasoning to the butter and stir to combine.
    A glass bowl with melted butter in the background and a measuring spoon containing cajun spices in the foreground.
  • Pour this mixture over the seeds and mix this together.
    Roasted Carnival Squash Seeds with butter and seasoning added to them in a white dish with a silver spoon.
  • The last step is to add salt to taste. And now it's time to enjoy your delicious roasted Carnival Squash seeds!!
    Seasoned Roasted Carnival Squash Seeds in a purple and terracotta bowl.

Notes

Enjoy these roasted squash seeds as the perfect nibble along with a favorite drink. Or, these are great added as a crunchy topping for salads!
Keyword carnival squash seeds, roasted squash seeds, seeds, squash seeds
Tried this recipe?Let us know how it was!

Super Easy and Delicious Boudin Balls!

June 13, 2021 by Grace Leave a Comment

This page may contain affiliate links. I receive a small commission at no cost to you when you make a purchase using my link. This post is about how to make Boudin Balls!

Boudin Balls on a white plate with mayo in a glass bowl
[feast_advanced_jump_to]

Billy's Boudin and Cracklins in Lafayette, LA

Our family discovered and fell in love with boudin during a trip to Layfayette, LA, in 2019. We kept seeing advertisements for a place called "Billy's Boudin and Cracklins" while driving and the advertisements worked! This mysterious thing called "boudin" must be discovered!

So we made our way to Billy's Boudin. I bought a couple of Boudin Balls, a Smoked Boudin Sandwich, and some Cracklins.

Boudin Ball
Billy's Boudin Ball
Hand holding a Smoked Boudin Sandwich
Billy's Smoked Boudin Sandwich

At that time, I still didn't know what Boudin was. All I knew was that after my first bite of the Boudin Ball and Smoked Boudin Sandwich, was that I was in HEAVEN!!!

Billy's definitely makes the BEST boudin!

...

Read More

How To Make Delicious Home Made Tater Tots!!!

November 14, 2020 by Grace Leave a Comment

This page may contain affiliate links. So, I receive a small commission at no cost to you when you make a purchase using my link. This post is about making your own delicious Home Made Tater Tots!

Tater Tots in a frying basket

Frozen tater tots are good, but homemade tater tots are better!

My husband Steve turned me on to these. For instance I was a skeptic. I had thought that homemade tater tots wouldn't be worth the trouble to make, but boy was I wrong!

The first time Steve made tots, he and Toby ate most of them and only left a few for me.

...

Read More

Salted Egg Fish Skins!

October 25, 2019 by Grace 2 Comments

This page may contain affiliate links. I receive a small commission at no cost to you when you make a purchase using my link.

My dog Toby is my taste tester. Let's see which Salted Egg Fish Skin he likes the best...

He's too chill LOL
[feast_advanced_jump_to]

Ok, so I first tried these DELISH snacks when I was sent them by @foodie_emilly (care of @asiansnackguy), my Instagram friend living in Singapore.

I can't tell you how excited I was to receive these snacks! Until I came across them on Instagram, I had never heard of salted egg, much less salted egg fish skins.

Taking my first bite of Salted Egg Fish Skin changed my life. 🙂

...

Read More

Primary Sidebar

Sign up so that you never miss the greatest recipes!

About Me

Hi I’m Grace! I'm married and a mom to my fur baby, Toby, and food and travel are two of my greatest passions! Since our bank account does not allow us to travel or eat out as much as we'd like, I decided I would cook delicious meals that could give us a taste of all the places we'd like to go. My goal is to get you in the kitchen, and inspire you to cook and taste delightful meals that will transport you too. Let’s throw some actual travel in from time to time, all with an emphasis on keeping your wallet full and happy as well. Let’s get cooking and let’s start exploring!! I'm excited to be on this journey with you!!

By the way most of these recipes are Toby taste tested and Toby approved!!

Chief Taste Tester Toby

Toby Chief Taste Tester

Recent Posts

  • Crispy Garlicky Roast Chicken Recipe
  • DELISH South Carolina Benne Wafers Recipe
  • Middle Eastern Style Cabbage Salad Recipe
  • Roasted Carrots With Berbere Spice Recipe
  • Perfectly Pan Fried Rainbow Trout Recipe

Recent Comments

  • Grace on All About Samyang 2x Spicy Buldak Ramen!
  • Alexis on All About Samyang 2x Spicy Buldak Ramen!
  • Grace on Easy and Delicious Connecticut Steamed Cheeseburgers!
  • Grace L Henrie on Easy and Delicious Connecticut Steamed Cheeseburgers!
  • Grace on How To Cook Korean Short Ribs In The Oven

Archives

Categories

Meta

  • Log in
  • Entries feed
  • Comments feed
  • WordPress.org

Footer

Amazon Associates Disclosure

We are a participant in the Amazon Services LLC Associates Program, an affiliate advertising program designed to provide a means for us to earn fees by linking to Amazon.com and affiliated sites. As an Amazon Associate I earn from qualifying purchases.

Copyright © 2023 Explore Cook Eat on the Foodie Pro Theme